
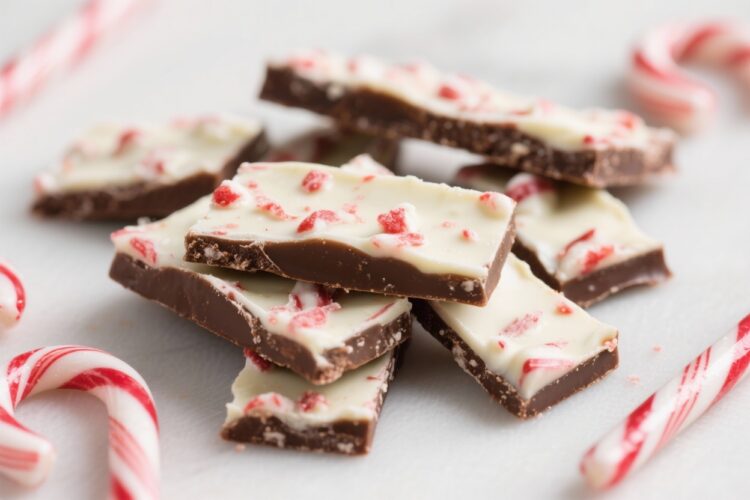
Peppermint bark is the kind of treat that makes the holidays feel official. It’s cool, minty, and perfectly snappy, with creamy layers of white and dark chocolate. You don’t need special tools or advanced skills—just a few quality ingredients and a baking sheet.
Make a batch for gifts, for a party tray, or just to have in the fridge for sweet cravings. It’s quick, customizable, and always a crowd-pleaser.
Why This Recipe Works
Peppermint bark succeeds because of contrast. The smooth richness of chocolate pairs with the crisp bite of crushed peppermint, so every piece feels satisfying.
Using two types of chocolate adds depth: bittersweet or semisweet chocolate anchors the sweetness of white chocolate on top. A little peppermint extract boosts the mint flavor without overwhelming it. The method is simple: melt, layer, chill, and break.
But a few small steps make a big difference. Properly melting chocolate and letting the layers set just enough ensures clean layers that don’t separate. A touch of neutral oil or cocoa butter helps keep the chocolate shiny and easy to bite.
Shopping List
- Bittersweet or semisweet chocolate (10–12 ounces), chopped or in chips
- White chocolate (12 ounces), chopped or in chips
- Peppermint extract (pure, not artificial), about 1/4 to 1/2 teaspoon
- Crushed candy canes or peppermint candies (about 1 cup)
- Neutral oil or cocoa butter (1–2 teaspoons, optional for smoother melting)
- Flaky sea salt (optional, a pinch for finishing)
- Vanilla extract (optional, 1/4 teaspoon for the white chocolate layer)
- Tools: Baking sheet, parchment paper, microwave-safe bowls or double boiler, spatula
Instructions
- Line a baking sheet with parchment paper.
Aim for a rectangle about 9×13 inches when spreading the chocolate to get a good thickness.
- Crush the candy canes. Place them in a zip-top bag and tap with a rolling pin until you have small shards and a bit of peppermint “dust.” Set aside.
- Melt the dark chocolate. Use a microwave in 20–30 second bursts, stirring between each, until smooth.
Alternatively, melt gently over a double boiler. Stir in 1/8 to 1/4 teaspoon peppermint extract and 1 teaspoon neutral oil if using.
- Spread the dark chocolate. Pour onto the parchment and spread into an even, thin layer.
Tap the pan on the counter to smooth. Chill in the refrigerator for 10–12 minutes, just until set but not rock hard.
- Melt the white chocolate. Again, use short microwave bursts or a double boiler.
White chocolate scorches easily, so go slow. Stir until perfectly smooth. Add 1/8 teaspoon peppermint extract (optional) and a splash of vanilla if you like.
- Check the base layer.
Press a fingertip lightly onto the dark chocolate. It should be firm with only a slight give. If it’s too hard, let it sit at room temperature for a couple of minutes so the layers adhere.
- Spread the white chocolate over the dark.
Work quickly and gently to avoid pulling up the base layer. Aim for complete coverage and a smooth surface.
- Sprinkle on the crushed peppermint. While the white chocolate is still glossy, scatter the candy evenly.
Add a light pinch of flaky sea salt if using—it brightens the sweetness.
- Chill to set. Refrigerate for 20–30 minutes, until fully firm.
- Break into pieces. Lift the bark by the parchment and use your hands to snap it into rustic shards.
For cleaner lines, use a sharp knife warmed under hot water and dried.
- Store properly. Keep the bark in an airtight container, layered with parchment, to maintain crispness and prevent moisture from making the candy sticky.
Storage Instructions
- Room temperature: In a cool, dry spot, the bark lasts 1–2 weeks. Keep it away from heat and sunlight to prevent blooming (a whitish film).
- Refrigerator: Store in an airtight container up to 3 weeks.
Let pieces sit at room temperature a few minutes before serving for the best texture.
- Freezer: Freeze up to 2 months. Wrap tightly and place in a sealed bag or container. Thaw in the fridge to reduce condensation.
Benefits of This Recipe
- Fast and festive: You can make a full batch in under an hour, including chilling time.
- Minimal equipment: No candy thermometer or special tools needed.
- Great for gifting: Pack in tins or cello bags for easy, homemade presents.
- Budget-friendly: A few simple ingredients stretch into many servings.
- Highly customizable: Change the chocolate, toppings, or flavor accents to suit your taste.
What Not to Do
- Don’t overheat the chocolate. It will seize or burn.
Use gentle heat and stir often.
- Don’t skip the brief chill between layers. If the base is too soft, the layers swirl. If it’s rock hard, they may separate. Aim for “just set.”
- Don’t use low-quality white chips. Some chips aren’t real white chocolate and won’t melt smoothly.
Look for cocoa butter in the ingredients.
- Don’t add liquid water. A single drop can seize melted chocolate. Keep tools dry.
- Don’t crush the candy too fine. A mix of small shards and tiny bits gives the best texture without turning the top layer sandy.
Variations You Can Try
- Triple chocolate: Dark base, milk chocolate middle, white chocolate top. Chill briefly between each layer.
- Swirled bark: Spread dark chocolate, then dollop melted white chocolate and swirl with a skewer.
Sprinkle peppermint.
- Nutty crunch: Add chopped toasted almonds, pistachios, or hazelnuts with the peppermint.
- Mocha mint: Stir 1 teaspoon espresso powder into the dark chocolate for a coffee kick.
- Salted caramel drizzle: After topping with peppermint, drizzle a thin ribbon of caramel and finish with flaky salt.
- Dairy-free: Use dairy-free dark chocolate and a good vegan white chocolate. Check labels for cocoa butter content.
- Sugar mint only: Skip extract and rely solely on candy canes for a gentler mint flavor.
FAQ
How do I keep the layers from separating?
Let the bottom layer set until firm but not icy-cold, then spread the white chocolate while the base is still slightly receptive. Press the peppermint into the top while it’s still warm so everything bonds as it cools.
Can I temper the chocolate for extra snap and shine?
Yes.
Tempering gives a glossy finish and better room-temperature stability. If you’re comfortable with tempering, apply it to both layers; if not, adding a teaspoon of cocoa butter or a little neutral oil helps with texture and sheen.
What if my chocolate seizes?
If chocolate turns grainy and stiff, it likely met water or overheated. Try whisking in 1 teaspoon of warm neutral oil at a time to loosen it.
If it stays lumpy, reserve it for brownies or hot chocolate and start a new batch for the bark.
Can I use mint chocolate instead of peppermint extract?
You can, but the mint flavor may be milder and less fresh. Peppermint extract delivers a clean, cool note. If using mint chocolate, skip the extract or use just a drop after tasting.
How fine should I crush the candy canes?
Aim for pea-sized pieces down to coarse crumbs, with a little peppermint dust.
Too fine and the top feels sandy; too large and pieces can fall off easily.
Is white chocolate the same as white baking chips?
Not always. Real white chocolate contains cocoa butter and melts smoothly. Many baking chips use other fats and can become pasty.
Check the label for cocoa butter to ensure a silky melt.
Can I make this ahead for gifting?
Absolutely. Make the bark up to two weeks ahead, store airtight in a cool place, and package just before gifting. Include parchment between layers to prevent sticking.
What’s the best way to get clean edges?
Score the bark with a warm, dry knife, then press down to cut.
Or let it snap naturally for a rustic look; both are attractive in gift boxes.
How do I prevent the peppermint from getting sticky?
Moisture is the enemy. Store the bark in a dry, airtight container and avoid frequent fridge-to-room temperature swings that cause condensation.
Can I add food coloring to the white chocolate?
Use oil-based or powdered coloring. Water-based gels can cause seizing.
A tiny amount of red creates a pretty pink tint if you want a festive touch.
Wrapping Up
Peppermint bark candy is a simple treat with big holiday energy. With quality chocolate, a light hand with peppermint, and smart layering, you’ll get crisp, shiny pieces that taste as good as they look. Make it classic, swirl it, or dress it up with nuts or caramel.
However you customize it, this is a guaranteed win for gifts, gatherings, or cozy nights at home. Enjoy every minty, chocolatey snap.
Printable Recipe Card
Want just the essential recipe details without scrolling through the article? Get our printable recipe card with just the ingredients and instructions.