
There’s something about old fashioned fudge that feels like a warm hug. It’s simple, rich, and perfect for sharing—or keeping all to yourself. This version gives you that nostalgic, chocolatey bite without the long wait or candy thermometer stress.
In about 15 minutes of active time, you’ll have a pan of smooth, dense fudge setting on your counter. Whether you’re making it for holidays, gifts, or a weeknight treat, this recipe gets the job done with classic flavor and zero fuss.
Why This Recipe Works
This recipe uses pantry staples and a straightforward method, so you get predictable results without special tools. The combination of sugar, butter, and evaporated milk creates the right texture—firm yet creamy—while chocolate chips melt into a silky base.
A small amount of marshmallow creme (or mini marshmallows) helps stabilize the fudge, preventing graininess and helping it set cleanly. Best of all, it comes together fast, and the flavor tastes like the fudge you grew up with: deep chocolate, not too sweet, and satisfyingly rich.
Ingredients
- 3 cups granulated sugar
- 3/4 cup unsalted butter (1 1/2 sticks), cut into pieces
- 2/3 cup evaporated milk (not sweetened condensed milk)
- 2 cups semisweet chocolate chips
- 1 jar (7 oz) marshmallow creme (or 3 cups mini marshmallows)
- 1 teaspoon pure vanilla extract
- 1/2 teaspoon fine sea salt (reduce to 1/4 teaspoon if using salted butter)
- Optional mix-ins: 1 cup toasted chopped nuts (walnuts or pecans), 1/2 cup peanut butter, or 1/2 cup mini chocolate chips for topping
How to Make It
- Prep your pan. Line an 8×8-inch baking pan with parchment, leaving a little overhang for easy lifting. Lightly butter the parchment.
Measure all ingredients before you start—things move fast.
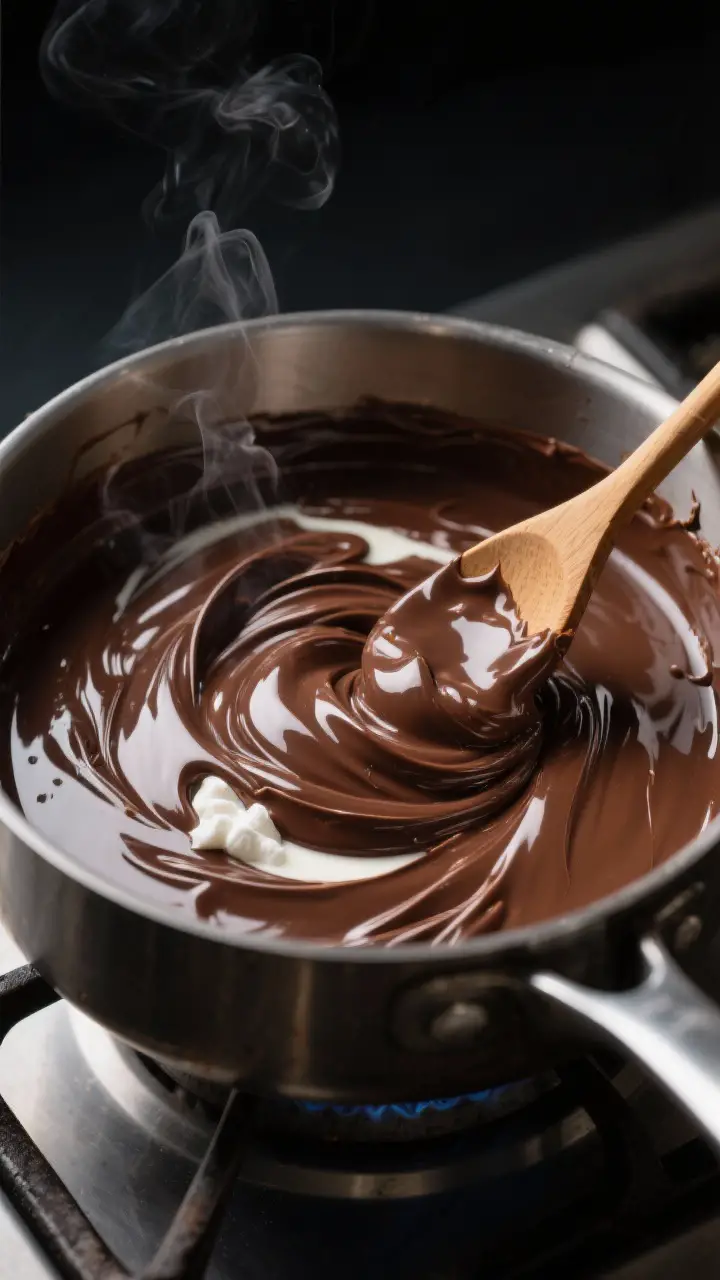
- Combine the base. In a medium heavy-bottomed saucepan, add sugar, butter, and evaporated milk. Stir over medium heat until the butter melts and the mixture starts to bubble.
- Boil briefly. Bring to a gentle rolling boil and cook for 4 to 5 minutes, stirring constantly. You want steady bubbles across the surface.
The mixture will thicken and look glossy.
- Remove from heat. Take the pan off the burner. Immediately add chocolate chips and salt. Stir until the chocolate is completely melted and the mixture is smooth.
- Add marshmallow and vanilla. Stir in the marshmallow creme and vanilla extract until fully incorporated.
The fudge should look thick, shiny, and uniform.
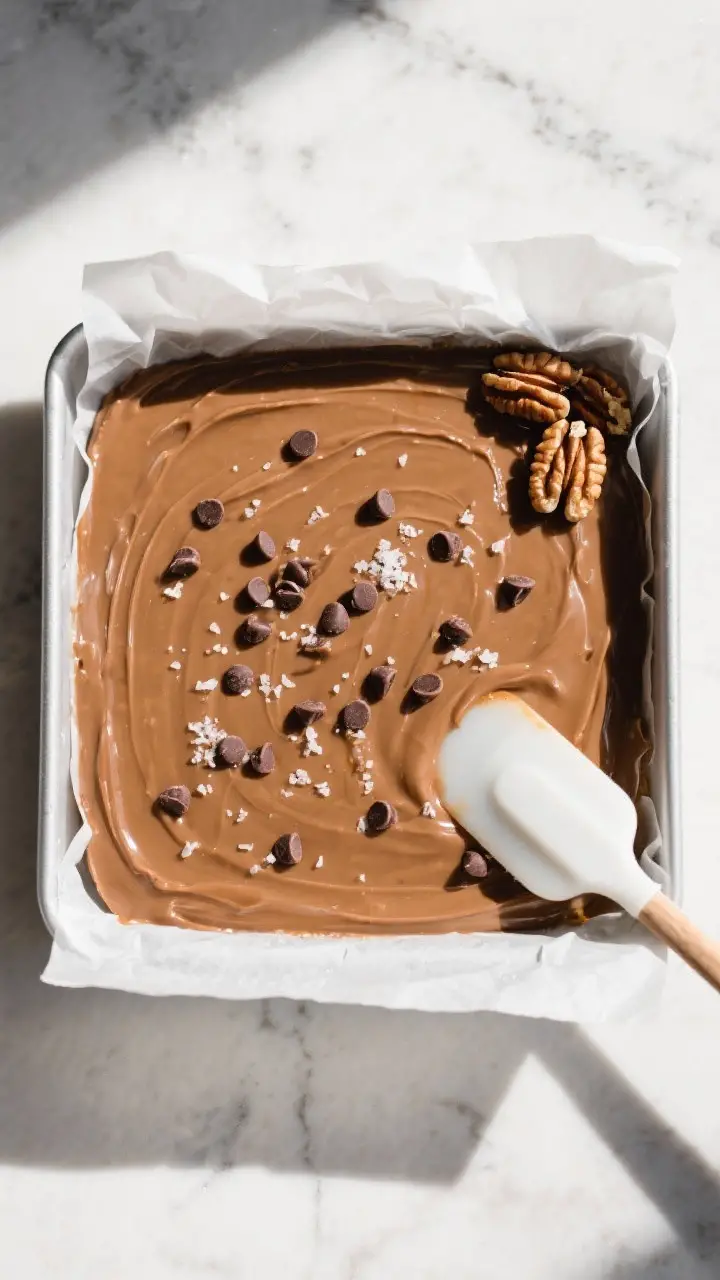
- Mix in extras (optional). Fold in nuts or swirl in peanut butter quickly. If using, press extra mini chocolate chips on top right after spreading.
- Spread and set. Pour into the prepared pan and smooth the top with a spatula. Let it cool at room temperature for 2 to 3 hours, or refrigerate for 45 to 60 minutes until firm.
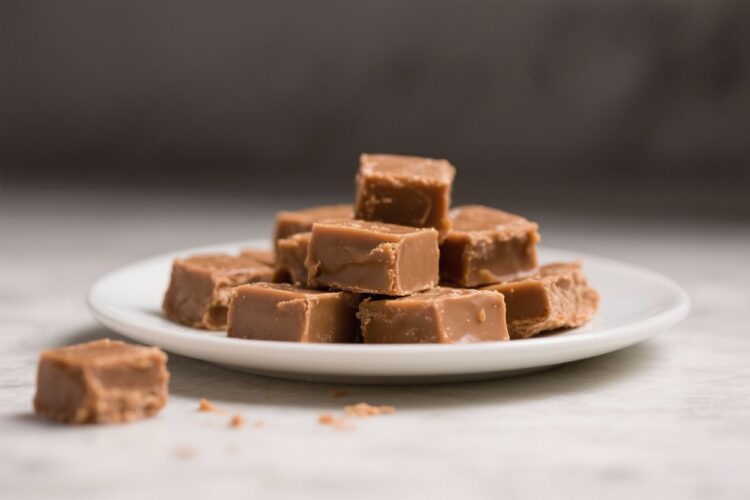
- Cut and serve. Lift the slab out using the parchment.
Use a sharp knife to cut into 1-inch squares. Wipe the knife between cuts for clean edges.
How to Store
- Room temperature: Store fudge in an airtight container for up to 1 week. Keep layers separated with parchment to prevent sticking.
- Refrigerator: Keeps well for 2 to 3 weeks.
Let pieces sit at room temp for 10 minutes before serving for the best texture.
- Freezer: Wrap tightly in parchment and plastic, then place in a freezer bag. Freeze for up to 3 months. Thaw in the fridge overnight, then bring to room temperature.
Benefits of This Recipe
- Quick and reliable: No candy thermometer needed.
The timing and visual cues are simple and forgiving.
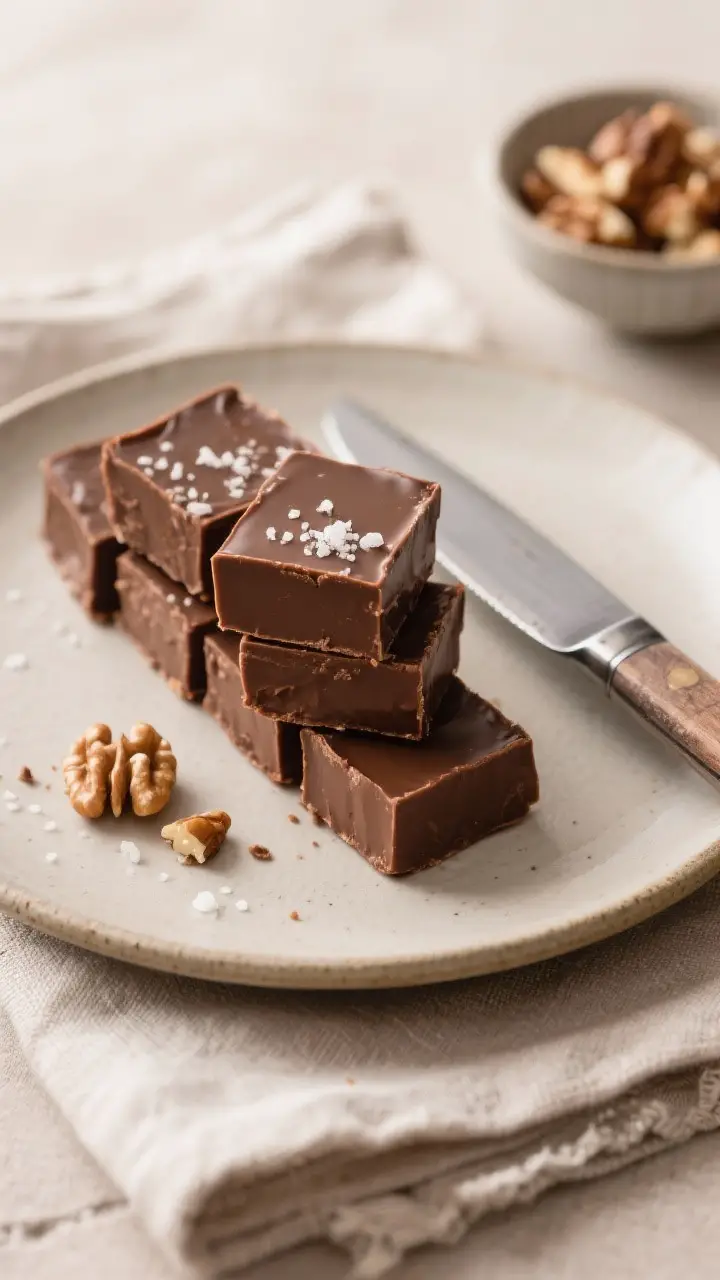
- Classic texture: Firm yet creamy, with that old-school fudge snap when you bite in.
- Flexible flavors: Add nuts, swirl peanut butter, or sprinkle sea salt. It’s a great base for variations.
- Great for gifting: Cuts cleanly and packs well in tins or boxes without crumbling.
- Budget-friendly: Uses basic pantry ingredients you probably already have.
Common Mistakes to Avoid
- Undercooking the syrup: If you skip the 4–5 minute boil, the fudge can be soft or sticky. Keep the boil steady and stir constantly.
- Overheating the chocolate: Add chocolate after removing the pan from heat.
If it scorches, the texture can turn grainy.
- Using sweetened condensed milk by accident: You need evaporated milk. Condensed milk is too sweet and will change the texture.
- Skipping the salt: A little salt sharpens the chocolate flavor and balances sweetness.
- Rushing the set: It’s tempting to cut too soon. Let it cool fully for neat squares and the right bite.
Alternatives
- Dark chocolate fudge: Swap semisweet chips for 60–70% dark chocolate chips.
Add an extra 1 tablespoon butter if you want a slightly softer texture.
- Peanut butter fudge twist: Stir in 1/2 cup creamy peanut butter after melting the chocolate. Swirl, don’t overmix, for a marbled look.
- Walnut maple: Add 1 teaspoon maple extract with the vanilla and fold in 1 cup toasted walnuts.
- Mocha fudge: Dissolve 1 tablespoon instant espresso in the evaporated milk before cooking for a subtle coffee kick.
- Holiday mint: Add 1/2 teaspoon peppermint extract and top with crushed candy canes as the fudge sets.
FAQ
Can I make this without marshmallow creme?
Yes. Replace the marshmallow creme with 3 cups mini marshmallows.
Stir them in off the heat until fully melted. The fudge will still set nicely.
How do I fix grainy fudge?
Graininess often comes from overheated chocolate or sugar crystals forming on the sides of the pan. Stir constantly while boiling, scrape down the sides if needed, and remove from heat before adding chocolate.
If it turns grainy, you can re-melt gently over low heat and stir in a tablespoon of hot evaporated milk, but results may vary.
Can I double the recipe?
Absolutely. Use a larger, heavy pot to prevent scorching, and pour into a 9×13-inch pan. Keep the same boil time, but stir diligently since larger batches retain heat.
What if I only have salted butter?
Use it, but reduce added salt to 1/4 teaspoon.
Taste a small smear of the mixture before pouring—if it seems a touch flat, you can sprinkle flaky salt on top as it sets.
How long does the fudge take to set?
At room temperature, expect 2 to 3 hours. In the fridge, about 45 to 60 minutes. Don’t freeze to set initially—the rapid chill can affect texture.
Can I use milk chocolate chips?
You can, but the fudge will be sweeter and softer.
If you go with milk chocolate, consider using half milk chocolate and half semisweet to keep balance.
Why did my fudge turn dry or crumbly?
Overcooking the sugar mixture or overheating the chocolate can cause dryness. Keep the boil to 4–5 minutes, stir constantly, and remove from heat before adding the chocolate.
Is there a dairy-free option?
Yes. Use dairy-free chocolate chips, plant-based butter, and a dairy-free evaporated milk alternative.
Results can vary slightly, but the method is the same.
Final Thoughts
Old fashioned fudge doesn’t need to be complicated to taste incredible. With a few basic ingredients and about 15 minutes of effort, you’ll have a nostalgic, chocolate-packed treat that cuts clean and melts in your mouth. Keep this recipe in your back pocket for holidays, potlucks, and last-minute gifts.
It’s the kind of classic that never goes out of style—and always disappears fast.