
Key Takeaways
- Turkey drippings create the most flavorful base for homemade Thanksgiving gravy
- A proper roux (fat and flour mixture) is essential for smooth, lump-free gravy
- Allow 25-30 minutes for preparation and cooking your homemade gravy
- Make-ahead options can save valuable time on Thanksgiving day
- Homemade gravy yields approximately 3-3.5 cups, serving about 16 people
- Store leftover gravy properly for up to 3 days in the refrigerator
- Using a fat separator ensures cleaner, less greasy gravy
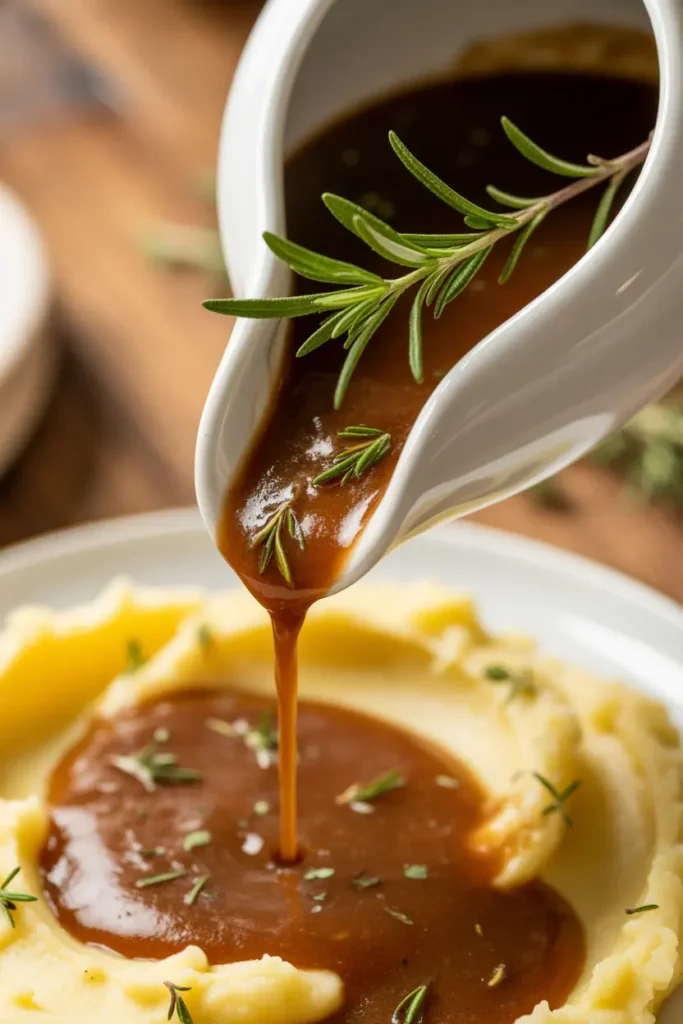
- Fresh herbs like thyme, sage, and rosemary enhance traditional gravy flavor
- Whisking continuously when adding liquid prevents frustrating lumps
- Dietary adaptations can accommodate gluten-free, dairy-free, and vegetarian needs
Introduction to Thanksgiving Gravy
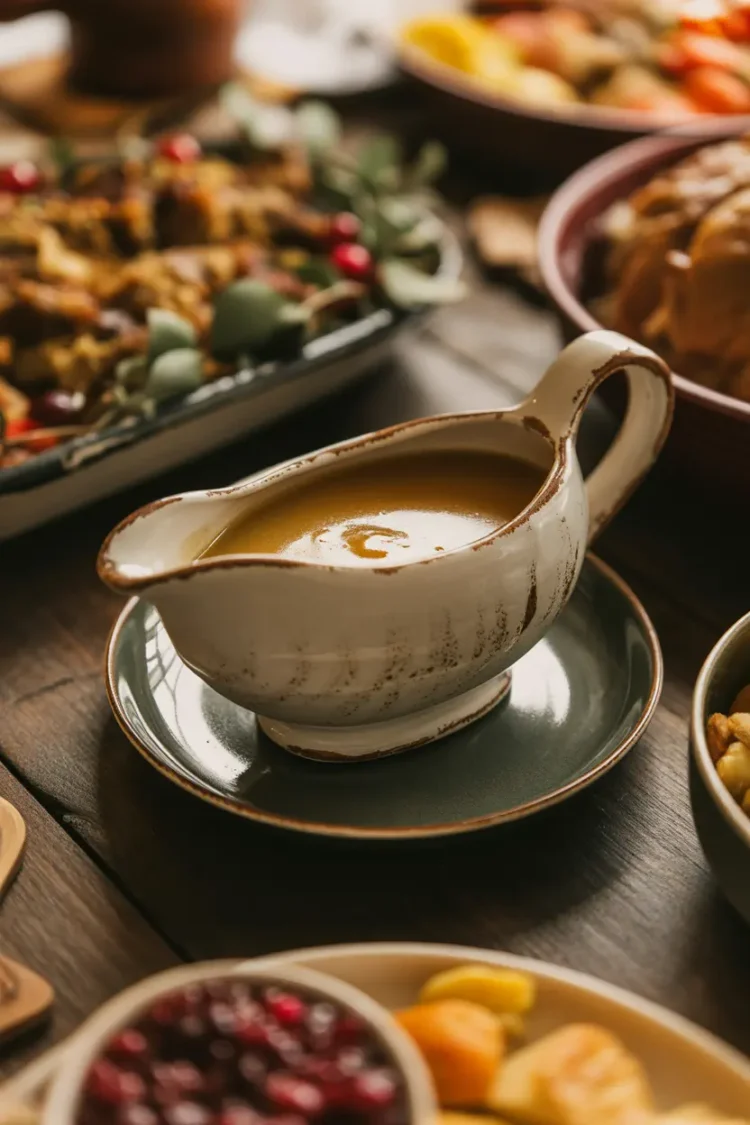
Thanksgiving dinner simply isn’t complete without a boat of rich, savory gravy over roasted turkey, fluffy mashed potatoes, and traditional stuffing. While you can buy gravy at the store, nothing matches the flavor of homemade gravy, especially when made from your holiday turkey drippings. Learning to make good gravy is a skill worth having – it can turn a regular meal into a special feast that creates lasting memories around your holiday table.


At Whaley Cooks, we specialize in creating exceptional sauces that make your holiday meals better. Our approach to Thanksgiving gravy uses traditional methods and good ingredients to give you the tastiest gravy possible. Whether this is your first time hosting or you’ve done many Thanksgivings before, our guide will help you make gravy that becomes part of your family tradition.
The nice thing about homemade gravy is how simple it is – with just a few ingredients and the right method, you’ll make a sauce that brings your whole Thanksgiving meal together. We’ll show you the basic parts, step-by-step process, and helpful tips that will have your guests asking for more gravy. The difference between okay and amazing gravy often comes down to understanding the basics while adding your own special touches.
Essential Ingredients for Perfect Gravy
Great Thanksgiving gravy starts with good ingredients. The list is short, but each item has an important job in creating that rich, tasty flavor that makes gravy so good. Turning basic ingredients into delicious gravy depends on both what you use and how you combine them.

Primary Ingredients:
1. Turkey Drippings: These are the star of the show – the flavorful juices that collect in your roasting pan as the turkey cooks. They contain both fat and concentrated meat flavors that form the base of great gravy. For a 12-14 pound turkey, you’ll collect about 1/2 to 3/4 cup of drippings. These drippings are like gold – packed with flavor that you can’t get from store-bought options.
2. All-Purpose Flour: This thickens your gravy by combining with fat to create a roux. For each cup of liquid, you’ll need about 2 tablespoons of flour. The starch in flour absorbs liquid and expands, creating that smooth texture that sticks nicely to your food. Cooking the flour properly gets rid of any raw taste and adds nutty flavors.
3. Stock or Broth: Turkey stock is best, but chicken stock works well too. This adds more liquid and flavor depth to your gravy. Have 3-4 cups ready, though you might not use it all. Homemade stock gives better results, but good store-bought options work fine when improved with herbs and other flavors.
4. Butter: Keep unsalted butter handy in case your turkey doesn’t make enough fat. Butter adds richness to your gravy. The milk solids in butter also help with browning and flavor while making the roux. European-style butter with more fat content makes an extra-rich gravy.
5. Salt and Pepper: These basic seasonings balance the flavors in your gravy. Always taste before adding more salt, since turkey drippings can be quite salty. Freshly ground black pepper gives better flavor than pre-ground pepper. White pepper works well if you don’t want visible specks in your gravy.
Optional Flavor Enhancers:
– Fresh Herbs: Thyme, sage, and rosemary go perfectly with turkey gravy. Their aromas add classic Thanksgiving flavors that improve the whole meal. Fresh herbs give brighter, more complex flavor than dried ones.
– Aromatics: Finely chopped onions, garlic, or shallots add complexity. When cooked slowly in the fat before adding flour, they release sweet, savory compounds that create layers of flavor. Shallots offer a nice balance of onion and garlic notes.
– Wine or Brandy: A splash of white wine or cognac can make your gravy more interesting with subtle acidity. The alcohol cooks off, leaving behind fruit flavors and complexity. Dry wines like Sauvignon Blanc or Pinot Grigio work best, as sweet wines can be too much.
– Umami Boosters: A dash of soy sauce or Worcestershire sauce deepens flavor without tasting out of place. These fermented products contain compounds that enhance the savory qualities in your turkey drippings. Just a teaspoon can transform good gravy into great gravy.
Our cooking guides emphasize having all ingredients measured and ready before you start. This organized approach is especially important for gravy making, as things move quickly once you begin. Being prepared prevents burning your roux or getting lumps during the critical liquid-adding step.
If you’re planning a big Thanksgiving gathering, proper quantity planning is essential. Plan for about 1/3 cup of gravy per person, which allows plenty for turkey, potatoes, and stuffing. This means a 12-person dinner needs about 4 cups of finished gravy – plan your ingredients accordingly.
The Essential Equipment for Gravy Making
Making smooth gravy needs just a few key tools, but having the right equipment makes all the difference between lumpy disappointment and velvety perfection. The proper tools not only make the process easier but also ensure good results that will impress your guests and make your Thanksgiving meal memorable for the right reasons.
Must-Have Equipment:
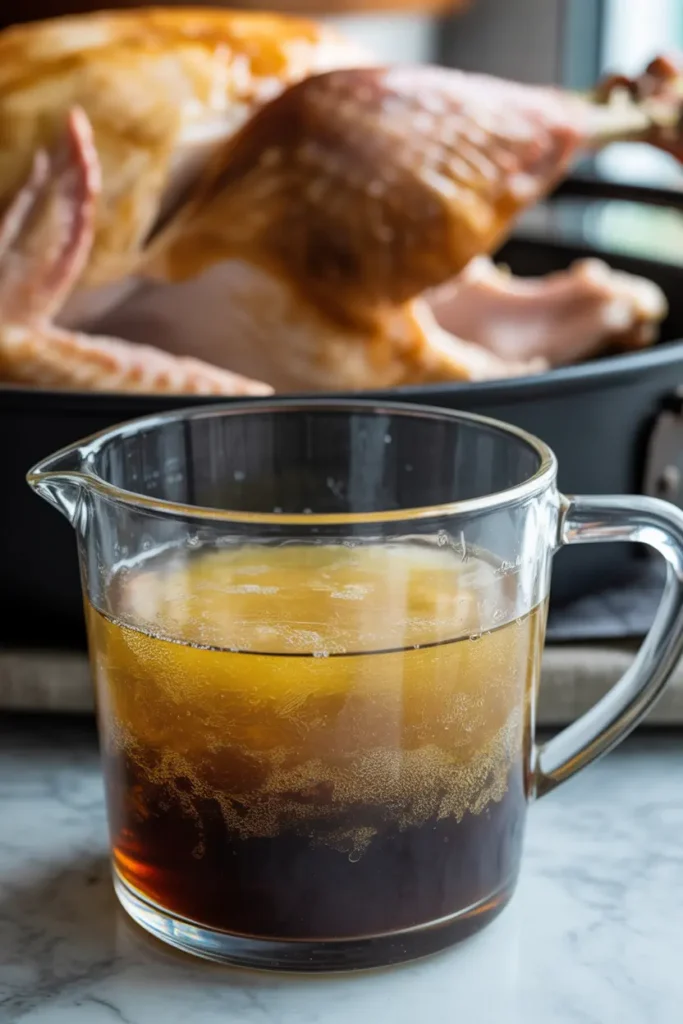
1. Fat Separator: This special measuring cup lets you pour off the flavorful drippings while leaving the fat behind. If you don’t have one, a regular measuring cup works too—just let the drippings sit for a few minutes and skim the fat from the top. The design has a spout that draws liquid from the bottom, leaving fat at the top. This separation is important for making gravy with rich flavor but without too much grease.
2. Heavy-Bottomed Saucepan: A thick-bottomed pan spreads heat evenly, preventing hot spots that can burn your roux. A 3-4 quart size is good for most Thanksgiving gatherings. Cast iron, enameled cast iron, or heavy stainless steel options all work well. The weight and material ensure steady heat that lets you focus on technique rather than constantly adjusting to prevent burning.
3. Whisk: A good balloon whisk is your best defense against lumps. The multiple wires break up flour clumps efficiently while adding air for a lighter texture. Look for a whisk with thin, flexible wires that can reach the corners of your pan. Silicone-coated whisks protect non-stick surfaces but may not break up flour clumps as well as metal ones.
4. Fine Mesh Strainer: For the smoothest possible gravy, straining removes any remaining solids or lumps before serving. A conical strainer offers the finest filtration, but any fine mesh strainer will greatly improve texture. This step might seem fussy, but it turns good gravy into restaurant-quality sauce with little effort.
5. Wooden Spoon or Heat-Resistant Spatula: Essential for scraping up the flavorful browned bits from your roasting pan. The flat edge efficiently releases these flavor bombs from the pan surface. These tools also won’t scratch your cookware, preserving both your equipment and the precious flavors.
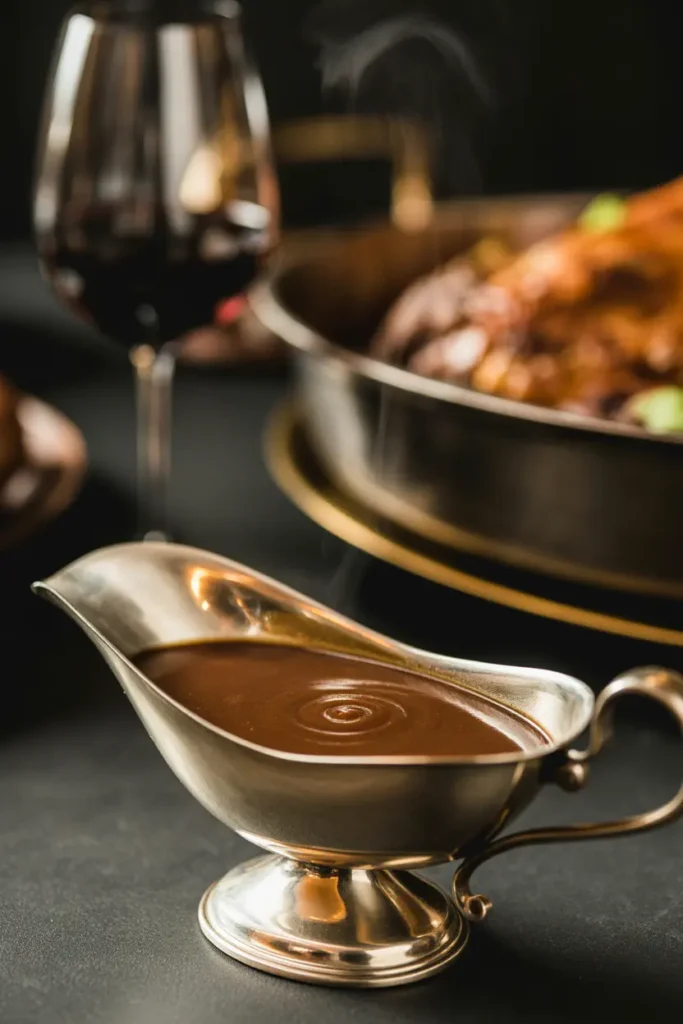
6. Gravy Boat: While not needed for preparation, a warmed gravy boat with a wide mouth makes serving easier and keeps your gravy hot longer at the table. Ceramic versions offer good heat retention, while insulated models maintain temperature even longer. Consider one with an attached saucer to catch drips and prevent tablecloth stains.
In our how-to guides, we emphasize that proper equipment doesn’t mean expensive equipment. Even basic kitchen tools, when used correctly, can help you get professional results. The technique and understanding of the process matter far more than having the fanciest utensils.
If you often host large gatherings, consider getting a dedicated gravy warmer or a small slow cooker set to low. This keeps your gravy at the perfect temperature throughout the meal without needing constant reheating or risking a skin forming on top. This approach lets you enjoy the meal with your guests instead of making repeated trips to the kitchen to reheat cooling gravy.
Step-by-Step Gravy Making Process
Creating perfect Thanksgiving gravy follows a careful process that rewards attention to detail. Follow these steps for gravy that’s rich, smooth, and full of flavor. The order matters a lot – each step builds on the previous one to develop layers of flavor and the ideal texture that will complement every part of your Thanksgiving feast.

1. Collect and Prepare the Drippings
After your turkey has finished roasting and has been removed to rest, pour the drippings from the roasting pan into your fat separator. Let it sit for about 5 minutes to allow the fat to rise to the top. For a 12-14 pound turkey, you should collect approximately: – 1/2 to 3/4 cup of fat – 1 to 2 cups of liquid drippings
If your turkey didn’t make enough fat, add some butter. You’ll need about 1/4 cup of fat total for a medium-sized batch of gravy. The separation step is crucial – while fat helps flavor and form your roux, too much fat makes greasy, unappetizing gravy. The clear drippings contain concentrated meat flavors, gelatin, and dissolved flavors from your turkey seasoning.
2. Create the Flavor Base (Optional but Recommended)
Return the roasting pan to the stove over medium heat. Add a splash of stock or white wine (about 1/4 cup) and use your wooden spoon to scrape up all the browned bits from the bottom of the pan. These caramelized pieces are packed with flavor. Pour this liquid gold into your drippings. This process releases the fond – intensely flavored caramelized proteins that stuck to the pan during roasting. These compounds contain concentrated umami and complex flavors that really enhance your gravy’s depth and taste.
3. Make the Roux
Heat your heavy-bottomed saucepan over medium heat. Add 1/4 cup of the separated fat (or a mix of dripping fat and butter). Once hot, whisk in 1/4 cup of all-purpose flour. Cook this mixture, whisking constantly, for 3-5 minutes until it turns a light golden brown. This cooking gets rid of the raw flour taste while developing nutty flavors. The color of your roux affects both flavor and final appearance – a darker roux has more complex flavor but slightly less thickening power. For traditional Thanksgiving gravy, aim for a blonde to light brown roux that balances thickening ability with developed flavor.
As with other dishes that feed a crowd, the roux is a critical foundation that determines the final texture of your gravy. Rushing this step or not cooking the flour enough can result in gravy with an unpleasant raw flour taste that no amount of seasoning can hide.
4. Add Liquid Gradually
Now comes the crucial step that prevents lumps: slowly add your liquid drippings and stock, about 1/4 cup at a time, whisking vigorously after each addition until smooth. Once you’ve added about a cup of liquid and the mixture is smooth, you can add the remaining liquid more quickly. This gradual addition allows each portion to fully mix before the next, preventing the flour from clumping. The initial additions create a paste-like consistency that gradually loosens with each addition of liquid.
In total, add approximately 3 cups of liquid (a combination of drippings and stock) to your 1/4 cup roux for a medium-thick gravy. For thinner gravy, add more liquid; for thicker gravy, use less. Remember that gravy thickens significantly as it cools, so it’s generally better to make it slightly thinner while it’s hot.
5. Simmer to Perfection
Bring the gravy to a gentle simmer and cook for 10-15 minutes, whisking occasionally. This cooking time allows the flavors to blend and the gravy to reach its full thickness. The gravy should coat the back of a spoon when ready. This simmering stage is where the magic happens – flour needs time and heat to fully hydrate and develop its thickening power. Rushing this step results in gravy that continues to thicken unpredictably after serving, potentially becoming gluey or pasty.
6. Season and Finish
Taste your gravy and season with salt and freshly ground black pepper as needed. Remember that as gravy reduces, it becomes more concentrated and saltier, so season carefully at first. This is also the time to add any final herb additions or flavor adjustments. Fresh herbs added in the last few minutes provide bright, aromatic notes that complement the deeper flavors developed during cooking.
For an extra-smooth finish, strain the gravy through your fine-mesh strainer into a clean saucepan or gravy boat. This step removes any accidental lumps or herb stems, creating restaurant-quality presentation and mouthfeel that makes your entire Thanksgiving spread better.
Our Thanksgiving recipes collection emphasizes that gravy should be one of the last items finished before serving, ensuring it’s hot and fresh for your meal. If needed, keep warm over very low heat, whisking occasionally to prevent a skin from forming on the surface.
Troubleshooting Common Gravy Problems
Even experienced cooks sometimes have gravy challenges. Here’s how to solve the most common issues quickly and effectively. With these troubleshooting techniques, you can confidently address any gravy emergency that might happen during your holiday meal preparation.
Problem: Lumpy Gravy
Quick Fix: If you notice lumps forming, immediately whisk vigorously. If lumps persist, strain the gravy through a fine-mesh sieve, pressing with the back of a spoon to get all the liquid out. For really stubborn lumps, try using an immersion blender (being careful to avoid splashing hot gravy) or transferring the gravy to a standard blender with the center cap removed and a towel placed over the opening to let steam escape.
Prevention: Always add liquid to your roux gradually, whisking constantly. Make sure your roux is smooth before adding any liquid. The temperature matters too – hot roux with cold liquid or cold roux with hot liquid can increase the chance of lumps forming. Try to use similar temperatures for smoother mixing.
Problem: Gravy Too Thin
Quick Fix: Make a slurry by mixing 1 tablespoon of cornstarch with 2 tablespoons of cold water. Whisk this mixture into your simmering gravy and cook for another 2-3 minutes until thickened. Unlike flour, cornstarch works almost immediately and doesn’t need long cooking to remove raw taste.
Another option is to make a beurre manié by kneading together equal parts soft butter and flour (1 tablespoon each). Whisk small pieces of this paste into your simmering gravy until you reach the thickness you want. This French technique combines the thickening power of flour with the spreading capabilities of fat for smooth, lump-free thickening.
Prevention: Use the right ratio of fat to flour to liquid. For medium-thick gravy, use 2 tablespoons each of fat and flour per cup of liquid. Measuring precisely rather than guessing helps achieve consistent results every time.
Problem: Gravy Too Thick
Quick Fix: Simply whisk in additional warm stock or broth, a few tablespoons at a time, until you reach the consistency you want. Using warm liquid rather than cold helps maintain temperature and prevents lumps during the thinning process.
Prevention: Remember that gravy thickens as it cools. Aim for a slightly thinner consistency than your final goal. If serving gravy in a gravy boat on the table, it should be even slightly thinner as it will continue to thicken while sitting. The professional approach is to make gravy that coats the back of a spoon but still flows smoothly when the spoon is tilted.
Problem: Gravy Tastes Bland
Quick Fix: Improve flavor with umami-rich additions like a splash of soy sauce, Worcestershire sauce, or a small amount of Better Than Bouillon paste. Fresh herbs like thyme or sage can also brighten flavors. A splash of acid – such as a few drops of lemon juice or a teaspoon of white wine vinegar – can wake up flavors without making the gravy taste sour.
Prevention: Make sure you’re scraping up all the flavorful browned bits from the roasting pan. Consider roasting the turkey neck and giblets separately to create an enriched stock. Developing color in your roux (cooking until golden rather than just combining fat and flour) creates important flavor compounds that prevent blandness.
Just as with our soup recipes, building flavors throughout the cooking process creates depth in your gravy. Adding flavor at each stage – from deglazing the roasting pan to properly browning the roux to simmering with herbs – ensures a rich final product.
Problem: Gravy Tastes Too Salty
Quick Fix: Dilute with unsalted stock or even a small amount of water. A splash of cream or a pat of butter can also help balance saltiness while adding richness. Adding a peeled, raw potato chunk to simmer in the gravy for 10 minutes (then removing it) can absorb some excess salt in emergency situations.
Prevention: Taste as you go, particularly before adding any additional salt. Remember that as gravy reduces, it becomes saltier. If using store-bought stock, choose low-sodium versions that let you control the final salt level. Brined turkeys often produce saltier drippings, so adjust accordingly.
“The mark of a truly great Thanksgiving chef isn’t just how well they roast the turkey, but how skillfully they transform those drippings into exceptional gravy.” — WhaleyCooks Culinary Team
Make-Ahead Gravy Options
Thanksgiving day is busy, with multiple dishes needing attention at once. Make-ahead gravy can be a huge help for reducing last-minute stress while still giving you fantastic flavor. Planning this part in advance lets you focus on other time-sensitive parts of the meal while making sure your gravy gets the care it deserves.
Full Make-Ahead Method
You can prepare your gravy up to three days before Thanksgiving:
1. Roast turkey wings, neck, and giblets with vegetables (onions, carrots, celery) until deeply browned. This creates a flavor foundation that’s similar to what you’d get from the actual turkey drippings. Roast at 425°F for 45-60 minutes, turning occasionally, until everything gets nice and caramelized.
2. Use these roasted ingredients to make a rich stock. Simmer with herbs, peppercorns, and bay leaf for 2-3 hours, then strain. This concentrated stock becomes the flavor base for your gravy, providing depth that’s similar to fresh drippings when properly prepared.
3. Create your gravy following the standard method, using butter for the fat component. A darker roux works particularly well for make-ahead gravy, as it provides more complex flavor notes that help make up for the absence of fresh drippings.
4. Cool completely, then refrigerate in an airtight container. Proper cooling is essential – transfer to a wide, shallow container and stir occasionally to release heat quickly, preventing bacterial growth. Once at room temperature, cover and refrigerate promptly.
5. On Thanksgiving day, reheat gently on the stovetop, whisking occasionally. Low and slow is the approach here – high heat can break the emulsion and cause separation. If the gravy seems too thick after refrigeration, thin with a small amount of stock or water.
6. For an extra flavor boost, stir in a few tablespoons of fresh turkey drippings just before serving. This “finishing touch” adds the unique flavor of your actual holiday turkey while maintaining the convenience of advance preparation.
Partial Make-Ahead Method
This hybrid approach gives you the convenience of advance preparation with the full flavor of fresh drippings:
1. Prepare a base gravy 1-2 days ahead using chicken or turkey stock and butter for the roux. Season lightly at this stage, as you’ll be adding more flavor components later. This base provides the structure and body of your gravy.
2. Make it slightly thinner than your desired final consistency. The addition of fresh drippings and subsequent reheating will reduce the gravy somewhat, so starting with a slightly looser consistency prevents ending up with gravy that’s too thick.
3. On Thanksgiving day, collect the fresh turkey drippings. Separate the fat and save it for other uses (like cooking vegetables or enriching stuffing). The clear drippings contain concentrated turkey flavor that will transform your base gravy.
4. Heat your base gravy and whisk in the fresh drippings to enhance flavor. This combination provides the best of both worlds – the convenience of advance preparation with the irreplaceable flavor of fresh turkey drippings. Final seasoning adjustments should be made at this stage.
As our dinner planning guide explains, make-ahead components are essential for managing large holiday meals efficiently. Preparing gravy in advance reduces stovetop congestion during the critical final hour before serving and eliminates one potential source of last-minute stress.
Freezing Gravy
Gravy can be frozen for up to three months:
1. Cool completely before transferring to freezer-safe containers. Rapid cooling is important for food safety – use an ice bath to speed the process if needed. Dividing into smaller portions speeds cooling and provides convenient serving sizes.
2. Leave about 1/2 inch of headspace for expansion. Liquids expand when frozen, and insufficient headspace can cause containers to crack or lids to pop off, resulting in freezer burn and quality problems.
3. Thaw overnight in the refrigerator before Thanksgiving. Never thaw at room temperature, which can allow bacterial growth in portions that thaw first while other parts remain frozen. Plan at least 24 hours for thawing a quart of frozen gravy.
4. Reheat gently, whisking to recombine any separated components. Frozen and thawed gravy often needs vigorous whisking to restore its original texture. A wire whisk works better than a spoon for this purpose.
5. If the texture seems off after freezing, a quick whisk with a splash of fresh stock usually fixes the issue. In extreme cases where separation persists, transferring to a blender and pulsing briefly can restore emulsion (use caution with hot liquids in blenders).
Flavor Variations to Elevate Your Gravy
While traditional turkey gravy is a Thanksgiving classic, creative variations can complement your meal and surprise your guests with unexpected flavors. These thoughtful adaptations respect the essence of traditional gravy while introducing nuanced elements that can become signature components of your holiday table for years to come.
Herb-Infused Gravy
Fresh herbs add brightness and complexity:
1. Add 2-3 sprigs of fresh thyme, sage, and rosemary to your simmering gravy. These classic poultry herbs infuse their essential oils into the gravy, creating aromatic complexity that enhances the entire meal. Bundling them with kitchen twine creates an easy-to-remove herb sachet.
2. Remove the stems before serving. Herb stems can become bitter with extended cooking and create texture issues in the finished gravy. Removing them ensures smooth consistency while retaining their flavor contribution.
3. For a more pronounced herb flavor, finely chop 1 tablespoon each of fresh sage and thyme and add during the final minutes of cooking. This technique preserves the bright, volatile compounds in fresh herbs that longer cooking can diminish. The visual speckles of green also add appealing color contrast to the gravy.
Wine-Enhanced Gravy
Wine adds acidity and depth:
1. Replace 1/2 cup of stock with dry white wine (Chardonnay or Sauvignon Blanc work well). The natural acidity and fruit notes in wine create balance and complexity that stock alone cannot provide. Avoid cooking wines, which contain salt and preservatives that can negatively impact flavor.
2. Add the wine after your roux is cooked but before the stock, allowing it to reduce by half. This reduction concentrates flavor while cooking off alcohol that could otherwise taste harsh. The process also allows the wine to deglaze any flavorful bits from the pan surface.
3. This slight reduction concentrates the wine flavor while cooking off the alcohol. What remains are the complex fruit compounds and acidity that brighten rich gravy and cut through the heaviness of traditional Thanksgiving fare. For red wine lovers, a small amount of Pinot Noir can create a more robust gravy that pairs beautifully with dark meat.
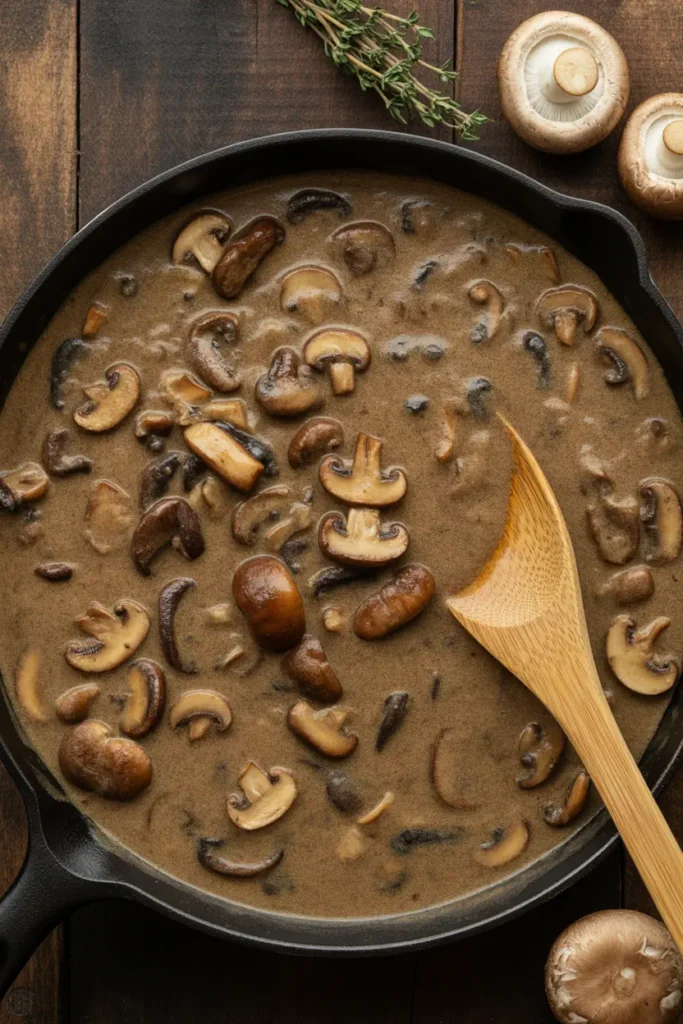
Mushroom Gravy
Mushrooms contribute earthy umami notes:
1. Sauté 8 ounces of finely chopped mushrooms (cremini, shiitake, or a mix) in butter until deeply browned. This caramelization develops the mushrooms’ natural glutamates and creates complex flavor compounds through Maillard reactions. Patience is key – proper mushroom browning takes 10-15 minutes.
2. Add to your finished gravy, or blend for a smoother texture. The choice between textured and smooth depends on your preference and your guests’ expectations. A textured mushroom gravy provides visual interest and substantial mouthfeel, while blended versions offer subtle earthiness without announcing themselves as “mushroom gravy.”
3. A splash of sherry or Marsala wine complements the mushroom flavor beautifully. These fortified wines have natural affinity with mushrooms, enhancing their earthy qualities while adding subtle sweetness and complexity that rounds out the flavor profile.
Similar to our approach with soups, these flavor additions should complement rather than overwhelm the fundamental turkey flavor. The goal is enhancement rather than replacement of the traditional Thanksgiving gravy experience.
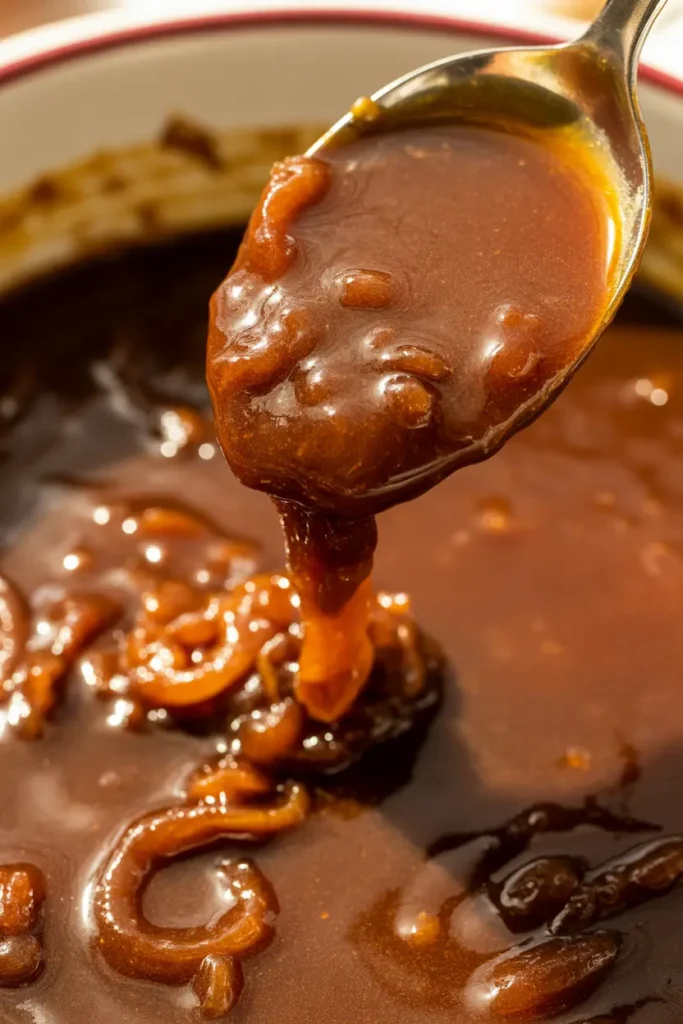
Caramelized Onion Gravy
Sweet, deeply flavored onions add complexity:
1. Slowly caramelize 1-2 onions, thinly sliced, in butter over low heat for 30-40 minutes until mahogany brown. This slow transformation converts the onions’ starches to sugars while developing hundreds of flavor compounds through caramelization. The process cannot be rushed – high heat creates bitter, burnt notes rather than sweet complexity.
2. Incorporate into your gravy, either leaving the onions intact or pureeing for a smooth texture. The intact version provides textural contrast and visible evidence of the flavor source, while pureeing creates a more uniform gravy with subtle sweetness throughout.
3. A pinch of fresh thyme enhances the sweet onion flavor. This classic herb pairing brings out the best in caramelized onions, adding aromatic notes that complement their natural sweetness. For a French-inspired variation, consider adding a bay leaf during the onion caramelization process.
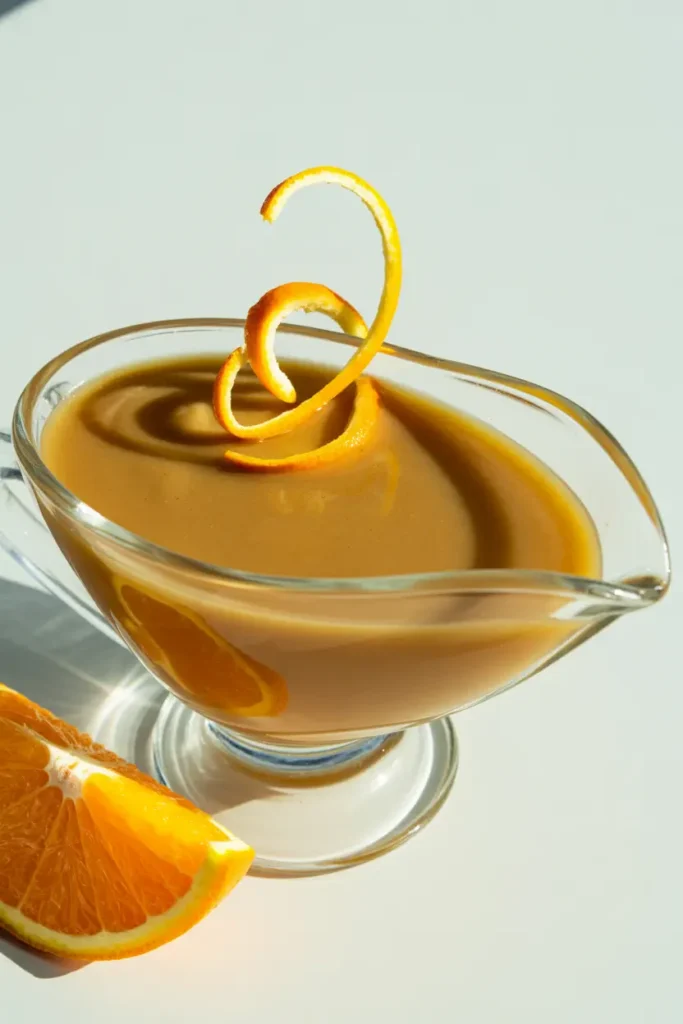
Citrus-Brightened Gravy
A surprising but delicious variation:
1. Add 1-2 teaspoons of orange or lemon zest to your finished gravy. The essential oils in citrus zest provide bright, aromatic notes without adding actual acidity or fruit flavor. Use a microplane for the finest zest that incorporates seamlessly.
2. The citrus brightens the rich flavors without making the gravy taste fruity. This subtle enhancement cuts through richness while adding aromatic complexity that makes guests wonder what your secret ingredient might be. The effect should be barely perceptible rather than dominant.
3. This variation pairs especially well with herb-rubbed turkeys. The citrus notes complement herbs like rosemary, thyme, and sage commonly used in turkey preparation, creating a harmonious flavor bridge between the meat and the gravy.
Serving and Presentation Tips
How you serve your gravy can be just as important as how you make it. These presentation tips ensure your gravy maintains its perfect temperature and consistency throughout the meal. Thoughtful service elevates the dining experience and demonstrates attention to detail that guests appreciate, even if they can’t quite identify why the meal feels so special.
Gravy Boat Selection
The ideal gravy boat should:
– Have a wide mouth for easy pouring that minimizes drips and spills. Narrow-spouted versions may look elegant but often create serving challenges, especially for guests with limited dexterity.
– Include a saucer to catch drips that might otherwise stain your tablecloth. This traditional design element serves a practical purpose while adding visual formality to your table setting.
– Be pre-warmed before filling to maintain gravy temperature longer. Simply fill with hot water for a few minutes, then empty and dry before adding gravy. This simple step significantly extends the time your gravy remains at optimal serving temperature.
– Have sufficient capacity (at least 2 cups) to minimize refill trips to the kitchen. Running out of gravy mid-service disrupts the meal flow and can leave late-serving guests without this essential accompaniment.
For large gatherings, consider placing multiple gravy boats around the table for easy access. This thoughtful touch eliminates the need to pass heavy, potentially drippy gravy boats across the table and ensures everyone has immediate access regardless of their seating position.
Temperature Management
Gravy thickens as it cools and can develop a skin on top:
1. Keep gravy hot in a small slow cooker set to low or warm. This approach maintains perfect serving temperature throughout even the longest meal. A dedicated gravy warmer with a candle underneath serves the same purpose with more traditional presentation.
2. If using a gravy boat, pre-warm it with hot water before filling. Ceramic and porcelain gravy boats retain heat well when properly preheated. Metal versions conduct heat efficiently but also lose it quickly, making preheating even more critical.
3. Cover with foil between servings if not using immediately. This simple barrier prevents both heat loss and skin formation. For longer holding periods, a floating butter pat on the surface prevents skin formation while adding richness.
4. A candle warmer under your gravy boat maintains temperature elegantly. These inexpensive devices provide gentle, consistent heat that keeps gravy at perfect serving temperature without cooking it further or causing reduction.
As our crowd-feeding guide notes, temperature management is crucial for serving quality food to large groups. Nothing diminishes the dining experience faster than lukewarm or congealed gravy on hot food.
Creative Serving Ideas
Beyond the traditional gravy boat:
– Small individual ramekins at each place setting provide personal portions that stay warmer than a single large serving vessel passed around the table. This approach also eliminates the need to pass serving pieces during the meal.
– Vintage teacups for a unique presentation add charming visual interest to your table. Their handles remain cool for easy passing, and the familiar drinking vessel shape facilitates easy pouring.
– Mini pitchers for a rustic farmhouse feel complement country-style Thanksgiving decor. Their practical pouring design minimizes spills while contributing to a cohesive table aesthetic.
– Insulated serving vessels for extended heat retention keep gravy at perfect temperature throughout even the longest, most conversation-filled meals. Modern double-walled designs maintain temperature while remaining cool to the touch externally.
Garnishing Your Gravy
While not traditional, subtle garnishes can elevate presentation:
– A light sprinkle of finely chopped fresh herbs adds visual appeal and aromatic freshness. This finishing touch signals attention to detail and provides a visual cue about flavor components within the gravy.
– A few drops of herb-infused oil on the surface creates dramatic visual effect while adding aromatic complexity. The small circles of golden oil create an elegant presentation that elevates humble gravy to restaurant-worthy status.
– A very light dusting of paprika for color contrast provides visual warmth without significantly altering flavor. This technique, borrowed from professional food stylists, makes gravy more photogenic for your holiday table memories.
– A twist of cracked black pepper adds textural interest and visual contrast while reinforcing the pepper flavor within the gravy. Using a pepper mill tableside adds theatrical presentation and fresh aroma.
Placement on the Table
Strategic placement ensures everyone has access:
– Position gravy boats near the turkey and mashed potatoes to minimize passing distance for these classic pairings. Proximity to the foods most commonly dressed with gravy improves dining flow and reduces the risk of spills.
– For long tables, place multiple gravy boats at intervals to ensure no guest needs to request gravy from across the table. This thoughtful arrangement demonstrates consideration for your guests’ dining experience.
– Consider a lazy Susan for central placement with easy rotation, particularly for round tables where reaching across can be awkward. This solution provides equal access for all guests while adding an interactive element to the meal service.
– Designate a “gravy refill station” in the kitchen for quick replenishment when serving vessels run low. Having a simmering batch ready for refills ensures no interruption in gravy availability throughout the meal.