
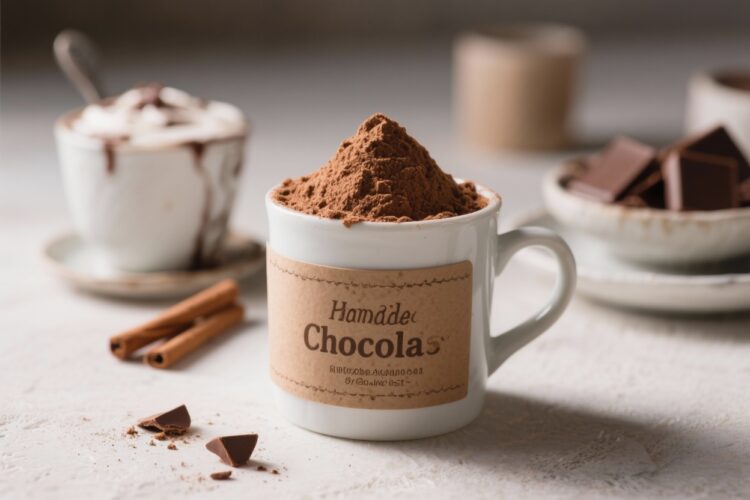
There’s something special about stirring a warm mug of hot chocolate on a chilly day. This homemade hot chocolate mix gives you that cozy, café-level comfort without the fuss or the price tag. It’s rich, smooth, and perfectly balanced—not too sweet, not too bitter.
Make a big batch once, and you’ve got instant hot chocolate whenever you need it. It also makes an easy, thoughtful gift that people actually want.
What Makes This Recipe So Good

This mix hits that sweet spot between rich cocoa flavor and creamy, velvety texture. It blends smoothly with hot milk or water—no chalky clumps.
You control the sweetness, the salt, and the chocolate intensity, so it tastes the way you like it. It’s pantry-friendly, budget-friendly, and endlessly customizable. Plus, it avoids hard-to-pronounce additives you’ll find in many store-bought packets.
- Deep chocolate flavor: Uses high-quality cocoa and a touch of chocolate chips for extra body.
- Creamy without fresh cream: Dry milk powder makes it rich and smooth.
- Balanced sweetness: Not overly sugary—just enough to highlight the cocoa.
- Mixes easily: A little cornstarch helps it thicken and dissolve nicely.
- Customizable: Adjust sweetness, add spices, or swap the dairy to fit your taste and needs.
Shopping List
- Unsweetened cocoa powder (Dutch-process for smoother, natural cocoa for more tang)
- Powdered sugar (confectioners’ sugar; it dissolves fast)
- Dry milk powder (whole milk powder for richer flavor; nonfat works too)
- Cornstarch (for body and a silky finish)
- Salt (fine sea salt or kosher salt)
- Chocolate chips or finely chopped chocolate (optional, but excellent)
- Vanilla powder (optional; skip liquid vanilla)
- Cinnamon or espresso powder (optional flavor boosters)
How to Make It
- Measure your base ingredients. Aim for 1 cup cocoa powder, 1 1/2 cups powdered sugar, 2 cups dry milk powder, 2 tablespoons cornstarch, and 1/2 teaspoon fine salt.
This yields about 4 1/2 cups of mix.
- Blend the dry ingredients. In a large bowl, whisk cocoa, powdered sugar, dry milk, cornstarch, and salt until uniform. Break up any visible clumps with the whisk or your fingers.
- Optional: Add chocolate for richness. Stir in 1/2 cup mini chocolate chips or finely chopped chocolate. Pulse in a food processor if you want a finer, more uniform mix.
- Add flavor boosters (optional). Mix in 1–2 teaspoons vanilla powder, 1 teaspoon cinnamon, or 1 teaspoon espresso powder.
These add subtle depth without overpowering the cocoa.
- Store it properly. Transfer the mix to an airtight jar or container. Label with “Hot Chocolate Mix,” the date, and directions for use.
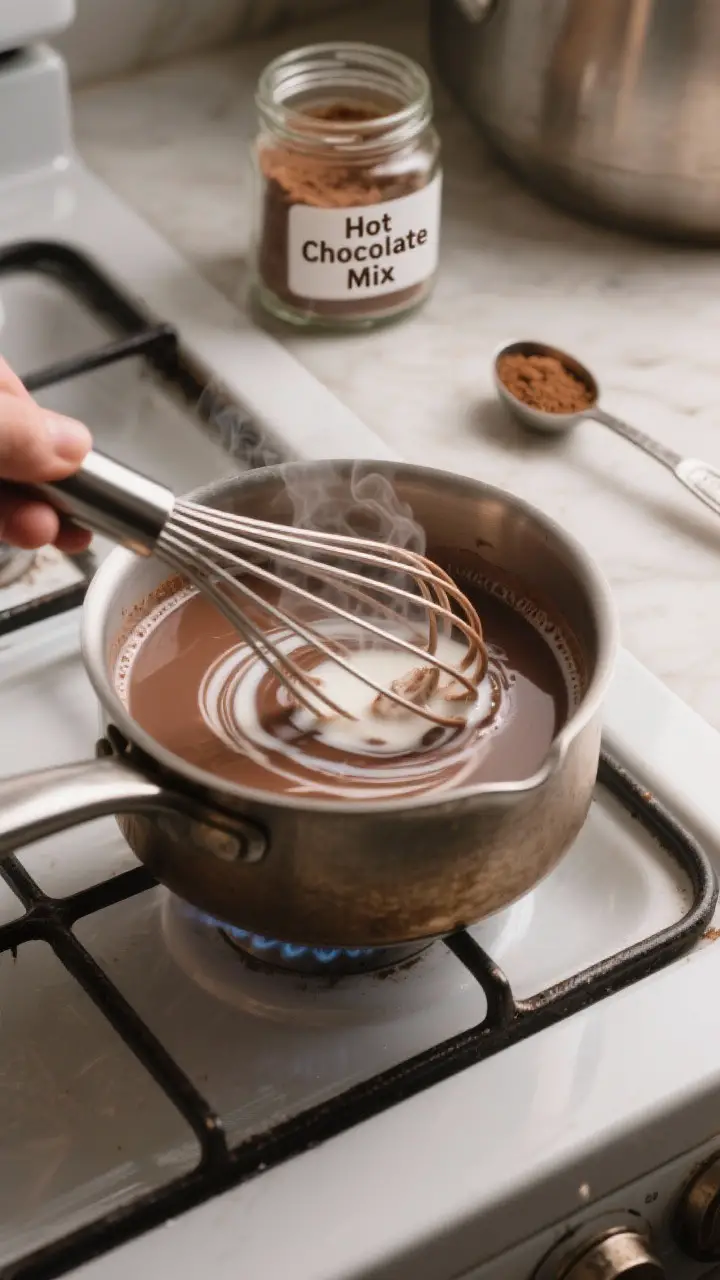
- To make a mug: Heat 8 ounces (1 cup) milk, a milk alternative, or water until steaming—not boiling. Whisk in 3–4 tablespoons of mix, to taste.
Simmer for 30–60 seconds for extra creaminess, whisking constantly.
- Adjust to your taste. Add a pinch more salt, an extra spoon of mix, or a splash of milk to fine-tune the sweetness and texture.
Storage Instructions
- Room temperature: Store in an airtight container in a cool, dark place for up to 3 months.
- Longer storage: For mixes that include chocolate chips, keep them in the pantry for up to 2 months, or refrigerate for up to 4 months.
- Moisture control: Add a food-safe desiccant packet if your kitchen is humid. Always use a clean, dry scoop.
- Freezing: Not necessary, but you can freeze for up to 6 months. Bring to room temperature before opening to avoid condensation.
Why This is Good for You
Hot chocolate can be more than a treat.
Cocoa is naturally rich in flavanols, which support circulation and may help with mood and focus. When you make your own mix, you control the sugar and sodium. You also skip artificial flavors and stabilizers.
Using milk or fortified plant milk adds protein and calcium, turning a simple mug into a satisfying snack.
- Customizable nutrition: Use less sugar or choose nonfat or whole milk powder based on your goals.
- Better ingredients: High-quality cocoa and a pinch of salt deliver flavor without heavy additives.
- Comfort factor: A warm, familiar drink that feels like a small act of care.
What Not to Do
- Don’t use granulated sugar. It doesn’t dissolve as quickly and can taste gritty. Stick with powdered sugar.
- Don’t add liquid vanilla to the dry mix. It will clump and spoil the shelf life. Use vanilla powder or add liquid vanilla to the mug.
- Don’t skip the salt. A small pinch makes the chocolate taste richer and less bitter.
- Don’t boil the milk. Overheating can scorch the milk and make the drink taste cooked or chalky.
- Don’t store it loosely covered. Moisture is the enemy.
Keep it airtight to prevent clumps.
Variations You Can Try
- Peppermint Hot Chocolate: Add 1–2 teaspoons crushed peppermint candies to the mix, or stir in a drop of peppermint extract per mug.
- Mexican-Style: Add 1 teaspoon cinnamon and a pinch of cayenne. It’s warm, not fiery, with a lovely aroma.
- Mocha: Mix in 1–2 teaspoons espresso powder. Brew with hot milk for a café-style treat.
- Salted Caramel: Add a drizzle of caramel sauce to the prepared mug and finish with a few flakes of sea salt.
- Dark and Intense: Use Dutch-process cocoa and chopped 70% chocolate.
Reduce powdered sugar by 2–3 tablespoons if you like it less sweet.
- Dairy-Free: Skip the dry milk powder and replace with coconut milk powder or oat milk powder. Prepare with hot almond, oat, or coconut milk.
FAQ
Can I make this without milk powder?
Yes. Leave out the milk powder and prepare the mix with hot milk or a plant-based milk.
You may want to add an extra tablespoon of mix per mug to keep it rich.
What’s the difference between Dutch-process and natural cocoa?
Dutch-process cocoa is alkalized, so it’s smoother and less acidic, with a classic “hot cocoa” flavor. Natural cocoa is a bit brighter and more intense. Either works—choose based on what you like.
How much mix do I use per cup?
Start with 3 tablespoons per 8 ounces of hot liquid.
If you prefer it thicker or sweeter, go up to 4 tablespoons. Adjust to taste.
Can I make this sugar-free?
Yes. Replace powdered sugar with a powdered sweetener blend formulated for baking.
Check the sweetness conversion on the package and adjust to taste.
Why add cornstarch?
Cornstarch helps the drink thicken slightly and improves mouthfeel. It also reduces clumping, so your hot chocolate comes out silky and smooth.
What’s the best liquid to use?
Whole milk gives the creamiest result. Oat milk is a great plant-based option, with good body and a neutral flavor.
Water works if you prefer a lighter cup—just add an extra spoon of mix.
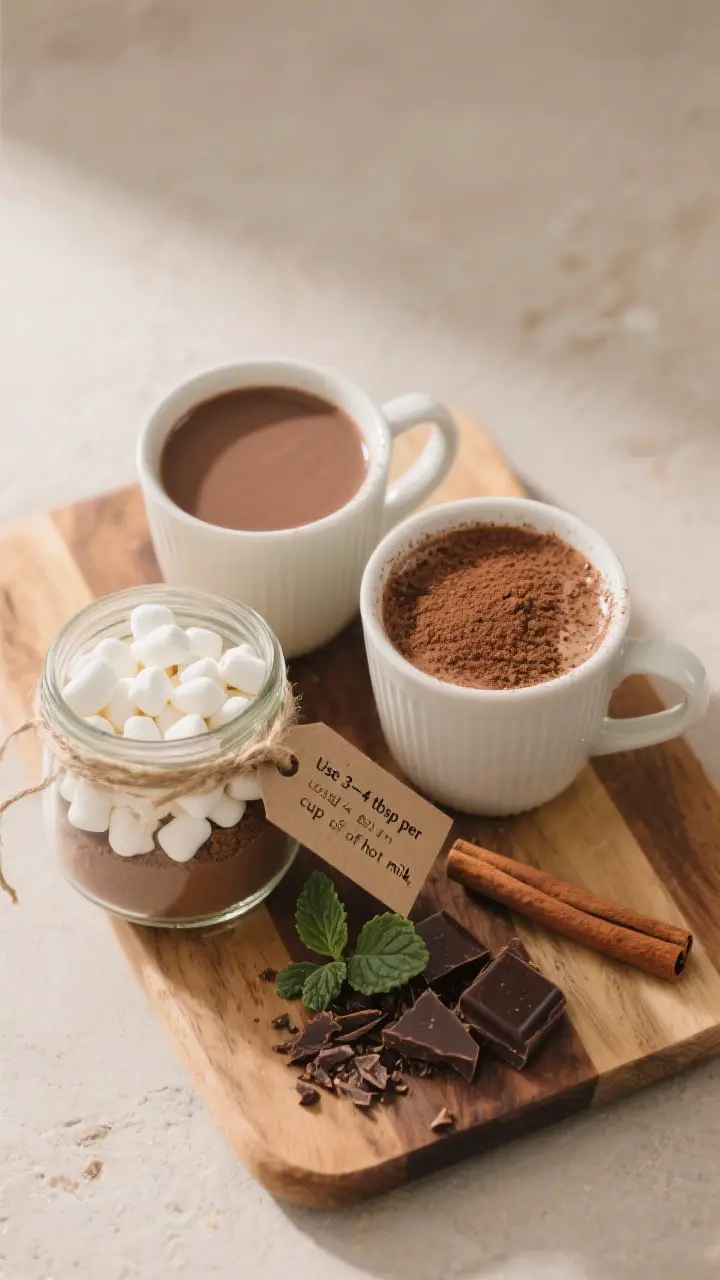
How do I package this as a gift?
Spoon the mix into a pretty jar, add mini marshmallows on top, and tie on a tag with directions: “Use 3–4 tbsp per cup of hot milk.” Include a cinnamon stick or a candy cane for flair.
Can I microwave it?
Yes. Heat milk in short bursts until steaming, then whisk in the mix. Microwave again for 15–20 seconds and whisk to finish.
Avoid boiling to prevent scorching.
In Conclusion
This Homemade Hot Chocolate Mix is simple to make, easy to store, and endlessly customizable. With a few pantry staples, you get a rich, cozy drink anytime, no packets required. Keep a jar in the cupboard for snow days, late-night cravings, or gifting.
Once you try it, you may never go back to the store-bought stuff.
Printable Recipe Card
Want just the essential recipe details without scrolling through the article? Get our printable recipe card with just the ingredients and instructions.