
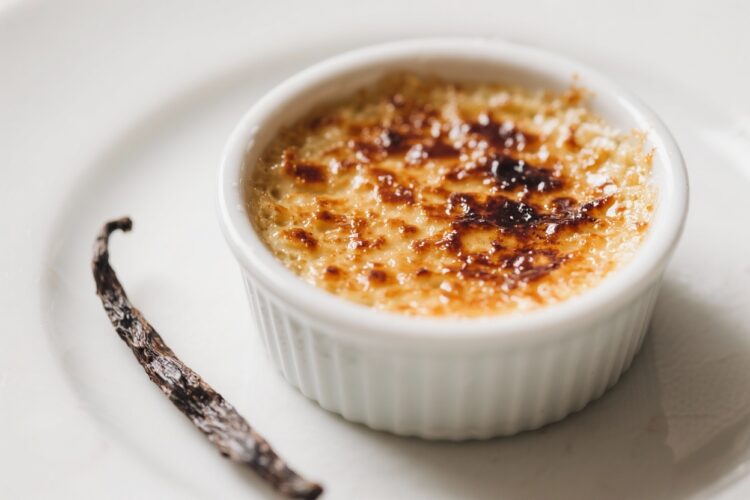
Crème brûlée looks fancy, but it’s really a simple dessert with a big payoff. You get a silky vanilla custard under a thin, glassy lid of caramelized sugar that shatters with the tap of a spoon. It’s elegant enough for company and easy enough for a quiet night in.
No special pastry school skills required—just a gentle hand and a little patience. If you love classic flavors with a touch of drama, this one never disappoints.
What Makes This Special
This recipe uses real vanilla bean, which gives the custard deep, aromatic flavor and those tiny, beautiful specks. The texture hits that sweet spot between creamy and set—no jiggle worries if you follow the steps.
A water bath (bain-marie) helps the custard cook evenly without curdling. And the sugar crust? It’s thin, crisp, and fast to torch or broil.
The contrast of warm top and cool custard is what makes every bite memorable.
Ingredients
- 2 cups (480 ml) heavy cream
- 1 whole vanilla bean (or 2–3 teaspoons pure vanilla extract)
- 5 large egg yolks
- 1/2 cup (100 g) granulated sugar (plus extra for topping)
- Pinch of fine sea salt
- Hot water for the water bath
How to Make It
- Prep your gear. Heat the oven to 325°F (160°C). Place 4–6 ramekins (4–6 ounce size) in a deep baking dish. Set a kettle of water to boil for the water bath.
- Infuse the cream. Pour the heavy cream into a saucepan.
Split the vanilla bean lengthwise and scrape out the seeds. Add both seeds and pod to the cream. Warm over medium heat until steaming and just starting to bubble at the edges.
Do not boil. Take off the heat, cover, and let steep for 10–15 minutes.
- Whisk the yolks and sugar. In a bowl, whisk egg yolks, 1/2 cup sugar, and a pinch of salt until slightly thick and lighter in color, about 1 minute. You want it smooth, not frothy.
- Temper the yolks. Remove the vanilla pod from the cream.
While whisking the yolk mixture, slowly pour in the warm cream in a thin stream. This prevents scrambled eggs and ensures a silky custard.
- Strain the custard. For the smoothest texture, pour the mixture through a fine-mesh sieve into a jug. This catches any bits of egg or stray vanilla fibers.
- Fill the ramekins. Divide the custard evenly among the ramekins.
Tap gently to pop surface bubbles, or skim them off with a spoon.
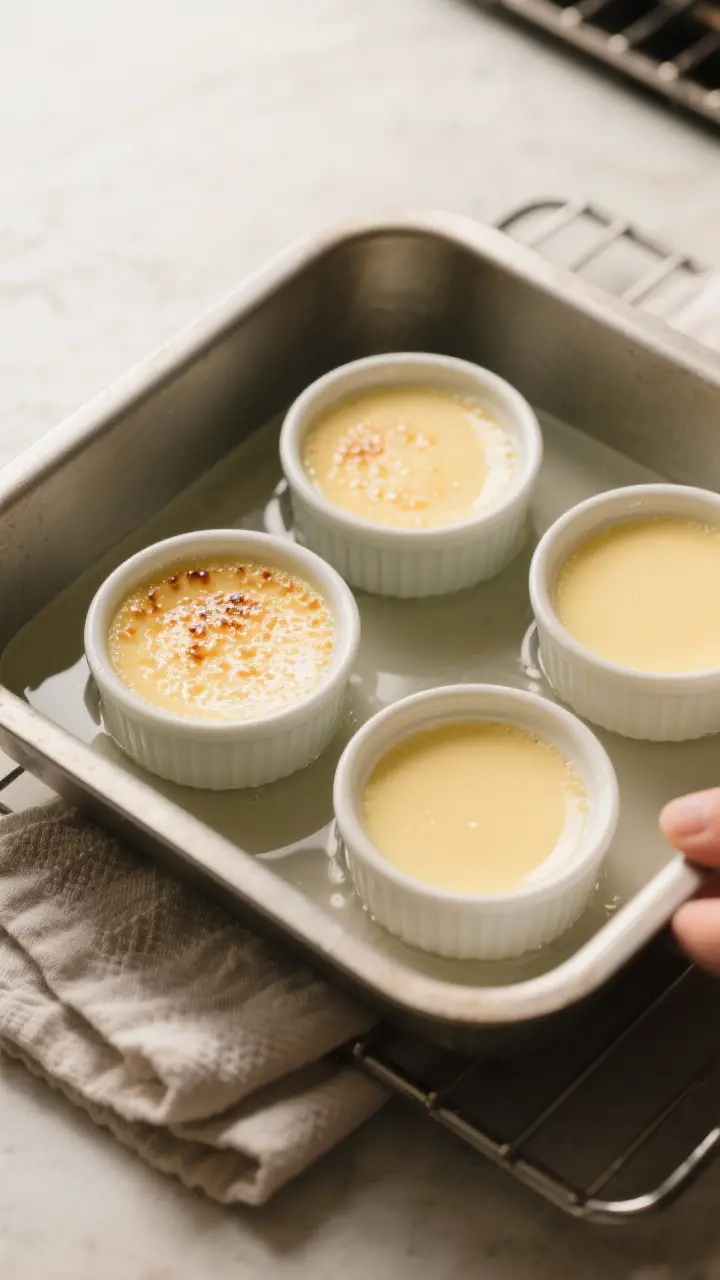
- Make the water bath. Slide the baking dish into the oven. Carefully pour hot water into the dish until it reaches halfway up the sides of the ramekins. This keeps the custard cooking gently and evenly.
- Bake until just set. Bake 30–40 minutes, depending on ramekin size.
The centers should be slightly wobbly when nudged, not liquid. They will firm up as they cool.
- Cool and chill. Remove ramekins from the water bath and let them cool to room temperature. Cover and refrigerate at least 3 hours, preferably overnight, until fully set and cold.
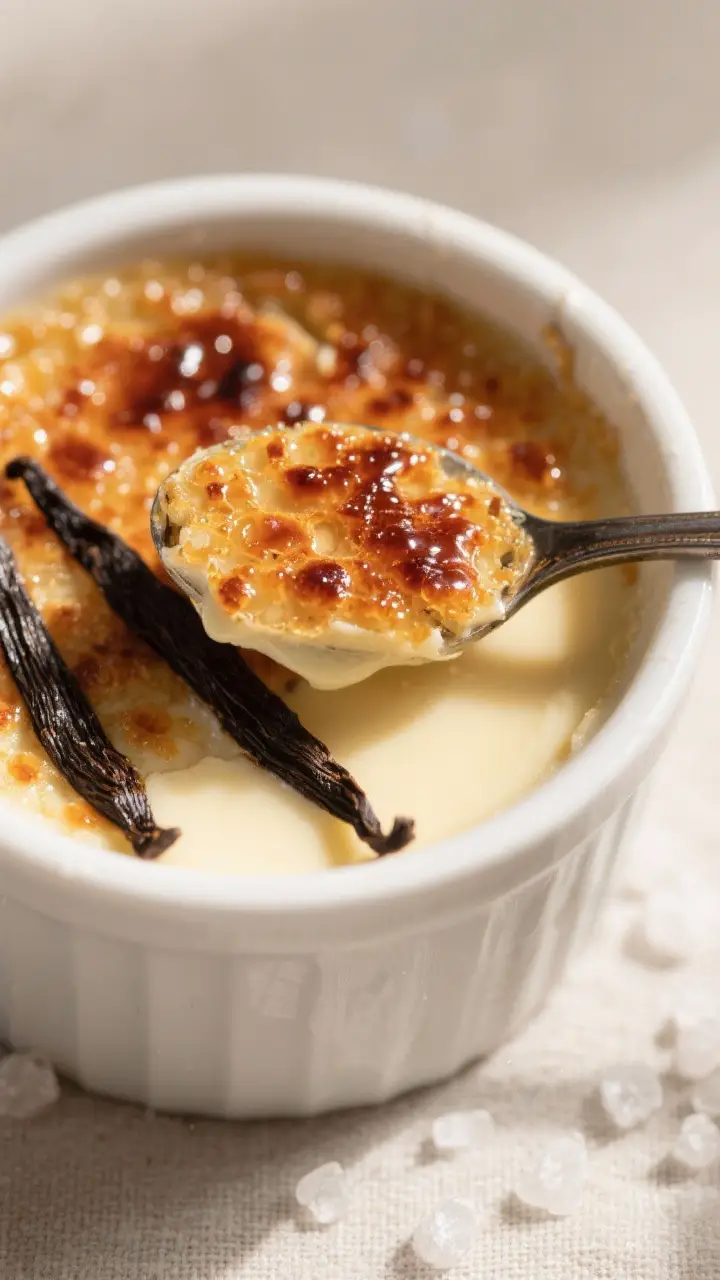
- Caramelize the sugar. Just before serving, sprinkle 1–2 teaspoons of granulated sugar evenly over each custard.
- With a torch: Move the flame in small circles until the sugar melts and turns a deep amber.
Let stand 1–2 minutes to harden.
- Under the broiler: Place ramekins on a chilled sheet pan 2–3 inches from the heat. Broil 2–4 minutes, rotating for even color. Watch closely—sugar goes from perfect to burnt fast.
- With a torch: Move the flame in small circles until the sugar melts and turns a deep amber.
Storage Instructions
- Before caramelizing: Keep covered in the fridge up to 3 days.
Add sugar and torch right before serving for the best crunch.
- After caramelizing: Enjoy within 1 hour. The top softens in the fridge.
- Do not freeze the custards; freezing breaks the texture.
Why This is Good for You
Crème brûlée is an indulgence, but it’s made from simple, real ingredients. You get protein from egg yolks and calcium from cream.
Using a real vanilla bean means big flavor without artificial notes, so you can rely on quality over quantity. A small serving satisfies sweet cravings in a calm, measured way—no towering sugars or heavy frosting needed.
Pitfalls to Watch Out For
- Overheating the cream: Boiling can split the fat and create a greasy texture. Heat until steaming, then steep.
- Skipping the tempering step: Adding hot cream too quickly scrambles the yolks.
Pour slowly while whisking.
- Overbaking: If the custard is fully firm in the oven, it will be grainy when cold. Pull it when the center still wobbles slightly.
- No water bath: Dry heat leads to rubbery, curdled custard. The bain-marie is non-negotiable for silkiness.
- Thick sugar layer: Too much sugar gives you a hard, bitter top.
Aim for an even, thin coating.
- Caramelizing too early: The crust softens in the fridge. Torch right before serving.
Recipe Variations
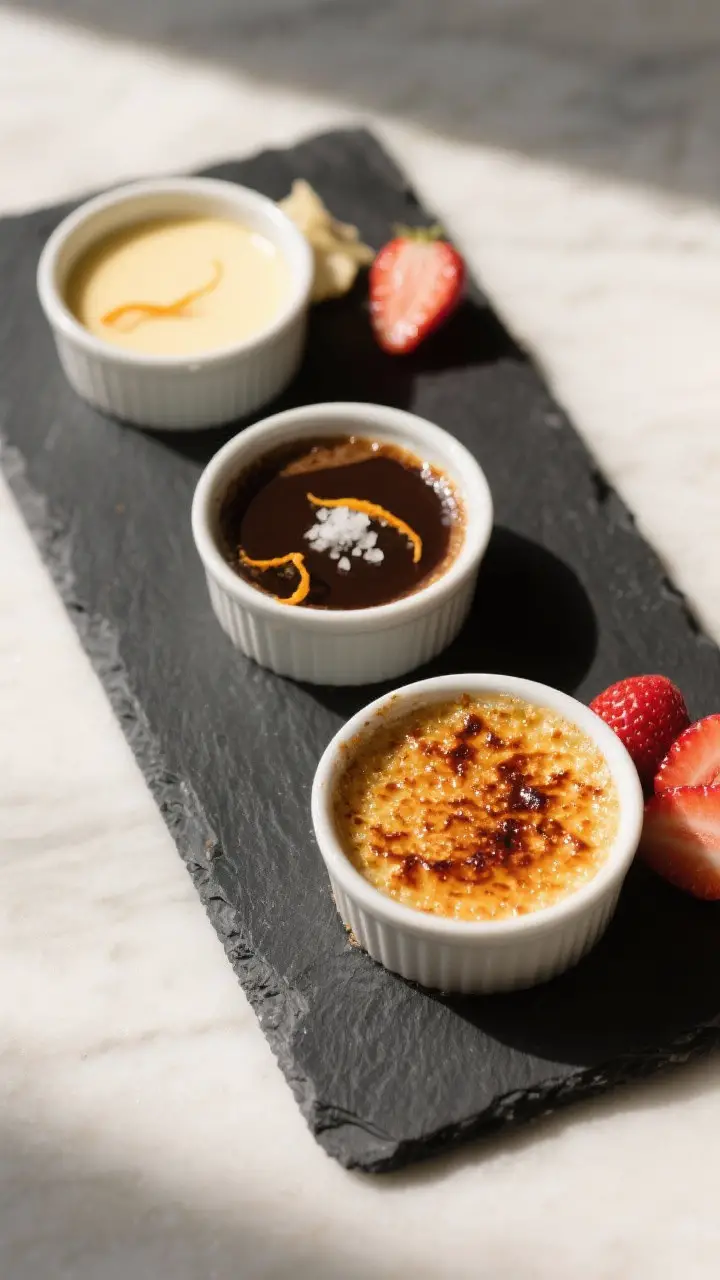
- Vanilla-Orange: Add 1 teaspoon finely grated orange zest to the cream with the vanilla bean for a bright citrus note.
- Espresso Brûlée: Stir in 2 teaspoons instant espresso powder to the warm cream for a coffee kick.
- Salted Caramel Twist: Replace 1/4 cup of the sugar with caramel sauce whisked into the warm cream, and finish with a tiny pinch of flaky salt on the crust.
- Maple: Swap half the granulated sugar in the custard for pure maple syrup. Use superfine sugar for the topping to ensure it caramelizes well.
- Coconut: Use 1 cup heavy cream + 1 cup full-fat coconut milk.
The flavor is subtle and lush; keep the vanilla bean.
- Brûléed Fruit Top: After torching, add thin slices of strawberry or peach and dust lightly with sugar. Torch briefly again for a glossy finish.
FAQ
Can I use vanilla extract instead of a vanilla bean?
Yes. Use 2–3 teaspoons of pure vanilla extract.
Add it after warming the cream so the flavor stays bright. You won’t get the specks, but the taste will still be lovely.
What if I don’t have a torch?
The broiler works. Chill the custards well and use a cold sheet pan to keep the custard from warming while the top caramelizes.
Watch closely and rotate the pan for even browning.
Why did my custard turn grainy?
It likely overcooked or wasn’t tempered properly. Next time, keep the oven low and use the water bath. Pull the custards while the centers still wobble slightly, and strain the mixture before baking.
How do I know when they’re done?
Gently nudge a ramekin.
The edges should look set and the center should jiggle like soft Jell-O. If it sloshes, give it a few more minutes. If it’s fully firm, it’s gone too far.
What sugar is best for the top?
Regular granulated sugar melts evenly and gives a clean, crisp crust.
Superfine sugar caramelizes even faster. Avoid powdered sugar—it won’t glass properly.
Can I make this dairy-light?
You can swap up to half the cream with whole milk or coconut milk, but expect a slightly softer set. For the classic texture, keep at least half heavy cream.
Is it safe to use raw sugar for the crust?
Turbinado or demerara can work for a more textured crust, but they take longer to melt and can scorch under the broiler.
If you use them, torch gently and finish with a small amount of granulated sugar to even the surface.
How far ahead can I prepare crème brûlée?
Make and chill the custards up to 3 days ahead. Keep them tightly covered to avoid absorbing fridge odors. Caramelize the sugar just before serving.
Wrapping Up
Crème brûlée is a classic for a reason: simple ingredients, rich flavor, and that satisfying crack with the first spoon tap.
With a vanilla bean and a gentle bake, you’ll get custard that’s smooth and lush every time. Keep the sugar layer thin, torch right before serving, and you’re set. It’s the kind of dessert that feels special without being fussy—exactly what you want when you’re cooking for someone you love, including yourself.
Printable Recipe Card
Want just the essential recipe details without scrolling through the article? Get our printable recipe card with just the ingredients and instructions.