
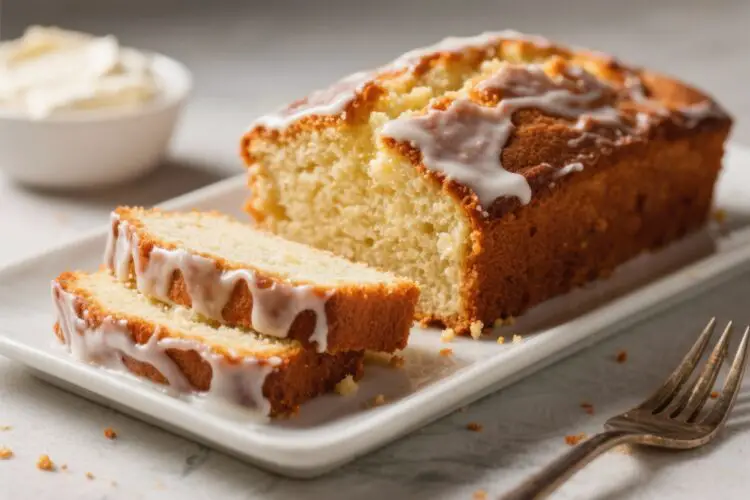
Cream cheese pound cake is one of those timeless desserts that never disappoints. It bakes up golden on the outside with a velvety crumb inside, and it smells like a bakery while it cools on your counter. Slice it thick for dessert or toast a piece for breakfast—it fits right in either way.
If you’ve only had traditional pound cake, this version brings a richer flavor and a softer bite. It’s simple, comforting, and surprisingly easy to pull together with pantry staples.
What Makes This Special
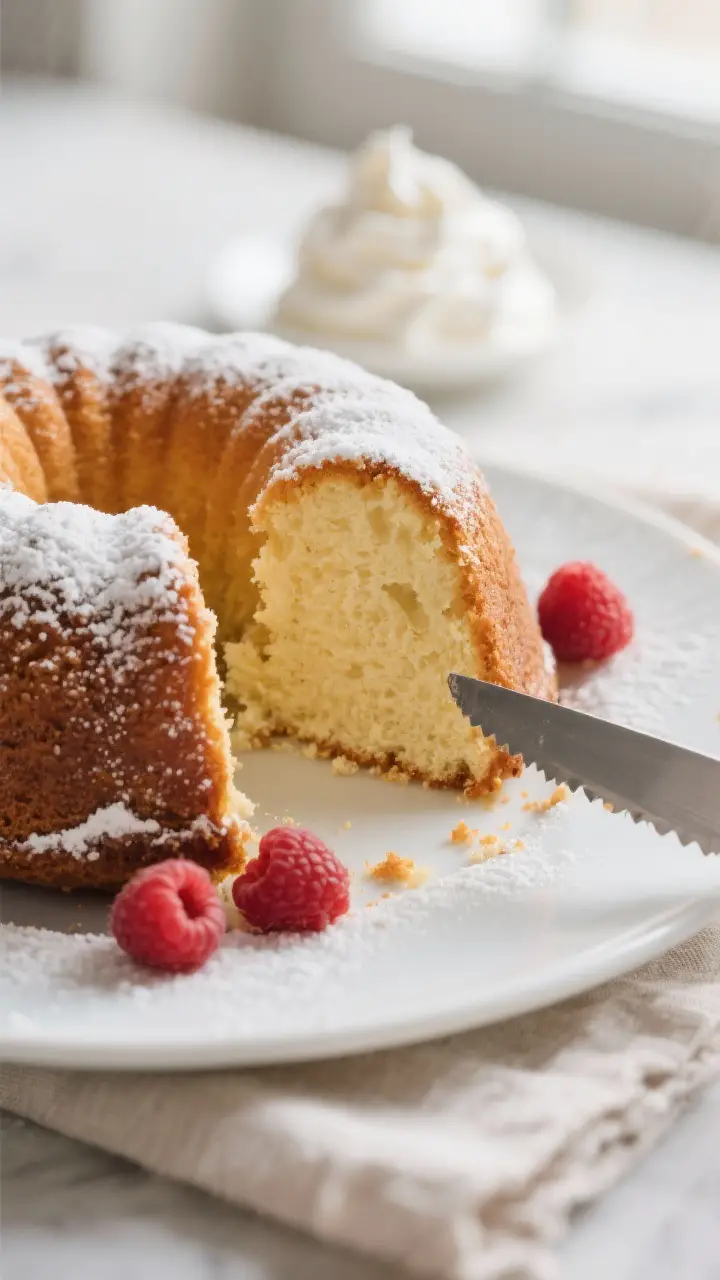
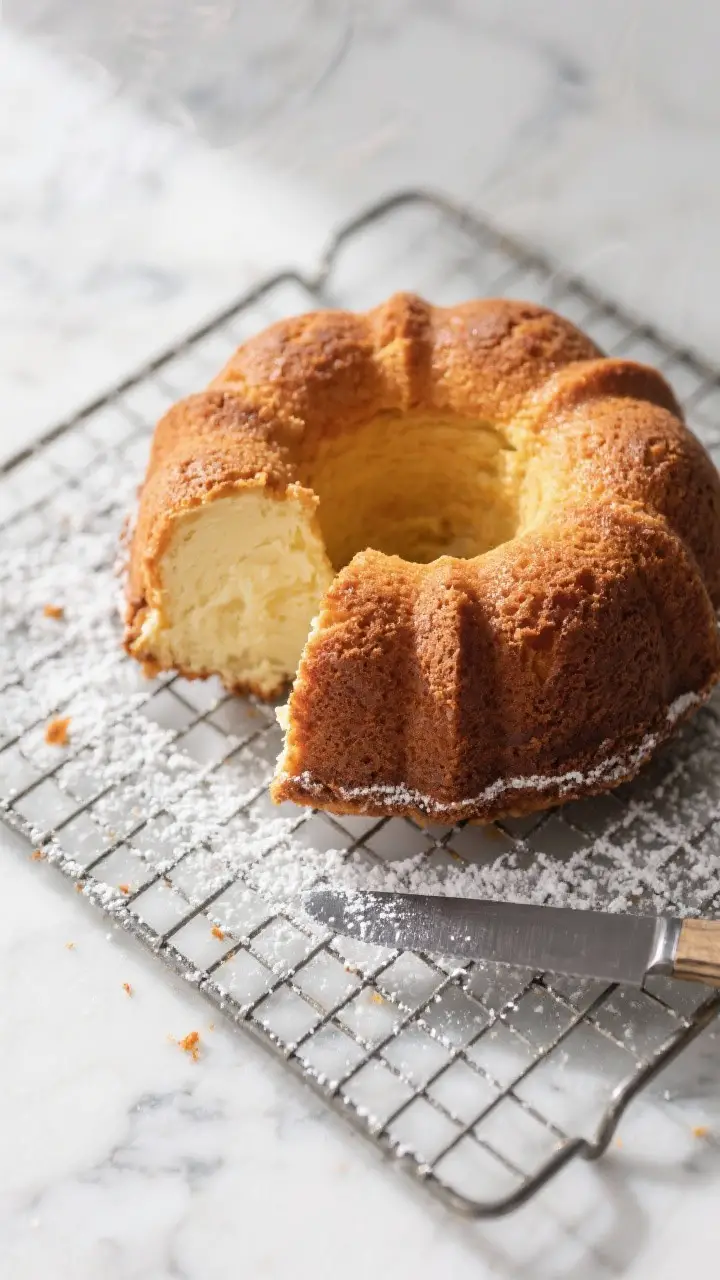
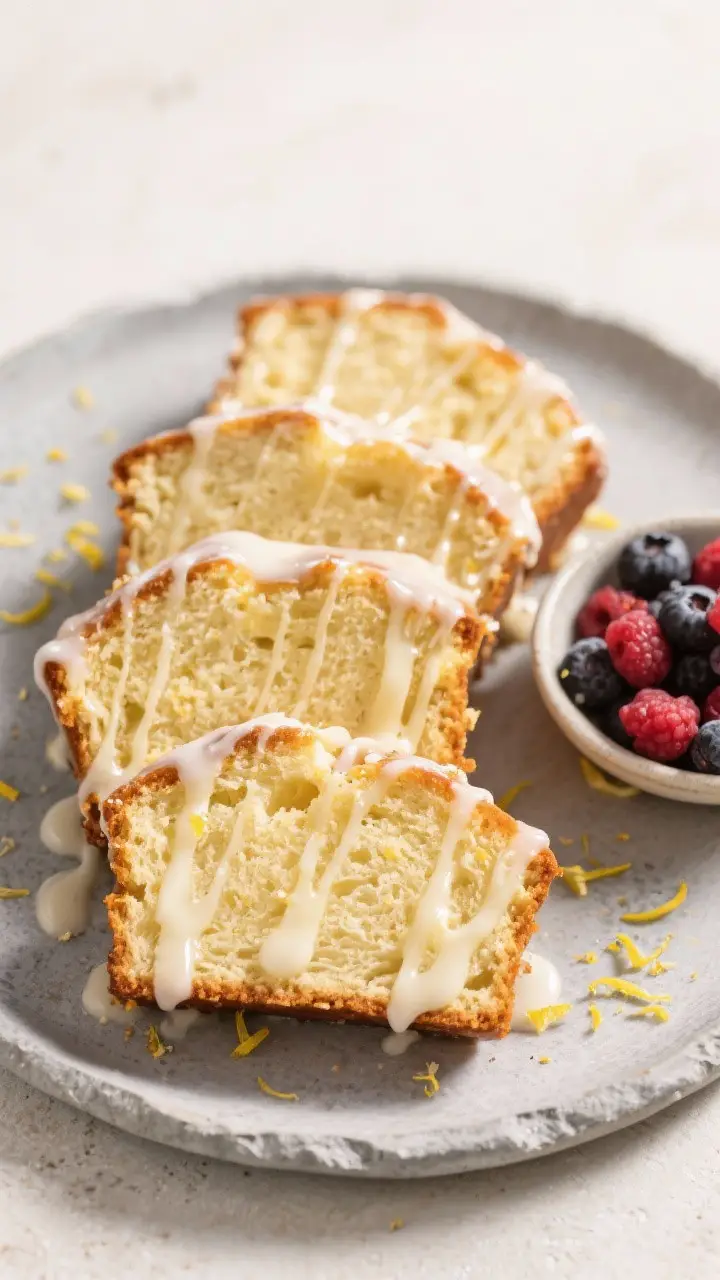
This cake gets its signature texture from a blend of butter and cream cheese. The cream cheese adds moisture, slight tang, and a fine, tight crumb that slices cleanly.
It’s sweet but not over the top, which makes it perfect with berries, whipped cream, or a dusting of powdered sugar. The batter is sturdy enough for a bundt pan, so you get a beautiful crust and a show-stopping shape. Best of all, it keeps well for days and stays tender.
What You’ll Need
- 1 1/2 cups (340 g) unsalted butter, softened
- 8 oz (225 g) cream cheese, softened
- 2 3/4 cups (550 g) granulated sugar
- 6 large eggs, at room temperature
- 3 cups (360 g) all-purpose flour, spooned and leveled
- 1/2 teaspoon fine salt
- 1 tablespoon pure vanilla extract
- Optional: 1 teaspoon almond extract for extra depth
- Optional: Zest of 1 lemon or orange for a citrus twist
- For the pan: butter and flour or baking spray with flour
- Optional glaze: 1 cup powdered sugar + 2–3 tablespoons milk or lemon juice
Step-by-Step Instructions
- Prep the pan and oven. Set your oven to 325°F (165°C).
Generously grease a 10–12 cup bundt pan with butter and dust with flour, or use baking spray with flour. Make sure every nook is coated to prevent sticking.
- Start with soft ingredients. Your butter and cream cheese should be very soft but not greasy. This helps them whip properly and trap air, which gives your cake lift and a fine crumb.
- Cream butter, cream cheese, and sugar. In a large bowl, beat the butter and cream cheese on medium speed until smooth, about 1 minute.
Add sugar and beat on medium-high until light and fluffy, 3–5 minutes. Scrape the bowl a couple of times. Proper creaming is key to a tender cake.
- Add eggs one at a time. Beat in the eggs one by one, mixing well after each addition.
If the batter looks slightly curdled, don’t worry—it will come together once the flour is added.
- Flavor it. Mix in the vanilla, and if using, the almond extract and citrus zest. These small touches make the cake taste bakery-level.
- Combine dry ingredients. Whisk the flour and salt in a separate bowl. With the mixer on low, add the dry ingredients in two additions, mixing just until incorporated. Do not overmix or the cake can turn dense.
- Fill the pan. Spoon the batter evenly into the pan.
Tap the pan on the counter a couple of times to remove large air bubbles and level the top with a spatula.
- Bake. Bake at 325°F (165°C) for 65–80 minutes, depending on your pan and oven. The cake is done when a skewer comes out with a few moist crumbs and the top springs back lightly. If it’s browning too fast, tent loosely with foil for the last 15 minutes.
- Cool carefully. Let the cake cool in the pan on a rack for 15–20 minutes.
Run a thin knife around the edges, then invert onto a rack to cool completely. Unmolding too soon can cause breakage.
- Finish and serve. Dust with powdered sugar or drizzle with a simple glaze. Slice with a serrated knife for clean cuts.
Serve plain, with berries, or a dollop of whipped cream.
Storage Instructions
- Room temperature: Wrap the cooled cake tightly or store in an airtight container for up to 4 days. The flavor actually improves on day two.
- Refrigerator: If your kitchen is warm or you’ve glazed with dairy, refrigerate for up to 1 week. Bring slices to room temperature before serving for the best texture.
- Freezer: Wrap the whole cake or individual slices in plastic, then foil.
Freeze up to 3 months. Thaw overnight in the fridge or at room temperature for a few hours.
Benefits of This Recipe
- Consistent results: The cream cheese stabilizes the batter, so it bakes up evenly without drying out.
- Make-ahead friendly: The flavor and texture improve after resting, making it perfect for parties and holidays.
- Versatile base: Pairs with fruit, sauces, ice cream, or coffee. Works for breakfast, dessert, or gifting.
- Simple ingredients: Uses pantry staples and basic techniques—no tricky steps.
What Not to Do
- Don’t skip softening. Cold butter or cream cheese won’t cream properly and can create a dense cake.
- Don’t overmix after adding flour. Too much mixing develops gluten and toughens the crumb.
- Don’t bake at a higher temperature. Pound cake needs a gentle bake to cook through without a dry crust.
- Don’t under-grease the pan. Bundt pans have curves that love to stick.
Coat every corner.
- Don’t cut while hot. The cake needs time to set. Slicing early compresses the crumb and makes it gummy.
Recipe Variations
- Lemon Cream Cheese Pound Cake: Add 2 tablespoons lemon zest and 2 tablespoons lemon juice. Finish with a lemon glaze.
- Vanilla-Bean Pound Cake: Swap the vanilla extract for the seeds of 1 vanilla bean plus 1 teaspoon extract for extra aroma.
- Almond Pound Cake: Use 1 teaspoon almond extract and stir in 3/4 cup toasted slivered almonds.
Dust with powdered sugar.
- Marble Pound Cake: Mix 2 tablespoons cocoa powder with 2 tablespoons hot water. Swirl into one-third of the batter and marble before baking.
- Berry Fold-In: Gently fold 1 to 1 1/2 cups fresh blueberries or raspberries with 1 tablespoon flour to prevent sinking.
- Brown Sugar Twist: Replace 1/2 cup granulated sugar with light brown sugar for a hint of caramel flavor.
- Gluten-Free: Use a 1:1 gluten-free flour blend that includes xanthan gum. Expect a slightly different crumb but still delicious.
FAQ
Can I use low-fat cream cheese?
You can, but it won’t be as rich or tender.
For the best texture and flavor, use full-fat brick-style cream cheese, not whipped or spreadable.
Why did my cake sink in the middle?
Common causes include underbaking, opening the oven too early, or overcreaming the butter and sugar (which can incorporate too much air). Make sure to bake until a skewer comes out with a few moist crumbs and avoid opening the door in the first 45 minutes.
How do I prevent sticking in a bundt pan?
Use a heavy coat of butter and flour or a baking spray with flour. Pay special attention to crevices.
After baking, let the cake rest 15–20 minutes before inverting to release cleanly.
Can I bake this in loaf pans?
Yes. Divide the batter between two 9×5-inch loaf pans, greased and floured. Bake at 325°F (165°C) for 55–70 minutes, checking early.
The same doneness cues apply.
Is a glaze necessary?
Not at all. The cake is flavorful on its own. A simple glaze or powdered sugar adds a pretty finish, but fresh berries and a spoon of whipped cream are just as nice.
What if I don’t have a stand mixer?
A hand mixer works fine.
Cream the butter, cream cheese, and sugar long enough to get light and fluffy, and keep the speed moderate when adding flour to avoid overmixing.
How do I know when it’s done without drying it out?
Look for a domed top that springs back lightly. A skewer should come out with a few moist crumbs, not wet batter. If the top browns too quickly, tent with foil and keep baking until the center sets.
Can I add chocolate chips?
Yes.
Toss 1 cup mini chocolate chips with 1 tablespoon flour and fold in at the end. Minis distribute better and are less likely to sink.
In Conclusion
Cream cheese pound cake is a classic for a reason. It’s buttery, tender, and easy to adapt to your taste.
With a few simple techniques—soft ingredients, careful creaming, and a gentle bake—you’ll get bakery-quality results at home. Keep this recipe in your back pocket for holidays, potlucks, or whenever you want a dependable, crowd-pleasing dessert. One slice, and it’ll earn a permanent spot in your recipe box.
Printable Recipe Card
Want just the essential recipe details without scrolling through the article? Get our printable recipe card with just the ingredients and instructions.