
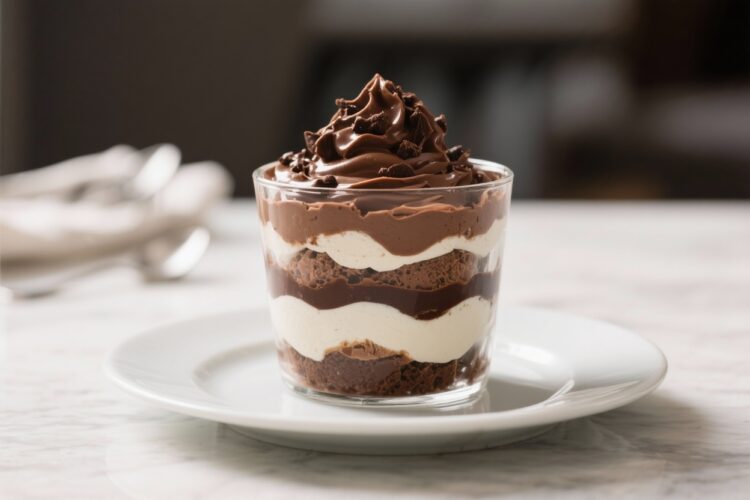
Chocolate trifle is one of those desserts that looks dramatic but feels easygoing. It’s rich, creamy, and loaded with layers that make every spoonful a little different from the last. You get cake, chocolate pudding, whipped cream, and crunchy bits all in one bite.
It’s perfect for birthdays, holidays, or a casual dinner when you want something memorable. Best of all, it’s flexible—use what you have, make it ahead, and let the fridge do the work.
What Makes This Recipe So Good
- Layers of texture: Soft cake, silky pudding, fluffy whipped cream, and crunchy toppings keep each bite interesting.
- Make-ahead friendly: The flavors meld as it chills, so it tastes even better after a few hours in the fridge.
- Customizable: Use brownies or chocolate cake, instant pudding or homemade pastry cream, and any mix-ins you love.
- Feeds a crowd: A single trifle dish makes dessert for a party without much effort.
- Low-stress assembly: No fancy techniques—just layer and chill.
What You’ll Need
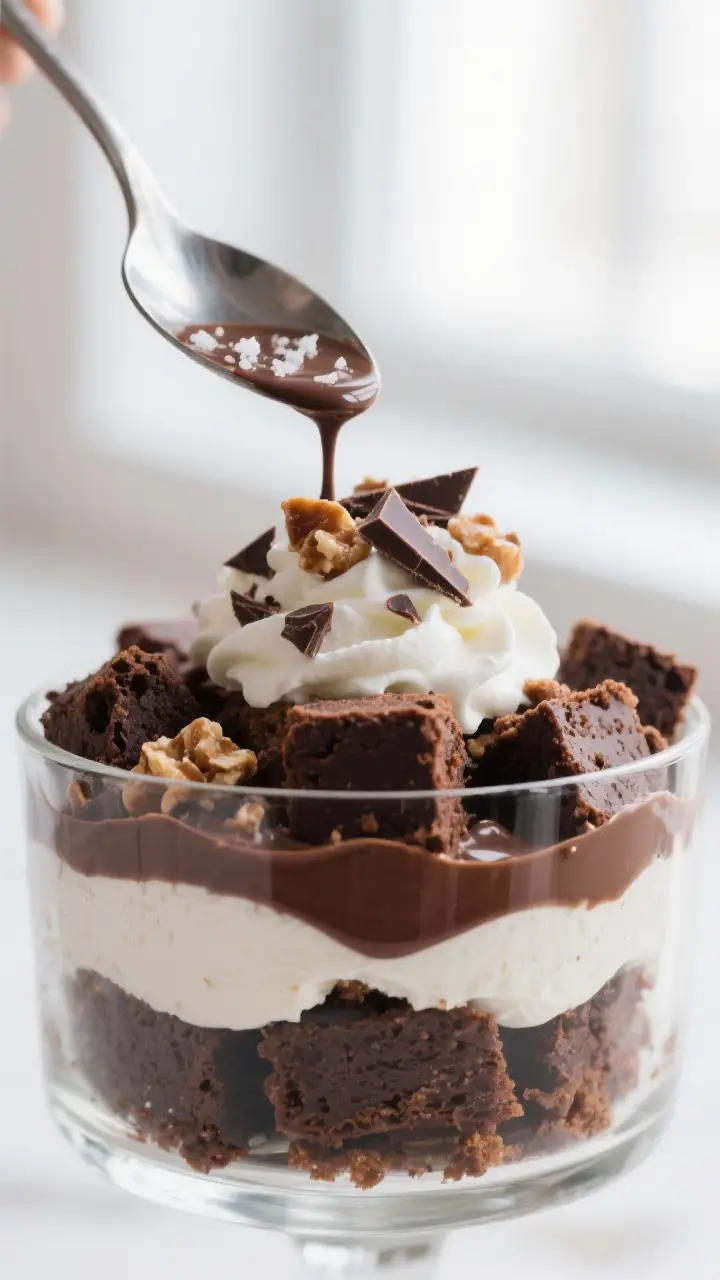
- Chocolate cake or brownies: About 9×13 inches of baked and cooled cake, or a full pan of brownies, cut into 1-inch cubes.
- Chocolate pudding: 4 cups total. Use instant or homemade.
Dark chocolate pudding adds the most depth.
- Whipped cream: 3 cups lightly sweetened. You can use store-bought whipped topping or whip 2 cups heavy cream with 2–3 tablespoons powdered sugar and 1 teaspoon vanilla.
- Chocolate sauce or ganache (optional): About 1/2 cup for drizzling between layers.
- Crunchy element: 1 cup crushed chocolate cookies, chocolate toffee bits, or shaved chocolate.
- Add-ins (optional): Fresh berries, chopped nuts, or a splash of coffee or liqueur to brush over the cake.
- Pinch of salt: To balance sweetness, especially if using very sweet cake or toppings.
Instructions
- Prepare the components: Bake and cool your cake or brownies, then cut into bite-size cubes. Make the chocolate pudding and chill it until thick.
Whip the cream until soft peaks form and lightly sweeten it. Keep everything cold.
- Set up your dish: Use a clear trifle bowl if you have one. A large glass mixing bowl works too.
Seeing the layers makes the dessert feel special.
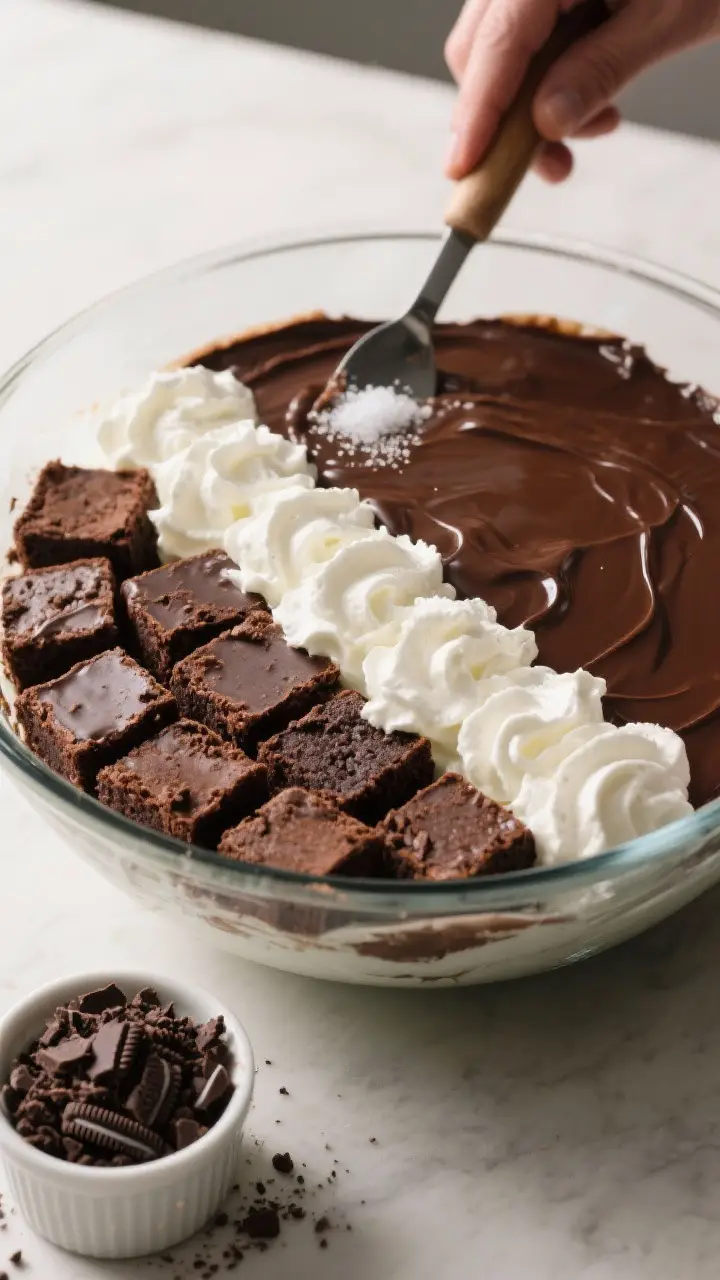
- Start with cake: Add a generous layer of cake cubes to cover the bottom. If you like, brush the cake with a little cooled coffee or your favorite liqueur for extra flavor.
- Add pudding: Spoon an even layer of chocolate pudding over the cake. Spread it gently to the edges.
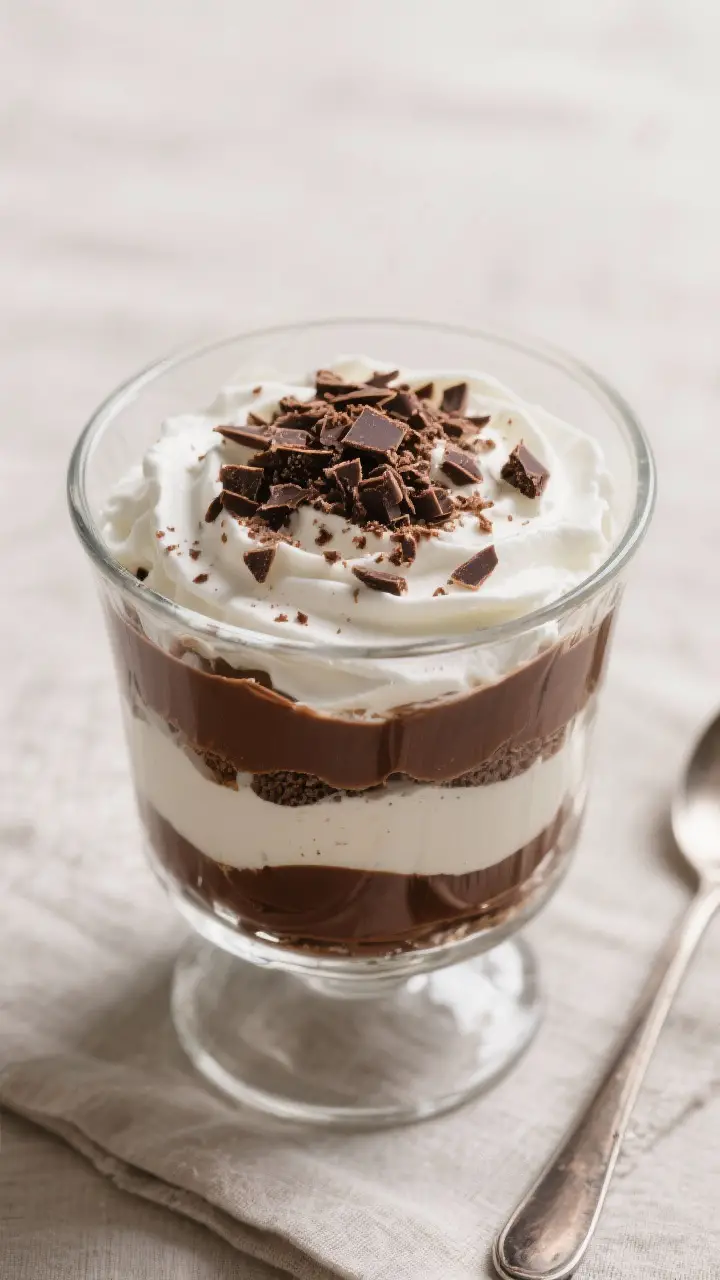
- Whipped cream layer: Add a layer of whipped cream.
Use a light hand so you don’t squash the pudding.
- Crunch and drizzle: Sprinkle on crushed cookies, toffee bits, or shaved chocolate. Drizzle a little chocolate sauce or ganache. A tiny pinch of salt here can make the chocolate pop.
- Repeat: Continue layering cake, pudding, whipped cream, and crunch until you reach the top of the dish.
Aim for at least two full sets of layers.
- Finish neatly: End with a smooth layer of whipped cream. Add a final flourish of shaved chocolate, a few crumbs, or a drizzle of sauce.
- Chill: Cover and refrigerate for at least 2–4 hours, or up to overnight. This helps the layers set and the flavors meld.
- Serve: Use a large spoon to scoop down through all the layers.
Wipe the bowl’s sides if you want to keep the presentation clean between servings.
How to Store
- Refrigerate: Cover the trifle tightly and keep it in the fridge for up to 3 days. It actually improves on day two.
- Avoid freezing: The pudding and whipped cream can turn grainy after thawing, so freezing isn’t ideal.
- Keep it chilled: If serving outdoors or at a party, set the bowl over a tray of ice to hold the structure and freshness.
Benefits of This Recipe
- Time-efficient: Uses store-bought shortcuts when needed but still tastes homemade.
- Economical: Stretches a single cake into a dessert for a large group.
- Flexible for dietary needs: Easy to adapt to gluten-free, dairy-free, or vegan versions with simple swaps.
- Great for beginners: No complicated baking steps—assembly is the star.
- High impact, low effort: Looks impressive without requiring pastry-chef skills.
Pitfalls to Watch Out For
- Too-wet layers: Overly saturated cake or runny pudding can cause the trifle to collapse. Make sure the pudding is fully chilled and thick.
- Over-sweetness: With so many sweet components, balance is key.
Use dark chocolate pudding, add a pinch of salt, or include berries for tang.
- Mushy texture: If you assemble too far in advance (more than 24 hours), the bottom layers can turn too soft. Keep crunch elements closer to the top or add them just before serving.
- Skipping the chill: Serving immediately can lead to sliding layers. Give it time to set.
- Uneven layers: Thin layers get lost and thick ones dominate.
Aim for even, generous layers for a balanced bite.
Alternatives
- Black Forest Style: Use chocolate cake, cherry pie filling, chocolate pudding, and whipped cream. Add kirsch if you like.
- Mocha Trifle: Brush the cake with espresso, use mocha pudding, and top with chocolate-covered espresso beans.
- Peanut Butter Chocolate: Alternate chocolate pudding with peanut butter mousse and sprinkle chopped peanuts or peanut butter cups.
- Mint Chocolate: Add peppermint extract to the whipped cream and use crumbled chocolate-mint cookies for crunch.
- Vegan Option: Use dairy-free chocolate pudding, coconut whipped cream, and a vegan chocolate cake or brownie.
- Gluten-Free: Swap in gluten-free cake or brownies and check that your cookies and toppings are certified gluten-free.
FAQ
Can I use instant pudding?
Yes. Instant pudding works great and saves time.
For a richer result, use whole milk or a milk alternative with some body, and chill the pudding until very thick before layering.
What’s the best cake to use?
Chocolate cake or brownies are traditional. Brownies give a fudgier, denser layer, while cake makes the trifle lighter. Day-old cake is perfect because it holds up better under the pudding.
How far ahead can I make it?
You can assemble it 8–24 hours in advance.
If you need to go longer, keep crunchy toppings separate and add them just before serving to maintain texture.
Do I need a special trifle bowl?
No. Any large, clear glass bowl works. The visual layers are nice, but the flavor is the real star.
How do I prevent it from being too sweet?
Use dark chocolate pudding, lightly sweeten the whipped cream, add a pinch of salt in each layer, and include tart elements like raspberries or blackberries.
Can I add alcohol?
Yes.
Brush the cake with coffee liqueur, Irish cream, or kirsch. Use a light hand—too much liquid can make the layers soggy.
What if I only have store-bought components?
That’s fine. Use a bakery cake or brownie bites, instant pudding, and prepared whipped topping.
Add a few fresh ingredients—like shaved chocolate or berries—to elevate the flavor.
How do I slice and serve cleanly?
Trifle is meant to be scooped, not sliced. Use a deep serving spoon to dig straight down so each scoop includes all the layers.
Final Thoughts
A chocolate trifle is the kind of dessert that makes people smile before they even taste it. The layers look beautiful, and the flavors feel familiar but indulgent.
Keep the process simple, balance the sweetness, and let the fridge do the heavy lifting. Once you have the basics down, play with flavors and textures. It’s hard to go wrong with chocolate, cream, and a little crunch.
Printable Recipe Card
Want just the essential recipe details without scrolling through the article? Get our printable recipe card with just the ingredients and instructions.