
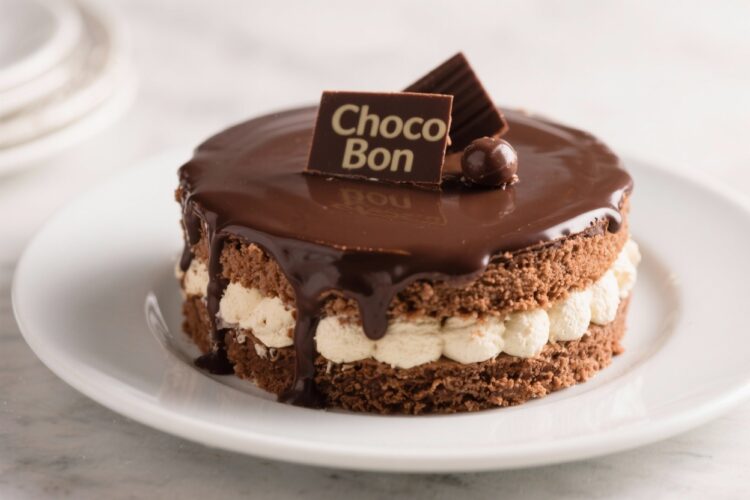
If you love chocolate, this cake is pure happiness. Imagine a tender chocolate sponge, a creamy bon bon filling, and a glossy chocolate glaze that ties it all together. It looks fancy, tastes indulgent, and still feels approachable enough to bake on a weeknight.
This is the kind of dessert that makes birthdays brighter and regular Tuesdays feel special. You don’t need special tools or pastry training—just a bowl, a whisk, and a craving for chocolate.
What Makes This Special
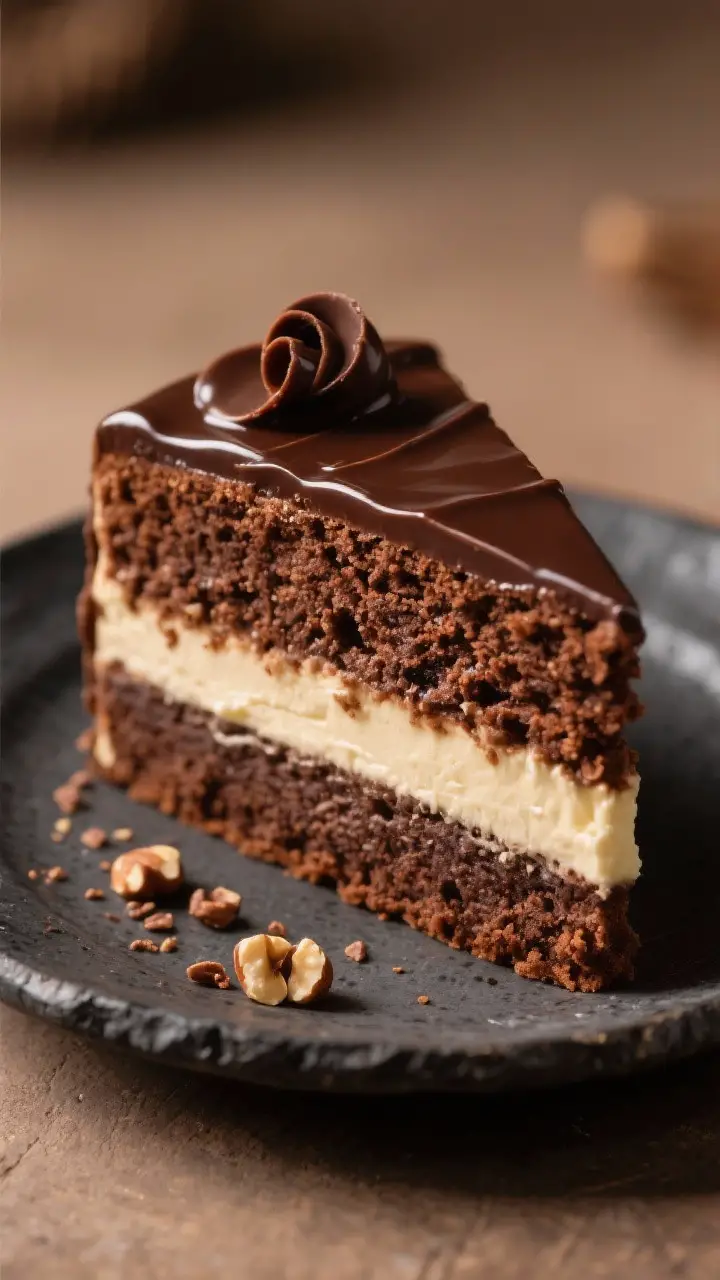
Choco Bon Bon Cake is all about contrast: soft cake, silky filling, and a shiny topping. The center is inspired by bon bons—sweet, creamy, and slightly fudgy.
It’s not just frosting between layers; it’s a richer, truffle-like cream that holds its shape but melts in your mouth.
The glaze adds that bakery-style finish with a gentle sheen. It’s not overly sweet, so the whole cake feels balanced. Most importantly, it’s a crowd-pleaser.
Kids love the candy-like center, and adults appreciate the deep cocoa flavor.
What You’ll Need
- For the chocolate cake:
- 1¾ cups (220 g) all-purpose flour
- ¾ cup (65 g) unsweetened natural cocoa powder
- 1½ cups (300 g) granulated sugar
- 1½ tsp baking powder
- 1 tsp baking soda
- ½ tsp fine salt
- 2 large eggs, room temperature
- ¾ cup (180 ml) whole milk
- ½ cup (120 ml) neutral oil (canola or vegetable)
- 2 tsp pure vanilla extract
- ¾ cup (180 ml) hot coffee or hot water
- For the bon bon filling:
- 8 oz (225 g) cream cheese, softened
- ¼ cup (60 g) unsalted butter, softened
- 2 cups (240 g) powdered sugar, sifted
- ½ cup (135 g) chocolate-hazelnut spread or chocolate spread
- 1 tsp vanilla extract
- Pinch of salt
- For the chocolate glaze:
- 1 cup (170 g) semi-sweet chocolate chips or chopped chocolate
- ¾ cup (180 ml) heavy cream
- 1 tbsp light corn syrup or honey (optional, for shine)
- Pinch of salt
- To finish (optional):
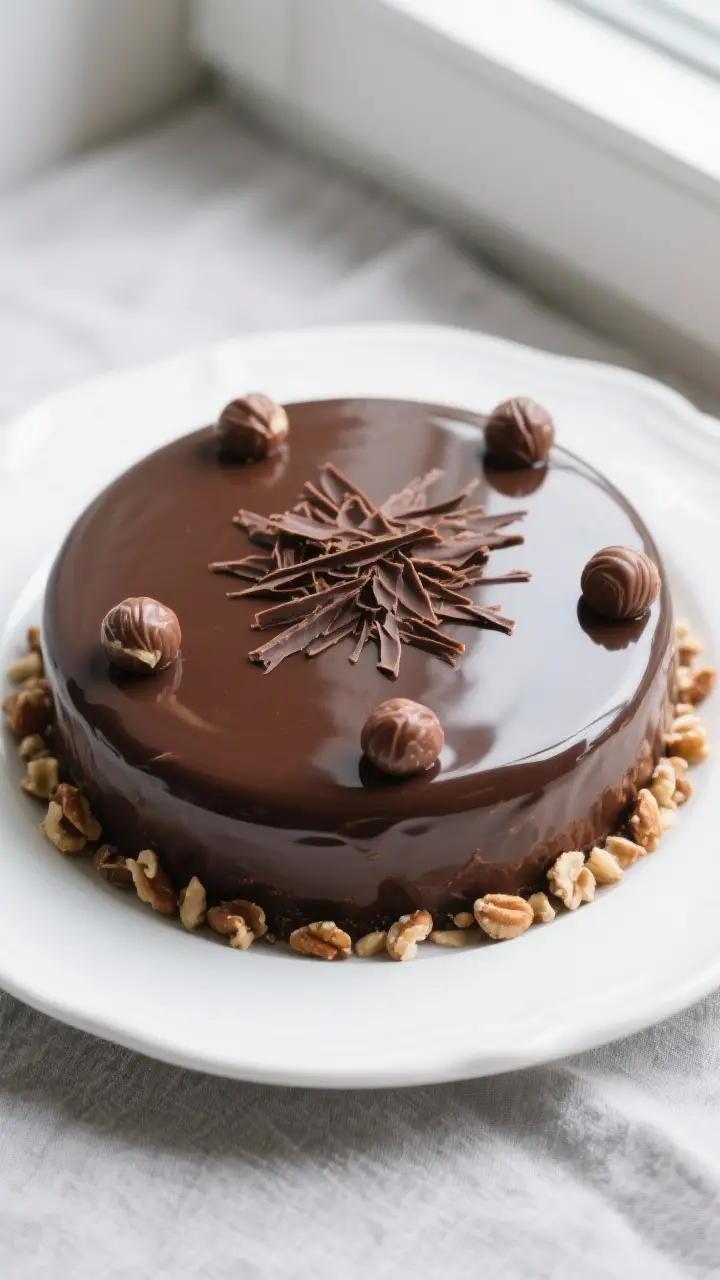
- Chocolate shavings, mini bon bons, or chopped hazelnuts
How to Make It
- Prep your pans. Heat the oven to 350°F (175°C). Grease and line two 8-inch round cake pans with parchment. Dust lightly with cocoa powder so the edges release cleanly.
- Mix dry ingredients. Whisk flour, cocoa, sugar, baking powder, baking soda, and salt in a large bowl.
Keep it airy and lump-free.
- Blend wet ingredients (except coffee). In another bowl, whisk eggs, milk, oil, and vanilla until smooth.
- Combine wet and dry. Pour the wet mixture into the dry ingredients. Stir just until you don’t see dry streaks. The batter will be thick at this point.
- Add hot liquid. Slowly pour in the hot coffee (or water), whisking gently.
The batter will become thin and glossy. Do not overmix.
- Bake. Divide batter between the pans. Bake 24–28 minutes, until a toothpick comes out with a few moist crumbs. Do not overbake.
- Cool completely. Let the cakes sit 10 minutes in the pans, then turn out onto racks to cool fully. A cool cake grips the filling better.
- Make the bon bon filling. Beat cream cheese and butter until creamy.
Add powdered sugar, chocolate-hazelnut spread, vanilla, and salt. Beat until smooth and slightly fluffy. Chill 10–15 minutes so it firms up slightly.
- Level and layer. If the cake tops domed, trim them flat with a serrated knife.
Place the first layer on a stand or plate. Spread the bon bon filling evenly to the edges. Top with the second cake layer and press gently to set.
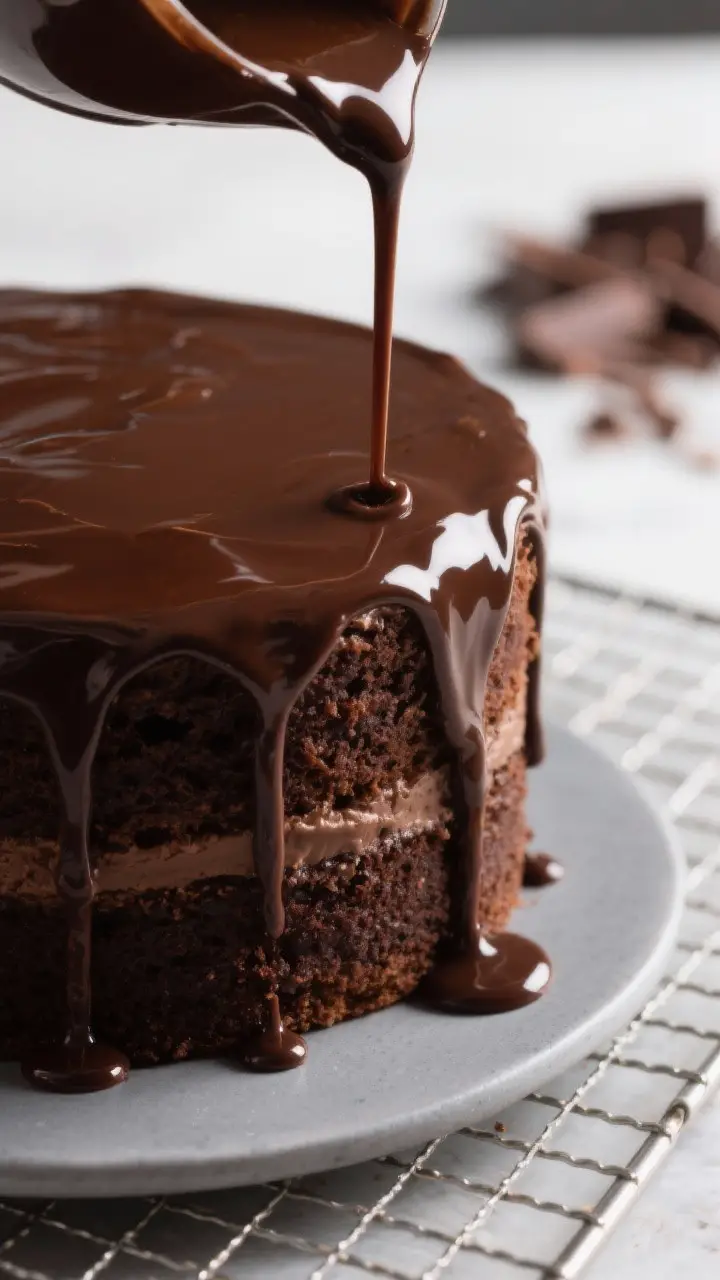
- Make the glaze. Heat the cream until steaming (not boiling).
Pour over the chocolate, add corn syrup and a pinch of salt, and let sit 2 minutes. Stir slowly from the center until smooth and glossy.
- Glaze the cake. Pour the glaze over the center of the cake and nudge it toward the edges, letting it drip naturally. Work on a cool cake to get clean drips.
- Decorate. While the glaze is still soft, add chocolate shavings, mini bon bons, or nuts. Chill 20–30 minutes to set the glaze.
- Slice and serve. Use a warm knife for clean slices.
Let the cake sit at room temperature for 15 minutes before serving for the best texture.
Storage Instructions
Because of the cream cheese filling, this cake should be stored in the fridge. Cover it loosely with plastic wrap or a cake dome to protect the glaze. It keeps well for 3–4 days.
For longer storage, wrap slices tightly and freeze for up to 2 months.
Thaw overnight in the fridge, then let sit at room temperature for 20 minutes before serving.
Why This is Good for You
This isn’t a “health” cake, but it still has its positives. Cocoa offers natural antioxidants and a deep flavor that satisfies with smaller portions. The filling uses cream cheese, which adds protein and a creamy texture without needing loads of butter.
Most importantly, it’s about balance.
Baking at home lets you control sweetness, choose quality chocolate, and avoid artificial flavors. A small slice with coffee can feel like a real treat without going overboard.
What Not to Do
- Don’t overbake the cake. Dry chocolate cake loses its charm. Pull it when crumbs, not wet batter, stick to the tester.
- Don’t skip cooling. Warm layers will melt the filling, causing it to ooze out.
- Don’t overmix the batter. Once the flour is wet, extra mixing can make the cake tough.
- Don’t pour boiling cream directly on chocolate chips. Let it sit a minute, then stir gently to avoid splitting.
- Don’t store at room temp. The cream cheese filling needs refrigeration.
Alternatives
- No coffee? Use hot water or hot milk.
Coffee simply boosts chocolate flavor; you won’t taste it.
- Gluten-free version: Use a 1:1 gluten-free baking blend with xanthan gum. Let the batter rest 10 minutes before baking to hydrate.
- Dairy-free option: Swap milk with almond or oat milk, use dairy-free cream cheese and butter, and choose dairy-free chocolate. Use coconut cream for the glaze.
- No chocolate-hazelnut spread? Mix ¼ cup melted dark chocolate with ¼ cup smooth peanut butter or almond butter for a nutty twist.
- Make it as cupcakes: Bake at 350°F (175°C) for 16–18 minutes.
Core each cupcake and pipe in the bon bon filling, then dip tops in glaze.
- Extra crunch: Sprinkle a thin layer of crushed wafer cookies or toasted hazelnuts over the filling before adding the top layer.
FAQ
Can I make this a day ahead?
Yes. Bake the layers and make the filling a day ahead. Keep the cakes wrapped at room temperature and the filling chilled.
Assemble and glaze the next day for the freshest finish.
What kind of cocoa powder should I use?
Natural unsweetened cocoa works great here. If you use Dutch-process cocoa, reduce the baking soda to ½ teaspoon and keep the baking powder the same to balance the leavening.
My glaze looks dull. What happened?
Usually it’s from overheating or stirring too fast.
Next time, let the hot cream sit on the chocolate for two minutes, stir gently, and add a bit of corn syrup or honey for shine. A small knob of butter can also help.
How do I get perfectly even layers?
Use a scale to divide batter evenly, tap pans to release air bubbles, and trim domed tops once cooled. A long serrated knife and a light sawing motion keep crumbs down.
Can I use a single 9-inch pan instead of two 8-inch pans?
You can bake it in two 9-inch pans for thinner layers or use one deep 9-inch pan and slice it.
If baking one thick layer, extend the bake time and watch for doneness to avoid a gooey center.
Is the filling stable for warm weather?
It’s stable for indoor serving, but heat can soften it. Add 2–3 tablespoons of cocoa powder or ¼ cup melted chocolate to the filling for extra structure if your environment is warm.
Can I reduce the sugar?
Yes, reduce granulated sugar in the cake by up to ¼ cup without hurting texture. For the filling, cutting sugar may loosen it; add a tablespoon of cocoa or cornstarch if needed.
In Conclusion
Choco Bon Bon Cake brings the joy of a candy-box center to a classic chocolate cake.
It’s simple to make, elegant to serve, and never fails to impress. With its creamy middle and glossy finish, it tastes like a bakery treat made right at home. Keep these tips handy, and you’ll have a go-to chocolate showstopper for any occasion.
Printable Recipe Card
Want just the essential recipe details without scrolling through the article? Get our printable recipe card with just the ingredients and instructions.