
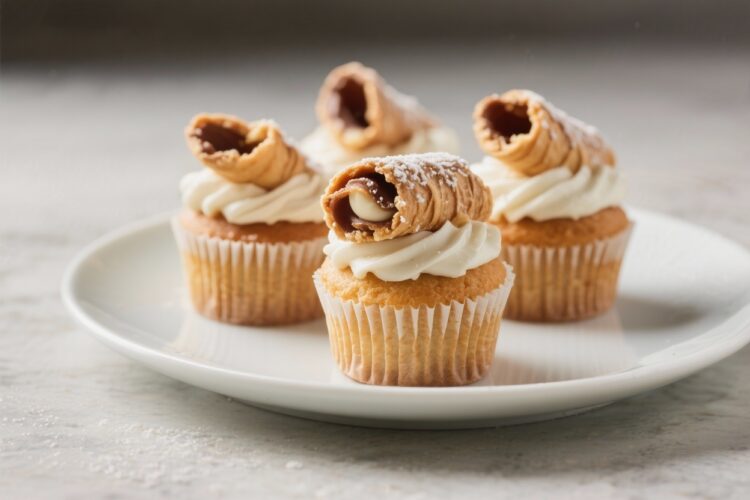
Cannoli cupcakes bring all the charm of the classic Italian pastry into a soft, tender cupcake. You get a fluffy vanilla base, a creamy ricotta-mascarpone filling, and a swirl of mascarpone frosting that tastes like a cannoli in every bite. They’re fun to make, look impressive, and don’t require any special pastry tools.
If you love a not-too-sweet dessert with a bit of chocolate and citrus, this one hits the mark. These are great for parties, holidays, or just because you want something special after dinner.
Why This Recipe Works
This recipe balances texture and flavor so every component complements the others. The cupcakes are moist but sturdy, so they hold the filling without collapsing.
The ricotta-mascarpone filling is lightly sweetened and brightened with orange zest, echoing classic cannoli flavor. Mini chocolate chips add texture and a bit of richness. The frosting uses mascarpone for a silky finish that’s stable enough to pipe and not overly sweet.
Shopping List
- All-purpose flour – for structure
- Granulated sugar
- Baking powder
- Fine sea salt
- Unsalted butter – softened
- Large eggs – room temperature
- Whole milk – room temperature
- Vanilla extract
- Ricotta cheese (whole milk, drained)
- Mascarpone cheese (cold)
- Powdered sugar
- Orange zest (or lemon zest)
- Ground cinnamon (optional)
- Mini chocolate chips
- Heavy cream (cold, for frosting)
- Pistachios (optional, for garnish)
- Confectioners’ sugar (extra, for dusting)
Step-by-Step Instructions
- Prep the essentials. Heat the oven to 350°F (175°C).
Line a 12-cup muffin pan with paper liners. Set butter, eggs, and milk out to come to room temperature if needed.
- Drain the ricotta. Place ricotta in a fine-mesh sieve over a bowl for 15–30 minutes. This step keeps the filling thick and prevents watery cupcakes.
- Make the cupcake batter. In a bowl, whisk 1 1/2 cups flour, 1 1/2 teaspoons baking powder, and 1/2 teaspoon salt.
In a separate bowl, beat 1/2 cup softened butter with 3/4 cup granulated sugar until light and fluffy, about 2–3 minutes.
- Add eggs and vanilla. Beat in 2 large eggs, one at a time, then 1 1/2 teaspoons vanilla extract. Scrape down the bowl to keep the batter smooth.
- Finish the batter. On low speed, add the dry ingredients in two additions, alternating with 1/2 cup milk. Mix just until combined.
Do not overmix.
- Fill and bake. Divide batter evenly among liners (about two-thirds full). Bake 18–20 minutes until the tops spring back and a toothpick comes out clean. Cool in the pan 5 minutes, then transfer to a rack to cool completely.
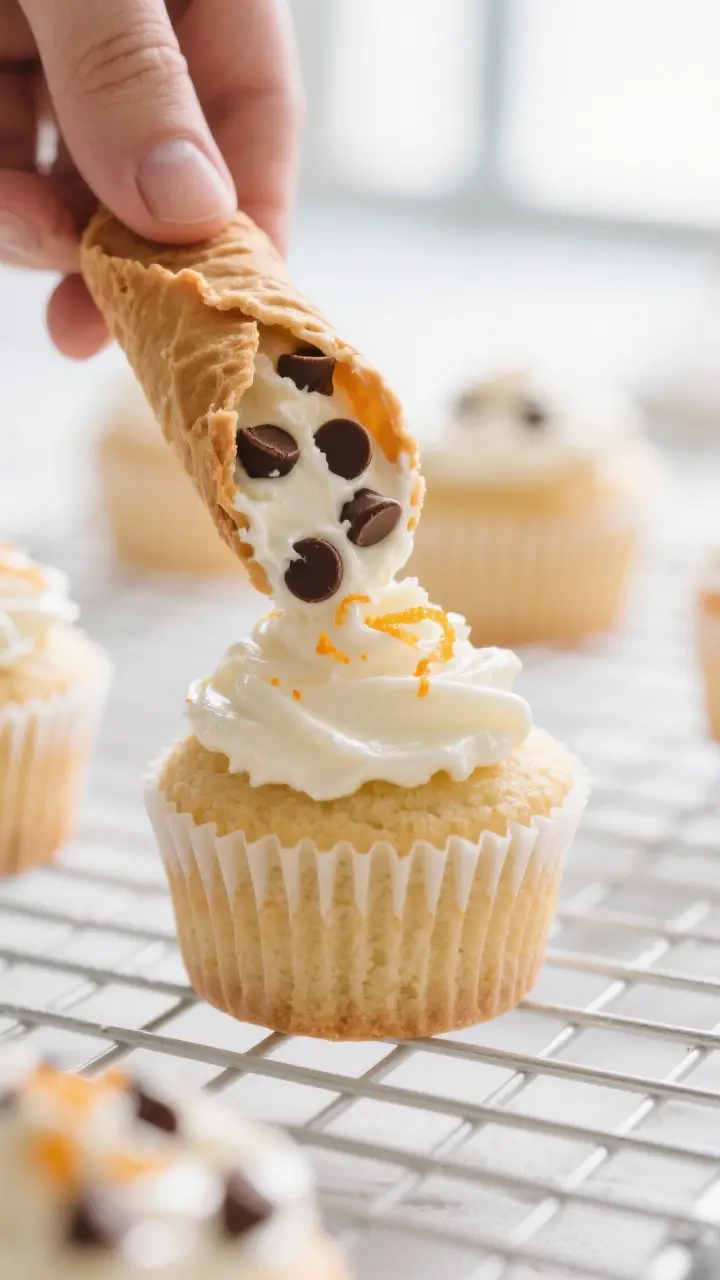
- Mix the cannoli filling. In a bowl, combine 3/4 cup drained ricotta, 3/4 cup cold mascarpone, 1/3–1/2 cup powdered sugar (to taste), 1 teaspoon orange zest, and a pinch of cinnamon if you like.
Fold in 1/3 cup mini chocolate chips. Keep chilled.
- Make the mascarpone frosting. In a clean bowl, beat 1/2 cup cold heavy cream to soft peaks. In another bowl, beat 3/4 cup cold mascarpone with 1/2 cup powdered sugar and 1 teaspoon vanilla until smooth, 20–30 seconds.
Gently fold the whipped cream into the mascarpone until fluffy. Chill 10 minutes.
- Core the cupcakes. Once cooled, use a small paring knife or a cupcake corer to remove a small plug from the center of each cupcake. Don’t cut all the way through—leave a base.
- Fill the centers. Spoon or pipe the cannoli filling into each cupcake cavity until level with the top.
You can trim and replace a bit of the cupcake plug if you like, or skip it.
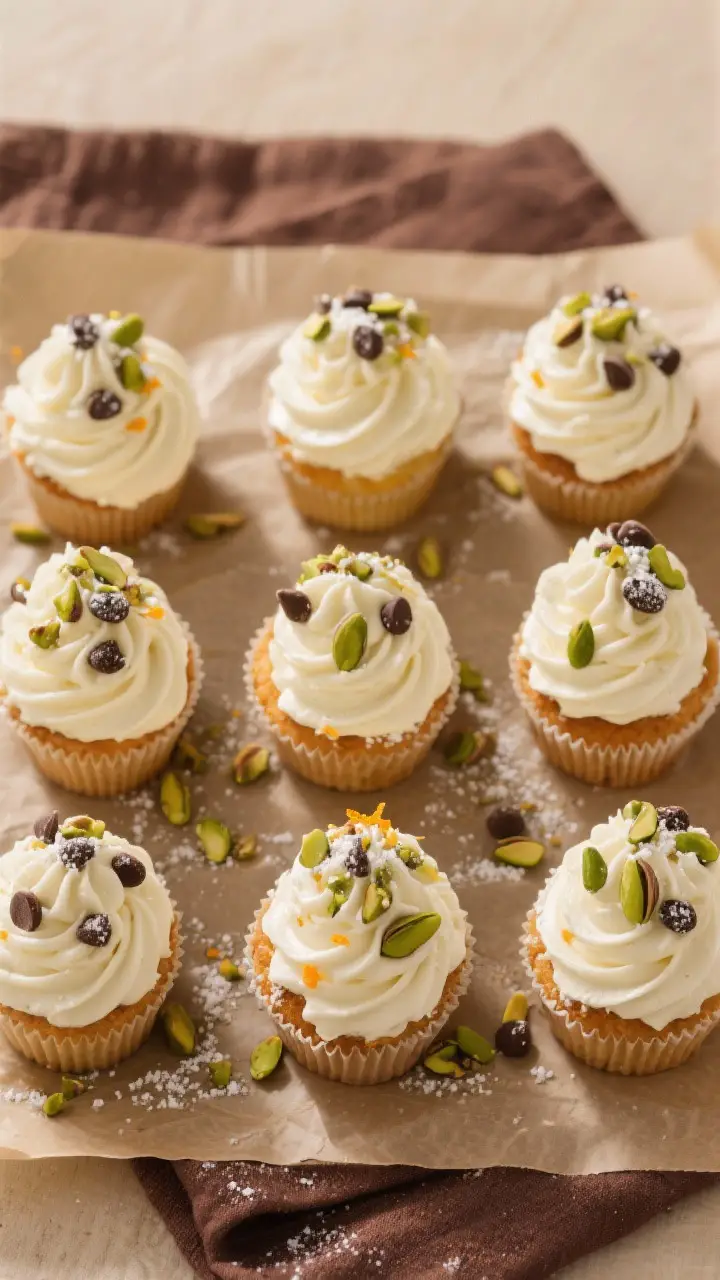
- Frost and garnish. Pipe or spread the mascarpone frosting on top. Sprinkle with mini chocolate chips or crushed pistachios. Finish with a light dusting of confectioners’ sugar.
- Chill briefly, then serve. Refrigerate for 20–30 minutes to set the frosting.
Serve slightly chilled or at cool room temperature.
Storage Instructions
Because of the dairy filling and frosting, store these cupcakes in the refrigerator. Keep them in an airtight container for up to 3 days. For the best texture, let them sit at room temperature for 10–15 minutes before serving.
You can bake the cupcakes a day ahead, then fill and frost the day you plan to serve. Avoid freezing assembled cupcakes; the dairy components can split after thawing.
Why This is Good for You
These cupcakes lean on ricotta and mascarpone, which add protein and a creamy mouthfeel without needing heavy amounts of buttercream. The orange zest provides brightness and natural aroma, helping you keep the sugar level moderate while still tasting sweet.
Using mini chocolate chips keeps the chocolate presence satisfying in small amounts. Portioning into cupcakes makes serving sizes clear and helps with mindful indulgence. It’s a treat, but one with balanced flavors and reasonable sweetness.
Pitfalls to Watch Out For
- Watery ricotta. If you skip draining, the filling can be loose and seep into the cupcake.
- Overmixing batter. This creates tough cupcakes.
Mix just until the flour disappears.
- Warm frosting. Mascarpone can loosen if overbeaten or warm. Keep everything cold and don’t overmix.
- Overbaking. Dry cupcakes won’t hold the filling well. Start checking at 18 minutes.
- Too much sugar. Oversweet frosting overwhelms the cannoli notes.
Taste as you go and adjust.
Recipe Variations
- Chocolate Cannoli Cupcakes: Swap 1/4 cup of flour for cocoa powder and add a pinch of espresso powder to the batter.
- Almond Twist: Use 1/2 teaspoon almond extract in the batter and top with toasted sliced almonds.
- Lemon-Ricotta: Replace orange zest with lemon zest and add a bit more to the filling for a brighter bite.
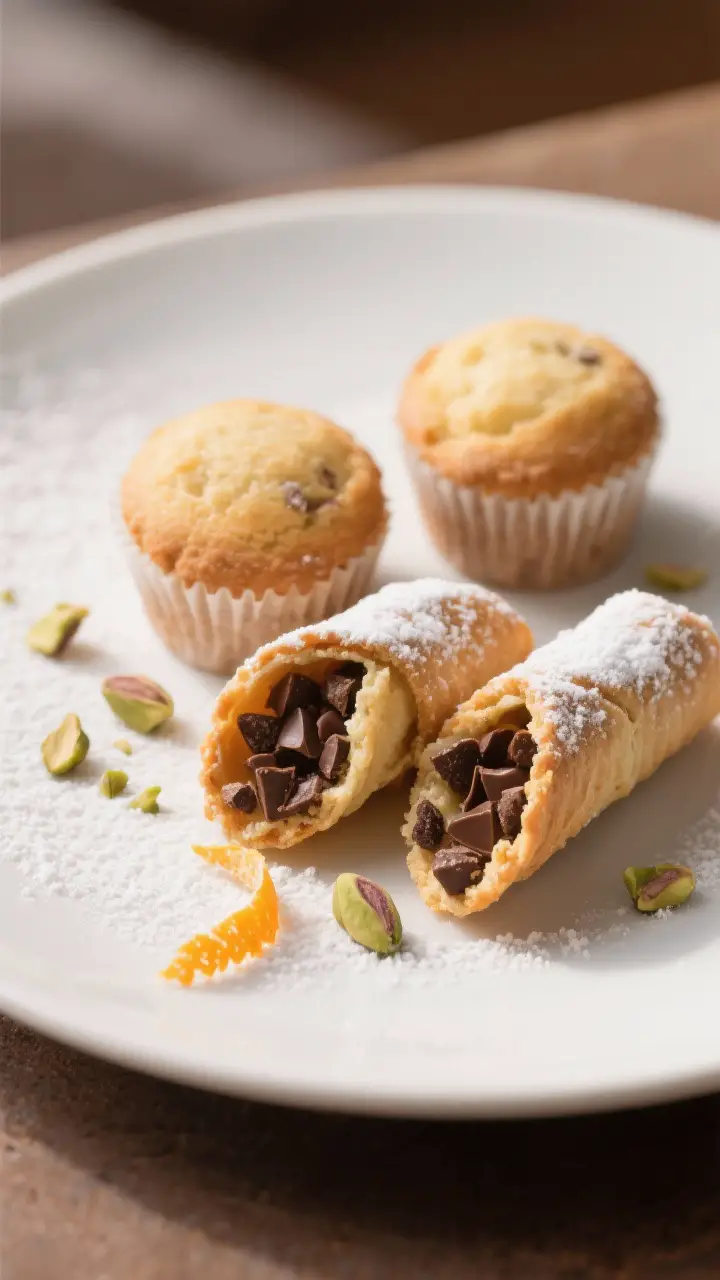
- Pistachio Crunch: Fold finely chopped pistachios into the filling and sprinkle more on top.
- Mini Party Size: Bake the batter in mini muffin pans (10–12 minutes). Fill and frost bite-size for events.
- Pipe-In Shell Texture: Add a light sprinkle of crushed cannoli shells or waffle cone pieces on top for crunch right before serving.
FAQ
Can I use cream cheese instead of mascarpone?
Yes, but the flavor and texture will change slightly. Soften the cream cheese well and beat until smooth before folding in whipped cream.
Add a splash of heavy cream to loosen if needed. Expect a tangier frosting.
How do I prevent mascarpone from curdling?
Keep it cold and avoid overbeating. Mix on low to medium speed just until smooth, and fold in cold whipped cream gently.
If it starts to look grainy, stop and chill the mixture for a few minutes.
What if I don’t have a cupcake corer?
Use a small paring knife to cut a cone-shaped plug from the center, or press in the wide end of a piping tip to remove a neat cylinder. Either method works fine.
Can I make these ahead?
Yes. Bake cupcakes up to 24 hours ahead and store covered at room temperature.
Fill and frost the day of serving, then chill until set. Leftovers keep well in the fridge for up to 3 days.
Is part-skim ricotta okay?
It works, but whole-milk ricotta gives a richer, creamier filling. If using part-skim, drain it a bit longer to remove extra moisture.
How sweet should the filling be?
Traditional cannoli filling isn’t overly sweet.
Start with the lower amount of powdered sugar, taste, and add more if you prefer. The chocolate chips and frosting add sweetness too.
Can I skip the chocolate chips?
Absolutely. You can replace them with chopped pistachios, candied orange peel, or leave the filling plain for a classic, creamy bite.
Wrapping Up
Cannoli cupcakes give you everything you love about a cannoli in a soft, handheld dessert.
With a tender crumb, a bright, creamy center, and a silky mascarpone topping, they feel special without being fussy. Follow the tips for draining ricotta, keeping ingredients cold, and not overbaking, and you’ll get bakery-worthy results at home. Serve them to guests or treat yourself—either way, they’ll disappear fast.
Printable Recipe Card
Want just the essential recipe details without scrolling through the article? Get our printable recipe card with just the ingredients and instructions.