
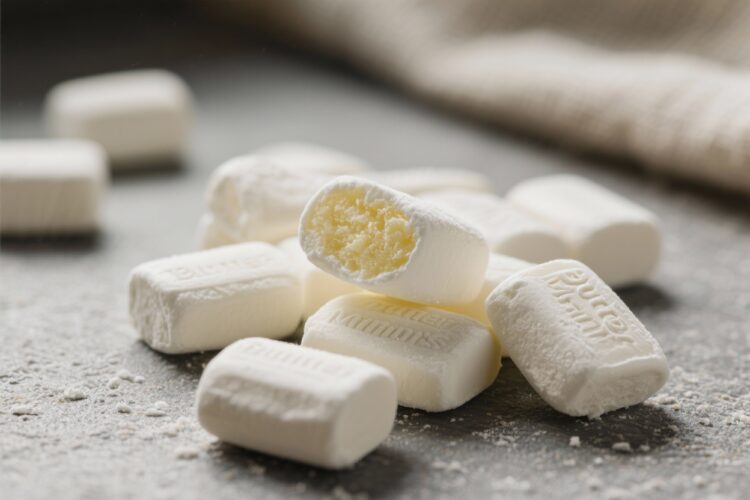
Butter mints are the tiny after-dinner candies everyone remembers from weddings, church receptions, or grandma’s candy dish. They melt on your tongue, taste lightly minty, and feel like a treat without being heavy. Making them at home is surprisingly simple, and the texture is even better than store-bought.
With a few pantry staples and a touch of patience, you can shape, color, and flavor them exactly how you like. They’re a fun, low-stress project that looks polished enough for gifting or parties.
Why This Recipe Works
Homemade butter mints work because the fat in butter creates a smooth, creamy base that dissolves gently as you eat it. A touch of cream or milk softens the candy so it sets but doesn’t turn rock hard.
Powdered sugar gives structure while keeping everything silky. Peppermint extract adds that signature freshness, and a pinch of salt balances the sweetness. The result is a candy that holds its shape, melts in your mouth, and tastes clean, bright, and buttery.
Ingredients
- 1/2 cup (1 stick) unsalted butter, softened to room temperature
- 4 cups powdered sugar, plus extra for dusting
- 2 tablespoons heavy cream (or whole milk)
- 1–1 1/2 teaspoons peppermint extract (to taste)
- 1/4 teaspoon fine sea salt
- Gel food coloring (optional)
- Extra powdered sugar or cornstarch for rolling
How to Make It
- Beat the butter. In a medium bowl, beat the softened butter until creamy and smooth.
You want it fluffy but not melted.
- Add cream, mint, and salt. Mix in the heavy cream (or milk), peppermint extract, and salt until well combined. Start with 1 teaspoon extract and taste as you go.
- Gradually add powdered sugar. Add the powdered sugar 1 cup at a time, mixing on low until a thick, dough-like mass forms. The dough should be soft but not sticky.
- Adjust consistency. If the dough is too sticky, add more powdered sugar 1–2 tablespoons at a time.
If it seems crumbly, add a teaspoon of cream until it comes together.
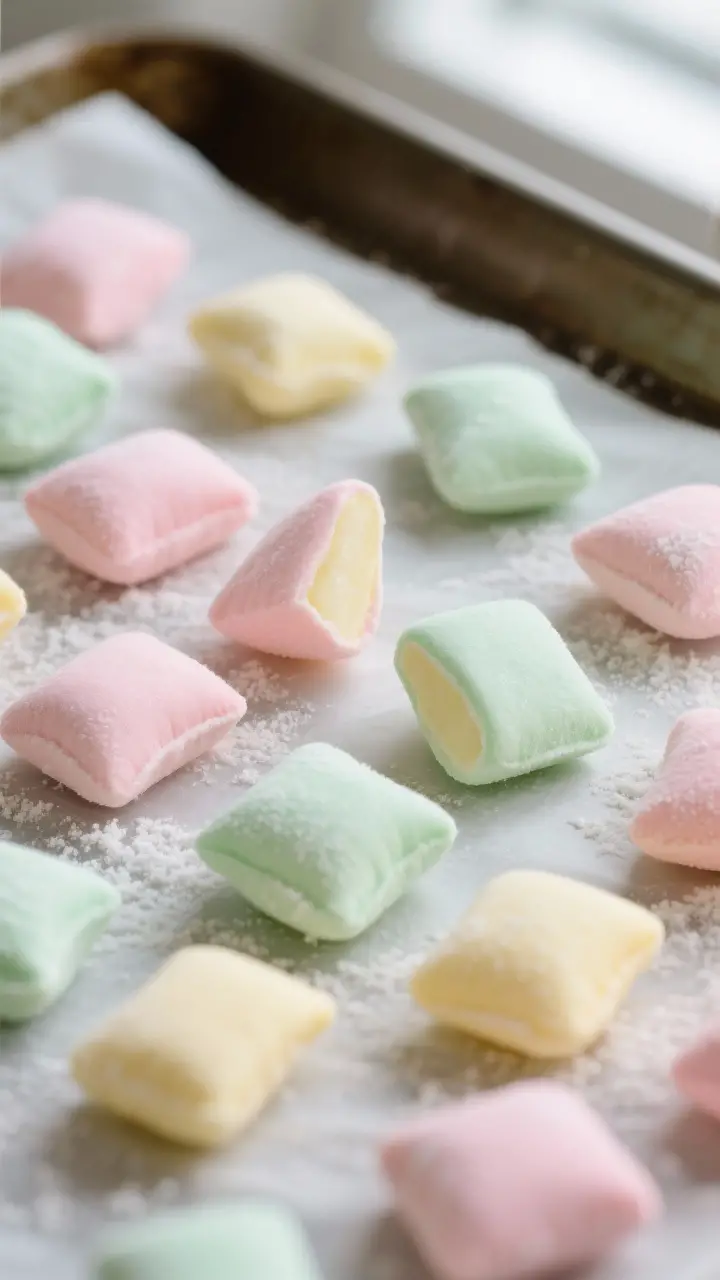
- Color the dough (optional). Divide the dough into portions and knead in gel food coloring with gloved hands. Pastel shades work beautifully—think light pink, mint green, or pale yellow.
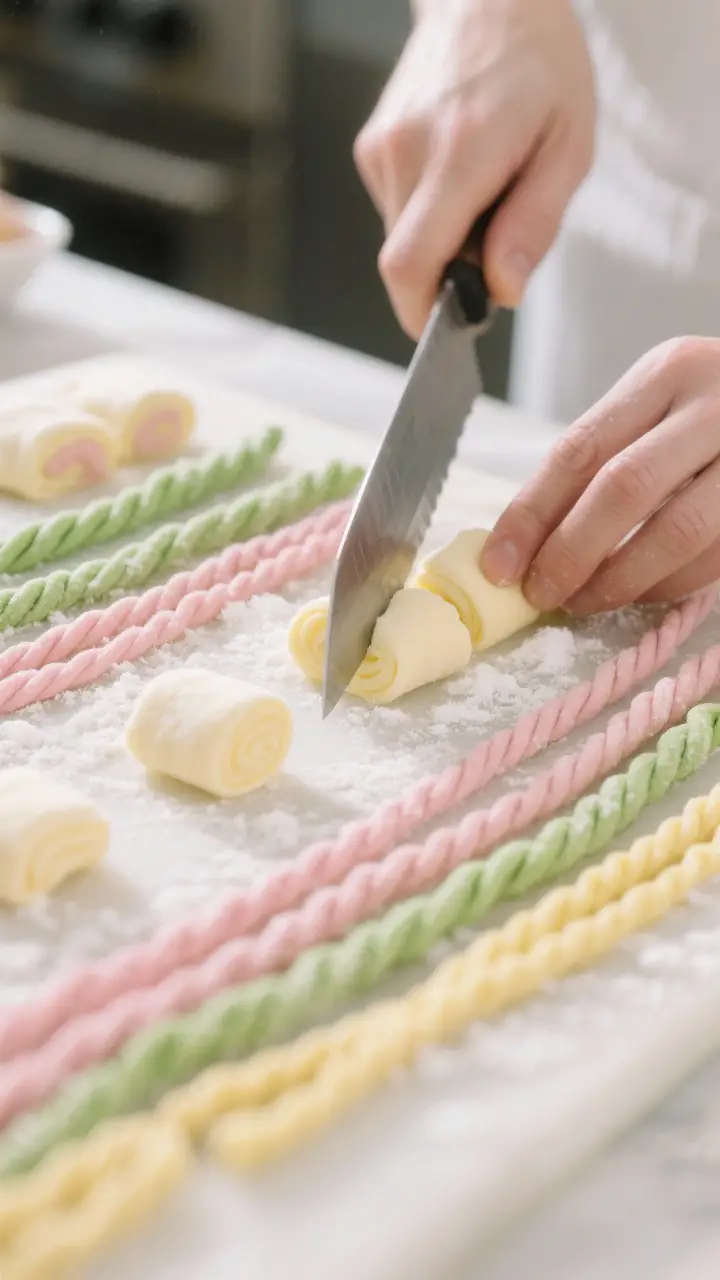
- Shape the mints. Dust your work surface with a little powdered sugar or cornstarch. Roll each portion into thin ropes about 1/2 inch thick.
Use a sharp knife to cut bite-size pillows, about 1/2 inch long.
- Dry the mints. Spread the pieces on a parchment-lined baking sheet in a single layer. Let them air-dry at room temperature for 12–24 hours, turning once. They’ll firm up on the outside and stay soft inside.
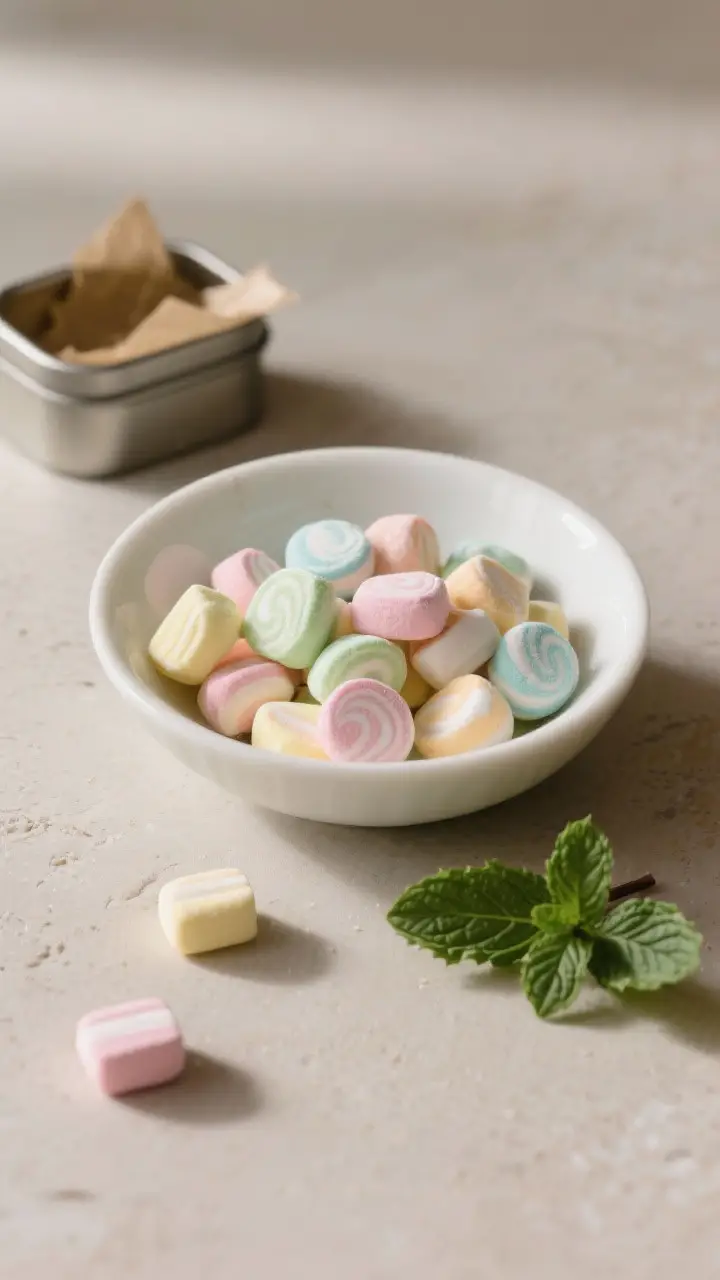
- Store and enjoy. Once dry, transfer the mints to an airtight container.
They’re ready to serve immediately and taste even better after a day.
Keeping It Fresh
Butter mints keep well when kept dry and sealed. Store them in an airtight container at room temperature for up to 2 weeks. For longer storage, refrigerate for up to 1 month or freeze for up to 3 months.
Separate layers with parchment so they don’t stick. Let chilled or frozen mints come to room temperature before serving for the best texture.
Why This is Good for You
Butter mints won’t pass for a health food, but they do have a few perks. Peppermint can feel soothing after a rich meal and leaves your mouth feeling fresh.
Making them at home means you control the ingredients—no strange additives or artificial flavors if you don’t want them. Portion size is easy, too. A couple of small pieces satisfy a sweet craving without a heavy dessert.
If you prefer, you can make them with reduced sugar or dairy-free swaps and still get that melt-in-your-mouth feel.
Common Mistakes to Avoid
- Using cold butter. Cold butter won’t blend smoothly and can cause a lumpy dough. Start with room-temperature butter for a creamy base.
- Adding all the sugar at once. Dumping in the powdered sugar can create dry pockets and clumps. Add gradually and mix well.
- Overdoing the peppermint. Peppermint extract is powerful.
Start small and taste—too much can make the mints harsh.
- Skipping the drying step. Freshly cut mints need time to set. Without drying, they’ll stay sticky and won’t store well.
- Using liquid food coloring excessively. Too much liquid color softens the dough. Use gel coloring for vibrant shades with minimal moisture.
- Not sealing during storage. Exposure to air makes mints stale and chewy.
Store them airtight to keep the tender snap.
Recipe Variations
- Vanilla cream mints: Replace peppermint with 1–2 teaspoons pure vanilla extract. Sweet and mellow, they’re perfect with coffee.
- Lemon or orange mints: Use lemon or orange extract instead of mint. Add a touch of citrus zest for a fragrant twist.
- Chocolate-dipped mints: After drying, dip half of each piece in melted dark chocolate and let set.
The contrast is lovely.
- Pressed designs: Flatten small balls and press with a fork, patterned stamp, or the tines of a comb for a classic wedding-mint look.
- Dairy-free: Use vegan butter and a splash of non-dairy milk. Choose a firm plant butter for the best texture.
- Color swirls: Knead in two pastel colors lightly so they streak rather than blend completely. Cut as usual for a marbled effect.
FAQ
Can I make butter mints without a mixer?
Yes.
A sturdy spatula and clean hands work fine. Mix as much as you can with the spatula, then knead in the remaining powdered sugar by hand until smooth.
How do I know if the dough is the right consistency?
It should feel like soft play-dough—pliable, smooth, and not sticky. If it clings to your fingers, dust in more powdered sugar.
If it cracks, add a teaspoon of cream.
What if I only have spearmint extract?
Spearmint is milder and sweeter than peppermint. It works well, but you may need a bit more. Start with the same amount and adjust to taste.
Can I dry them faster in the oven or dehydrator?
Avoid heat.
It can melt or warp the texture. Air-drying at room temperature is best. If you’re in a hurry, place them near (not on) a gentle fan to improve airflow.
Why are my mints grainy?
Graininess usually means the butter wasn’t fully creamed or the powdered sugar had lumps.
Sift the sugar first and beat the butter until creamy for a smoother finish.
Do I need to add cream of tartar or corn syrup?
No. This style of butter mint doesn’t require cooked sugar or stabilizers. The butter and powdered sugar provide all the structure you need.
Can I make them ahead for a party?
Absolutely.
Make them 3–7 days ahead and store in an airtight container at room temperature. The flavor actually settles and improves after the first day.
How many mints does this make?
It depends on size, but typically about 8–10 dozen small pieces. If you want fewer, halve the recipe.
For big events, the recipe scales easily.
What’s the best way to package them for gifts?
Use small cellophane bags or tins and add a parchment layer to prevent sticking. Keep them away from heat and sunlight so the colors stay bright.
Can I use powdered erythritol or another sugar substitute?
You can, but texture may be cooler and slightly gritty. If using a sugar-free blend, look for one designed for confectioners’ use and expect a firmer set.
Final Thoughts
Butter mints are proof that simple ingredients can make something special.
They’re easy to customize, pretty to serve, and a nostalgic finish to any meal. Once you make a batch at home, you’ll see why they’ve been a classic for generations. Keep a jar on the counter, share them with friends, and enjoy that soft, minty melt any time you want a little sweetness.