
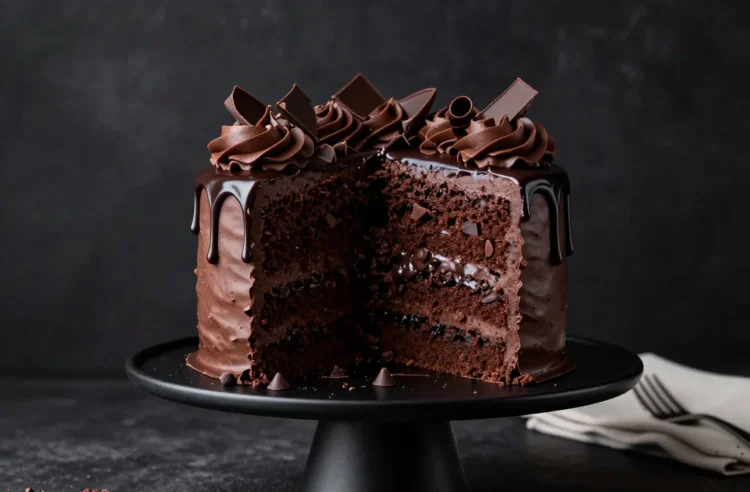
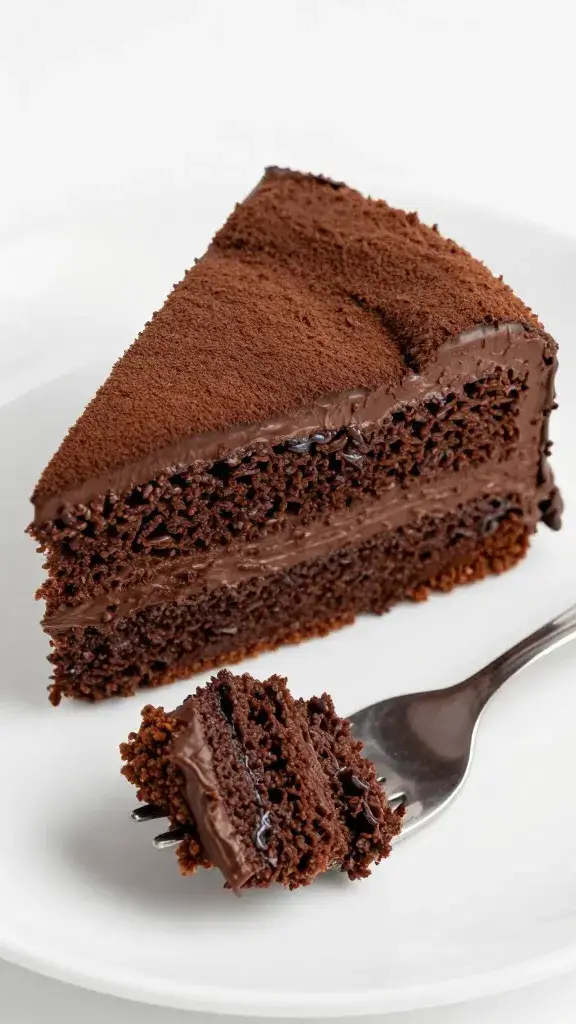
You want a cake that wrecks your willpower and ruins all other desserts for you? This is it. Ultimate Death by Chocolate Cake doesn’t whisper “treat yourself”—it shouts “cancel your plans.” We’re talking moist chocolate layers, lush ganache, and fudgy frosting, all stacked in unapologetic excess. Grab a fork, a plate, and maybe a chair with lumbar support.
What Makes It “Death by Chocolate” Anyway?
You can’t slap that label on any old cocoa cake. This is a chocolate overload from every angle, and yes, that’s the point.
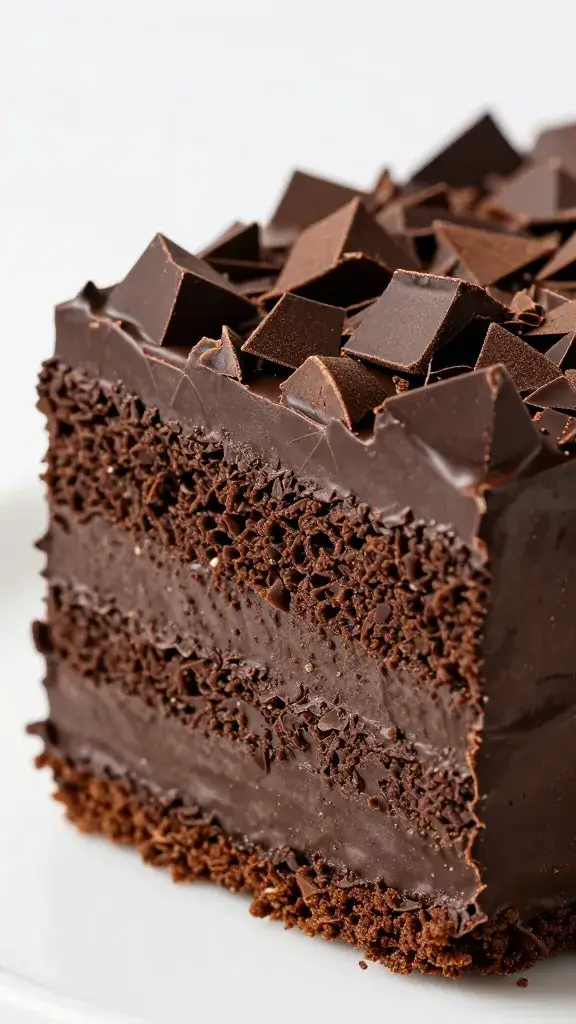
- Multiple chocolate forms: Cocoa powder, melted dark chocolate, chocolate chips, and silky ganache.
- Moist, rich crumb: Oil plus buttermilk equals tender perfection that doesn’t dry out.
- High contrast textures: Fluffy layers, glossy ganache, and a frosting that feels like a chocolate hug.
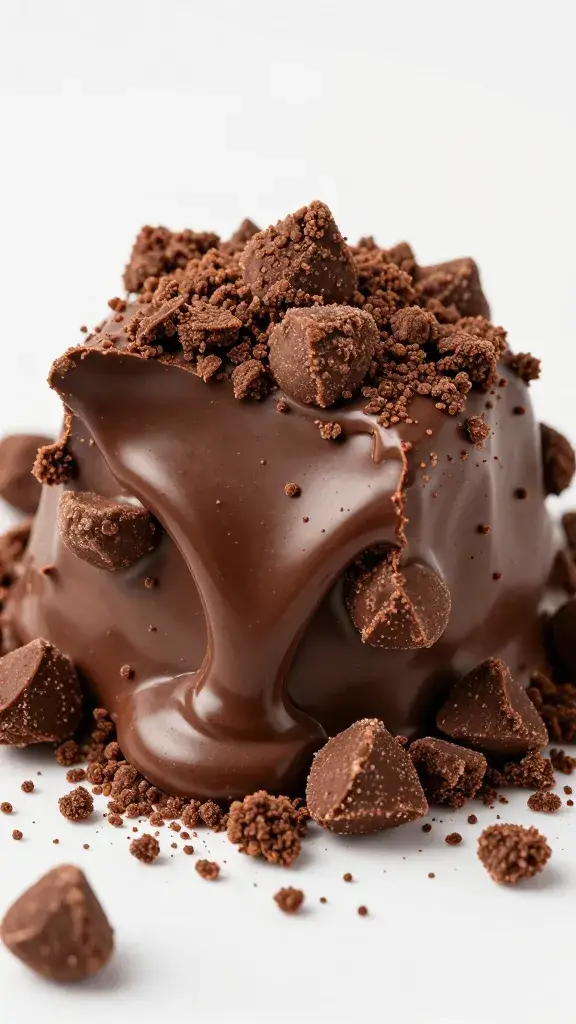
- Extra drama: Chocolate shards, curls, or a drip finish. Over-the-top? Absolutely.
The Flavor Balance
You need intensity without bitterness. Use Dutch-process cocoa for deep color and smooth flavor. Pair it with 60–70% dark chocolate so it tastes bold but not harsh. A touch of espresso? It boosts chocolate flavor without turning it into coffee cake. Promise.
The Core Layers: Building the Base
Let’s get the cake layers right first. No one likes a dry diva.
- Fat matters: Choose neutral oil (canola or light olive) for moisture that lasts for days.
- Buttermilk + hot coffee: Buttermilk for tenderness, hot coffee to “bloom” the cocoa and intensify flavor.
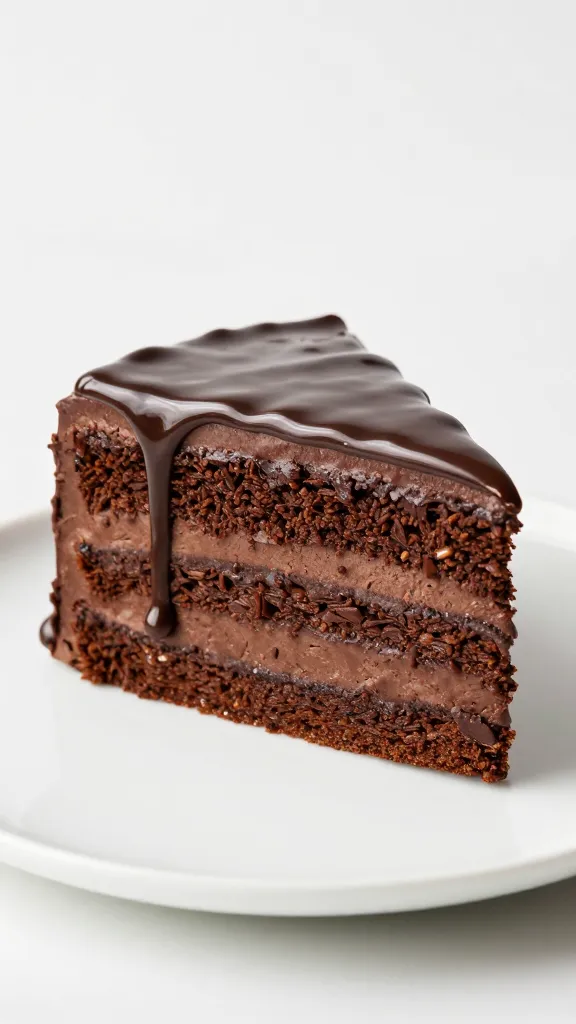
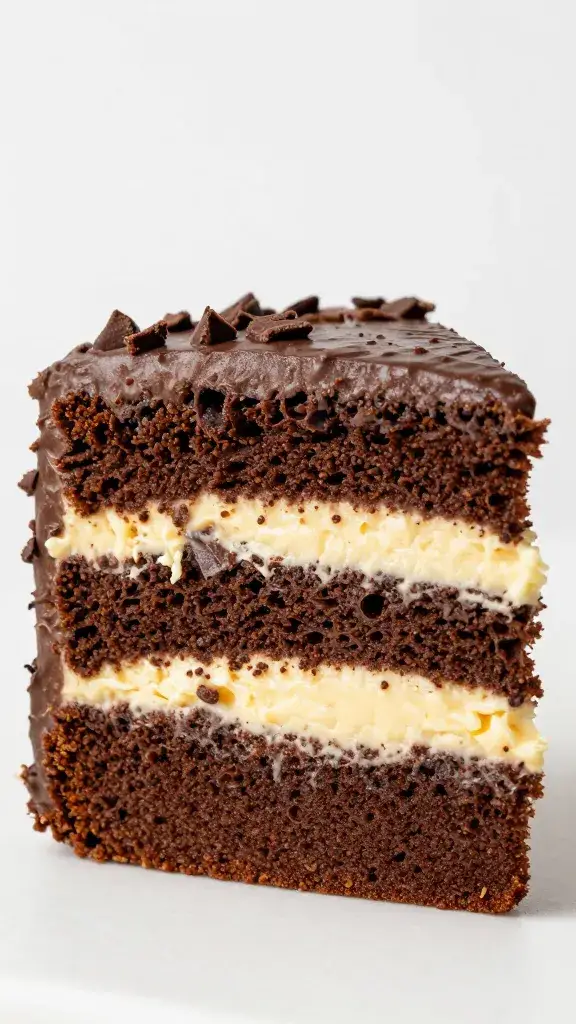
- Two or three layers? Three thin layers look fancy and bake evenly. Two thicker layers feel classic and sturdy for fillings.
Texture Tips
– Don’t overmix. Stir until the flour just disappears.
– Tap pans on the counter to pop large air bubbles.
– Line pans with parchment circles for easy release (your sanity will thank you).
Filling and Frosting: The Double Threat
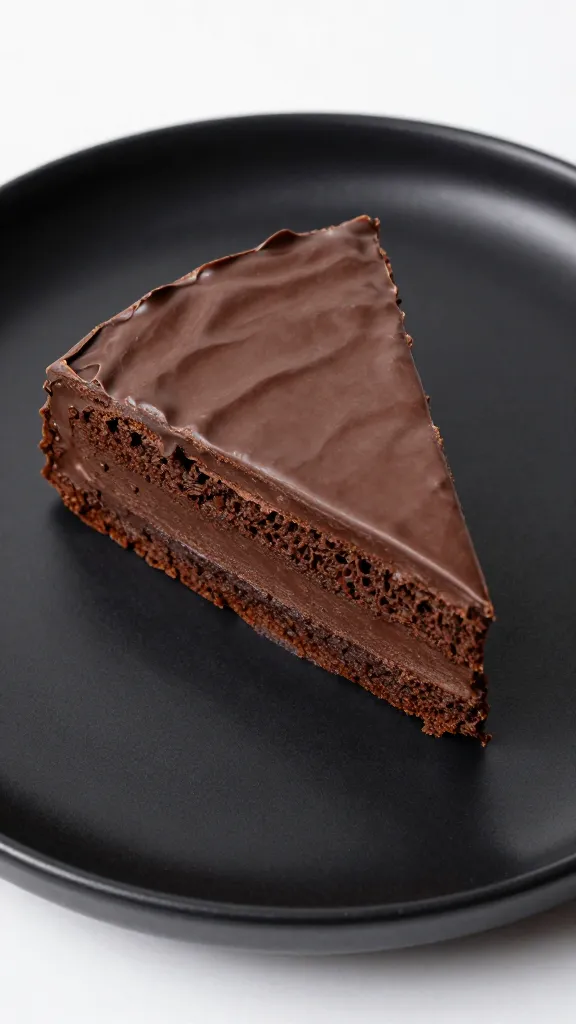
Here’s where it becomes “ultimate.” We’re using both ganache and fudge frosting because moderation is for salads.
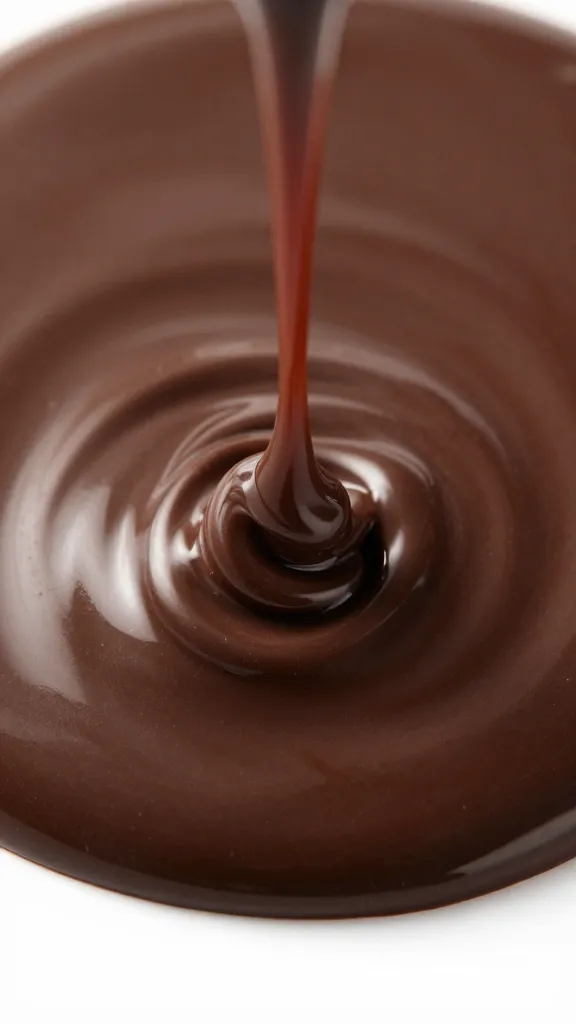
Silky Ganache
Ganache sounds fancy, but it’s just chocolate and cream. For a spreadable texture, use a 1:1 ratio by weight (e.g., 300 g chocolate to 300 g heavy cream). Heat the cream until steamy, pour over chopped chocolate, wait a minute, then stir from the center outward. Let it thicken until it’s like room-temp Nutella.
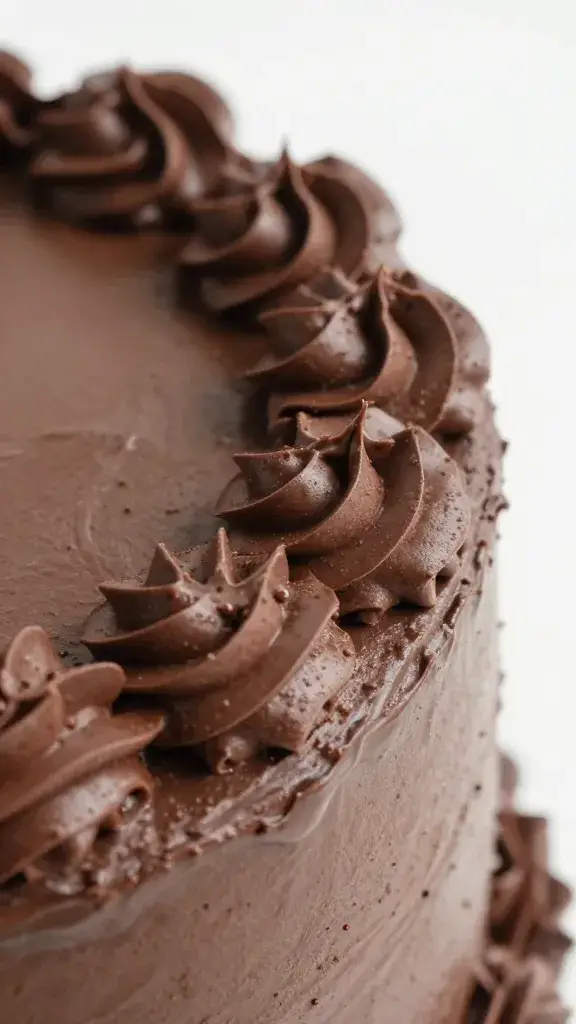
Fudge Frosting
You want a frosting that spreads smoothly but sets with a gentle fudge bite. FYI, buttercream alone can feel too sweet here. Go for a hybrid:
- Butter: Creamy base and stability.
- Melted dark chocolate: Real chocolate flavor, not just cocoa.
- Cocoa powder: Extra depth and structure.
- Powdered sugar + pinch of salt: Sweetness control and balance.
- Heavy cream: Adjusts texture to pillowy perfection.
Whip until glossy. If it looks grainy, add a tablespoon of warm cream and keep mixing.
The Assembly Game Plan
No one wants a leaning tower of chocolate. Strategy matters.
- Level the layers: Use a serrated knife to trim domes. Flat tops stack better.
- Crumb coat first: Apply a thin layer of frosting to trap crumbs. Chill 15–20 minutes.
- Fill with ganache: Pipe a frosting “dam” around the edge, then spread ganache inside so it doesn’t ooze out.
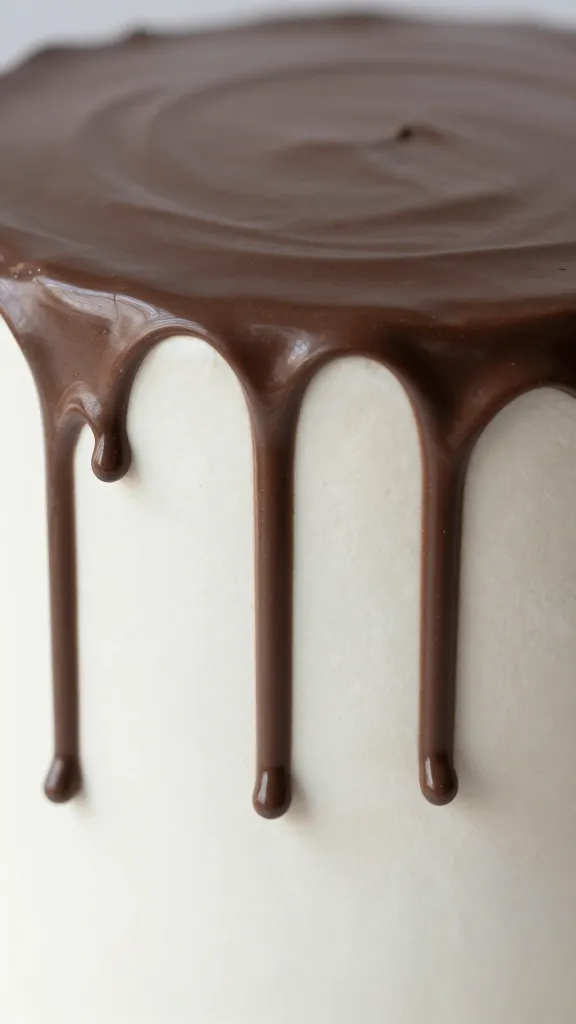
- Final coat: Frost generously and smooth with a bench scraper. Chill again if you plan a drip.
- Finish with a drip (optional): Use slightly warmed ganache. Test one drip; if it runs too far, thicken it with a few minutes of cooling.
Decoration Ideas
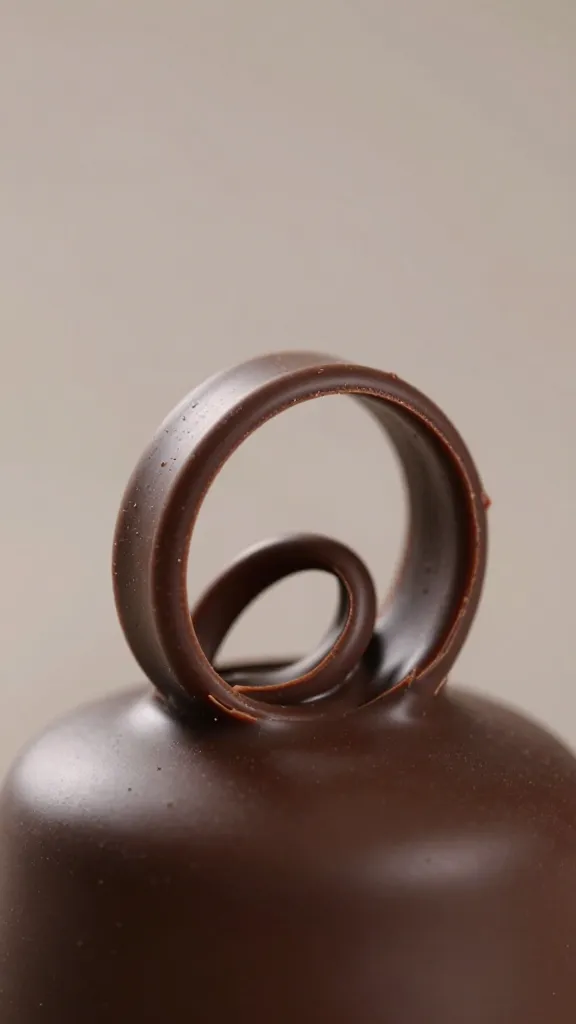
– Chocolate curls: Run a vegetable peeler along a chocolate bar.
– Shards: Spread melted chocolate thin on parchment, chill, then break.
– Crunch factor: Sprinkle cacao nibs, crushed chocolate wafers, or mini chips around the base.
Flavor Boosters That Actually Help
Want to go from great to ridiculous? Try these:
- Espresso powder: 1–2 teaspoons in the batter. Big chocolate energy, zero coffee cake vibes.
- Vanilla + salt: Non-negotiable. Both amplify chocolate like turning up the volume.
- Brown sugar swap: Replace 25–50% of granulated sugar with brown sugar for moisture and a caramel undertone.
- Sour cream swirl: Sub 1/4 of the buttermilk with sour cream for extra tang and richness.
Filling Variations
– Salted caramel layer: Thin spread between ganache and cake. Sweet-salty magic.
– Raspberry compote: Cuts the richness with bright acidity.
– Peanut butter ganache: Mix warmed peanut butter into ganache for a Reese’s moment, IMO.
Make-Ahead, Storage, and Serving
This cake tastes even better the next day. The flavors settle in and the moisture evens out. Win-win.
- Bake ahead: Wrap cooled layers tightly and chill up to 3 days or freeze up to 2 months.
- Frosting: Store in the fridge up to 3 days. Bring to room temp and rewhip with a splash of cream.
- Assembled cake: Keep chilled if your kitchen runs warm, but serve at room temp for best texture.
- Slicing tip: Warm a knife under hot water, wipe, slice, repeat. Clean edges = professional vibes.
Ingredient Quality: Where to Splurge (and Where Not To)
You don’t need gold-leaf cocoa, but some choices matter more than others.
- Chocolate: Splurge here. Use a brand you love to eat straight. 60–70% dark works best.
- Cocoa powder: Dutch-process for smooth, deep flavor and rich color.
- Vanilla: Real extract tastes better. I love a mix of vanilla and a tiny splash of almond extract (like, 1/8 teaspoon) for warmth—optional but delightful.
- Oil and dairy: Standard brands work fine. Just avoid anything with strong flavors that could distract from the chocolate.
Pan Choices and Troubleshooting
– Pan size: Three 8-inch rounds or two 9-inch rounds. Adjust bake time accordingly.
– Dry cake? You likely overbaked. Pull when a toothpick has moist crumbs, not a bone-dry stick.
– Dense center? Batter sat too long or oven ran cool. Preheat fully and bake layers immediately.
FAQ
Can I make this gluten-free?
Yes. Use a 1:1 gluten-free baking blend with xanthan gum. Add an extra tablespoon of milk if the batter looks thick. Bake time may vary by a few minutes, so start checking early.
What if I don’t have buttermilk?
Stir 1 tablespoon of lemon juice or vinegar into 1 cup of milk and let it sit for 5–10 minutes. It won’t taste identical to real buttermilk, but it will deliver the tenderness you want.
Do I need espresso powder?
No, but it makes the chocolate pop. If you skip it, the cake still slaps—just slightly less intense. You can also use strong brewed coffee in the batter for a similar boost.
How long will this cake keep?
Up to 4–5 days in the fridge, tightly covered. Bring slices to room temp before serving so the crumb softens and the frosting goes silky again. Cold chocolate cake tastes muted; give it time to wake up.
Can I turn this into cupcakes?
Absolutely. Fill liners two-thirds full and bake at the same temp for 18–22 minutes. Top with ganache and a swirl of fudge frosting for mini death-by-chocolate bombs.
Any kid-friendly tweaks?
Use milk chocolate ganache for the filling and reduce espresso powder or skip it. FYI, the frosting still benefits from a pinch of salt to balance the sweetness.
Conclusion
Ultimate Death by Chocolate Cake isn’t subtle. It’s indulgent, dramatic, and completely worth the nap you’ll need afterward. Layer rich cake with ganache and fudge frosting, finish with a glossy drip, and serve it proudly. IMO, if your guests go quiet after the first bite, you did it right.