
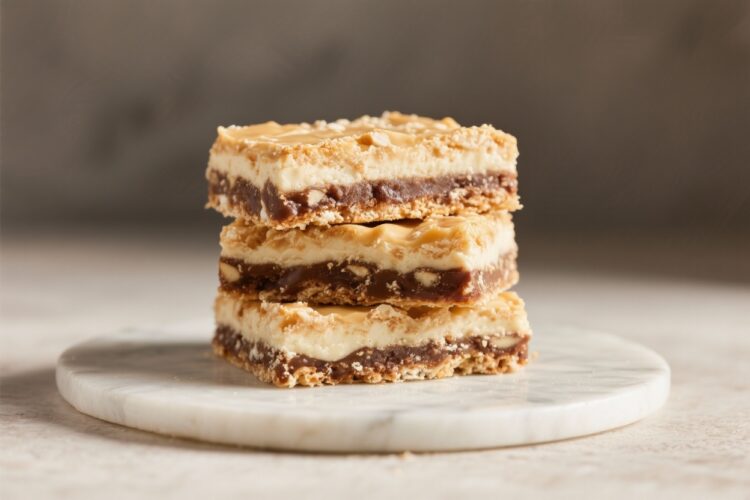
These bars are the kind of dessert that makes people ask for the recipe after the first bite. Three distinct layers—crisp graham cookie base, creamy coconut-caramel center, and glossy chocolate-peanut butter topping—come together in a satisfying square. They’re easy enough for a weeknight and special enough for a party tray.
You can make them ahead, slice them cleanly, and bring them anywhere. If you like texture, sweetness, and a hint of salt, these bars hit all the right notes.
Why This Recipe Works
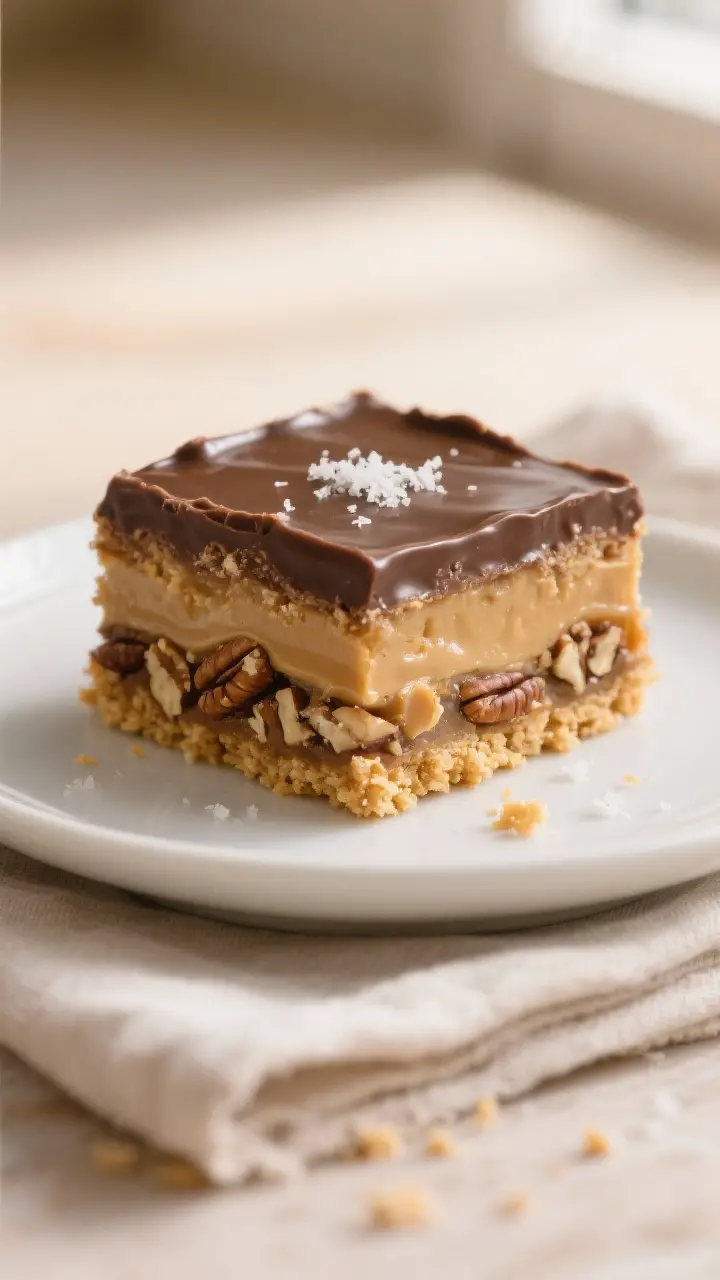
The bottom layer is a simple graham cracker crust that bakes into a sturdy, buttery foundation. It keeps its shape, so the bars slice without crumbling.
The middle layer combines sweetened condensed milk with shredded coconut and nuts, creating a chewy, candy-like center that’s rich but not heavy. The top layer is a smooth, silky chocolate-peanut butter ganache that pulls everything together. A tiny pinch of salt balances the sweetness, while the layers chill into perfect, neat squares.
What You’ll Need
- For the crust:
- 2 cups graham cracker crumbs (about 14 full sheets)
- 1/2 cup unsalted butter, melted
- 2 tablespoons granulated sugar
- 1/4 teaspoon fine sea salt
- For the middle layer:
- 1 can (14 ounces) sweetened condensed milk
- 1 1/2 cups sweetened shredded coconut
- 3/4 cup chopped pecans or walnuts
- 1 teaspoon vanilla extract
- 1/4 teaspoon fine sea salt
- For the top layer:
- 1 1/2 cups semi-sweet chocolate chips
- 1/2 cup creamy peanut butter
- 2 tablespoons unsalted butter
- Flaky sea salt, for finishing (optional)
- Equipment:
- 9×13-inch baking pan
- Parchment paper
- Mixing bowls and spatula
- Small saucepan or microwave-safe bowl for melting
Step-by-Step Instructions
- Prep the pan. Line a 9×13-inch baking pan with parchment, leaving overhang for easy lifting.
Lightly grease the sides. Preheat oven to 350°F (175°C).
- Make the crust. Stir graham crumbs, sugar, and salt in a bowl. Add melted butter and mix until the texture resembles damp sand.
Press firmly into the pan in an even layer, using the bottom of a measuring cup to compact.
- Bake the crust. Bake for 8–10 minutes, until lightly set and fragrant. Remove and let it cool for 5 minutes while you make the filling.
- Mix the middle layer. In a bowl, combine sweetened condensed milk, shredded coconut, nuts, vanilla, and salt. Stir until evenly coated and sticky.
- Spread and bake again. Dollop the coconut mixture over the crust and spread gently into an even layer.
Bake for 15–18 minutes, until the edges look set and lightly golden. Remove and let the pan cool on a rack for at least 20 minutes.
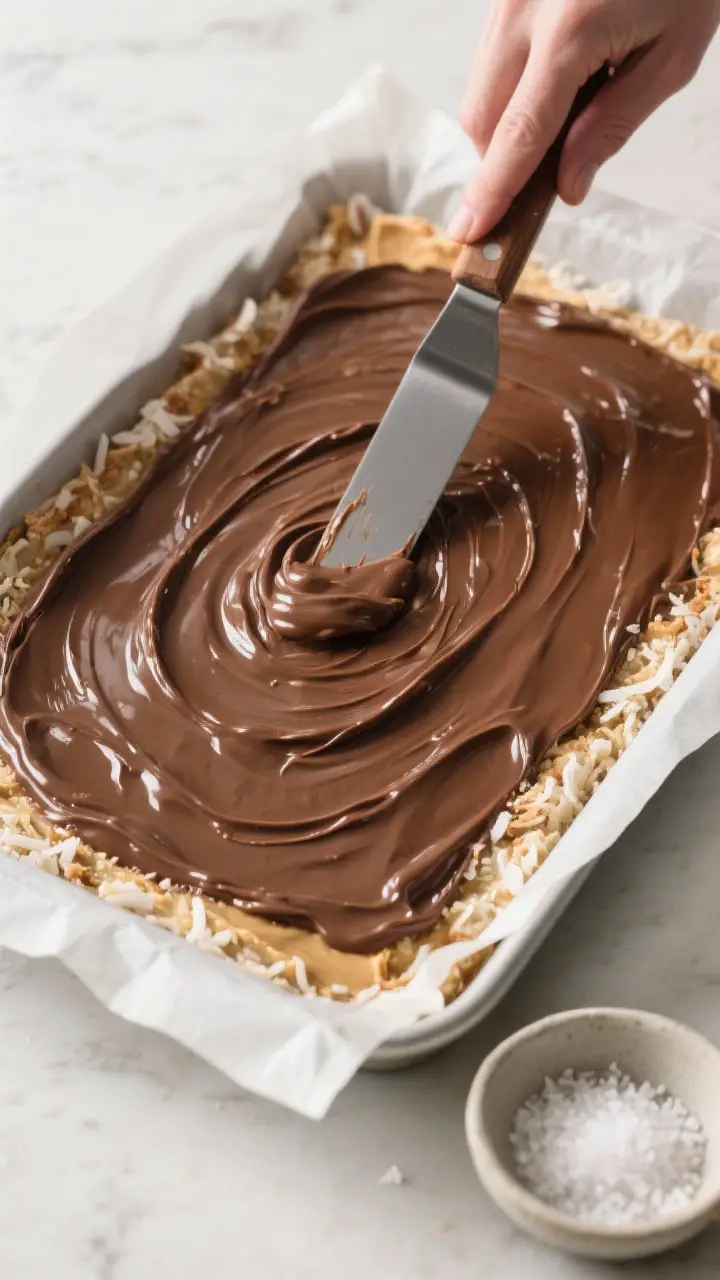
- Make the topping. Melt chocolate chips, peanut butter, and butter together. You can use a microwave in 20–30 second bursts, stirring in between, or a small saucepan on low heat.
Stir until smooth and glossy.
- Finish the bars. Pour the warm chocolate mixture over the cooled middle layer. Tilt the pan or use an offset spatula to cover evenly. Sprinkle with flaky salt if you like.
- Chill to set. Refrigerate for 1–2 hours, until the top is firm to the touch.
The bars will slice much cleaner once fully set.
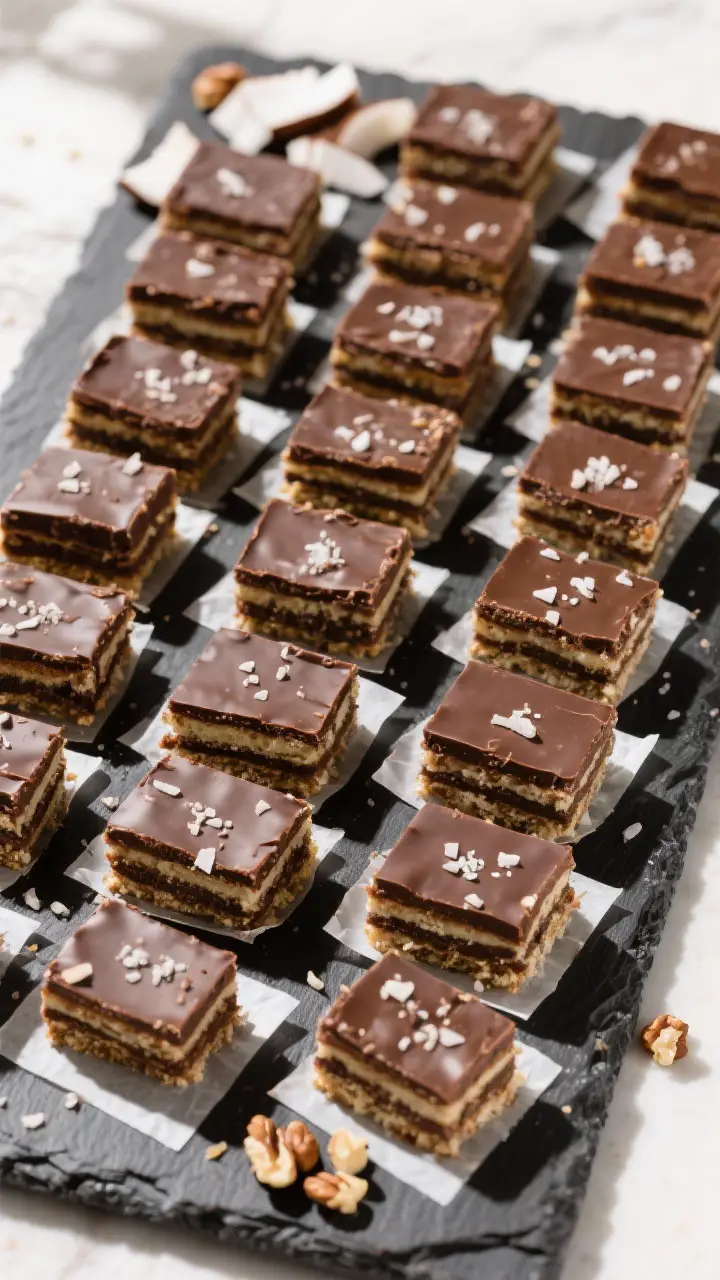
- Slice and serve. Lift the slab out using the parchment. For clean edges, warm a sharp knife under hot water, dry it, and cut into squares or bars, wiping the blade between cuts.
How to Store
Refrigerator: Store the bars in an airtight container for up to 1 week. Place parchment between layers to prevent sticking.
Freezer: Freeze for up to 2 months.
Wrap the slab or individual bars tightly in plastic, then foil, and place in a freezer bag. Thaw in the fridge overnight or at room temperature for 20–30 minutes.
Room temperature: If your kitchen is cool, the bars can sit out for a few hours. In warm weather, keep them chilled so the topping stays firm.
Benefits of This Recipe
- Make-ahead friendly: They taste even better the next day and hold up well for events.
- Easy to transport: Firm layers travel well and don’t smudge easily.
- Balanced texture: Crunchy base, chewy middle, silky top—each bite is satisfying.
- Flexible ingredients: Swap nuts, change the chocolate, or go nut-free with simple adjustments.
- Crowd-pleaser: Familiar flavors that appeal to both kids and adults.
Pitfalls to Watch Out For
- Crumbly crust: If the crust doesn’t press tightly or lacks enough butter, it can fall apart.
Compact it firmly.
- Overbaking the middle: The coconut layer should be set at the edges but still moist. If it turns too dark, it will be dry and brittle.
- Runny topping: Pour the chocolate layer only after the middle has cooled a bit. If you pour too soon, it can sink.
- Messy slices: Cut only after fully chilling.
A warm, cleaned knife makes all the difference.
- Too sweet: Add a light sprinkle of flaky salt or use bittersweet (60–70%) chocolate to balance.
Variations You Can Try
- Almond Joy Style: Use almonds instead of pecans and top with toasted almond slivers. Choose dark chocolate for the topping.
- Nut-Free Crunch: Replace nuts with toasted pumpkin seeds or crushed pretzels. Skip peanut butter and use straight chocolate with 1 tablespoon oil.
- Mocha Dream Bars: Stir 1 teaspoon instant espresso powder into the chocolate topping for a coffee kick.
- Salted Caramel Swirl: Drizzle 1/3 cup warm caramel over the coconut layer before the chocolate, then swirl lightly.
- Gluten-Free: Use certified gluten-free graham crackers.
Everything else stays the same.
- Extra Chewy: Add 1/2 cup mini chocolate chips to the coconut layer for pockets of melt.
- No Peanut Butter: Swap with almond butter or skip entirely and use 2 cups chocolate chips plus 1 tablespoon butter.
FAQ
Can I make these without coconut?
Yes. Replace the 1 1/2 cups shredded coconut with 1 1/2 cups finely chopped nuts, crushed cornflakes, or Rice Krispies for texture. The sweetened condensed milk will still bind the layer.
Do I need to toast the nuts?
It’s optional, but toasting brings out flavor.
Toast the chopped nuts in a dry skillet over medium heat for 3–4 minutes, stirring, until fragrant. Cool before mixing in.
What if I don’t have a 9×13-inch pan?
Use a 9×9-inch pan for thicker bars and bake the middle layer a few minutes longer. Keep an eye on the edges to avoid overbrowning.
How do I get perfectly clean slices?
Chill the bars fully, then use a sharp knife warmed under hot water.
Wipe the blade after each cut. This prevents drag and keeps the layers distinct.
Can I use milk chocolate instead of semi-sweet?
You can, but the bars will be sweeter. If using milk chocolate, add a pinch more salt or mix in 1/2 cup dark chocolate to balance.
How can I make them dairy-free?
Use a dairy-free sweetened condensed coconut milk, plant-based butter, and dairy-free chocolate chips.
Skip peanut butter if your brand contains dairy, or choose a vegan nut butter.
Do these freeze well already cut?
Yes. Freeze slices on a sheet tray until firm, then transfer to a freezer bag with parchment between layers. This keeps edges sharp and prevents sticking.
Can I reduce the sweetness?
Use unsweetened coconut, bittersweet chocolate, and a light hand with the chocolate layer.
A pinch of flaky salt on top also helps balance the flavor.
Is there a way to add fruit?
Stir in 1/2 cup finely chopped dried cherries or cranberries to the middle layer. Their tartness pairs nicely with the chocolate topping.
How long can they sit out at a party?
About 2–3 hours in a cool room. If it’s warm, the topping can soften, so keep a small tray in the fridge and replenish as needed.
Wrapping Up
Triple Decker Dream Bars are the reliable dessert you’ll turn to again and again.
They’re simple to make, easy to customize, and guaranteed to disappear fast. With a sturdy crust, chewy center, and silky top, every bite feels special. Make a batch today, stash a few in the freezer, and you’ll be set for any sweet craving or last-minute gathering.
Printable Recipe Card
Want just the essential recipe details without scrolling through the article? Get our printable recipe card with just the ingredients and instructions.