
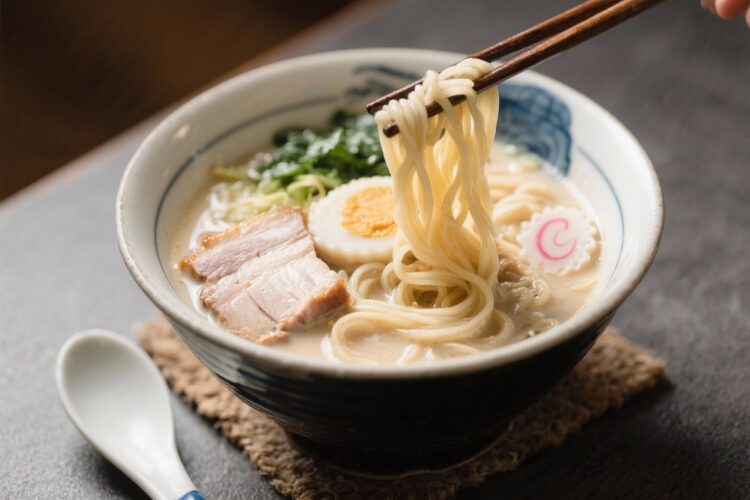
Tonkotsu ramen is the bowl you reach for when you want something deep, silky, and soul-warming. The broth is creamy and opaque, made by boiling pork bones hard and long until they surrender all their richness. It takes time, patience, and a bit of stove attention, but the payoff is big.
This is the kind of project that makes your kitchen smell amazing and your table feel special. If you love ramen shop-quality bowls, you’ll appreciate this method.
What Makes This Recipe So Good
- Milky, rich broth: The long, rolling boil emulsifies pork fat and collagen into a creamy, full-bodied soup.
- Restaurant-level technique: Blanching bones, aggressive boiling, and finishing with aromatic tare mimic classic ramen shops.
- Layered flavors: A simple shoyu tare, fragrant garlic oil, and marinated eggs take it from good to great.
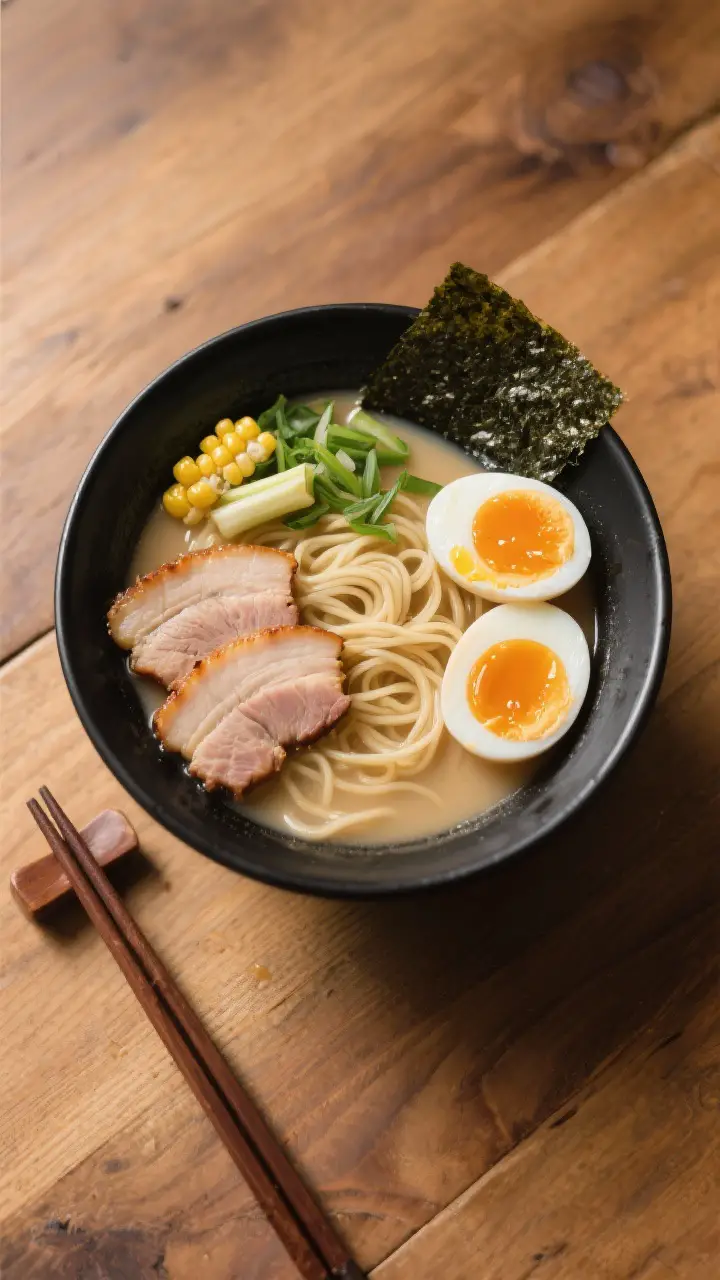
- Customizable toppings: Char siu, scallions, mushrooms, and nori let you build your ideal bowl.
- Big-batch friendly: Make a pot on the weekend and enjoy multiple bowls throughout the week.
Ingredients
- For the Tonkotsu Broth:
- 5–6 lb pork bones (neck, femur, trotters preferred)
- 1 lb pork belly or shoulder (optional, for extra richness and chashu)
- 2 onions, halved
- 1 head garlic, halved horizontally
- 1 knob ginger (2 inches), sliced
- 2–3 leeks or 3 scallions (white parts), roughly chopped
- Water, enough to cover
- Shoyu Tare (Seasoning Base):
- 1/2 cup soy sauce
- 1/4 cup mirin
- 1/4 cup sake
- 1 tbsp sugar
- 1 piece kombu (optional), 3 inches
- 1 small handful bonito flakes (optional)
- Mayu (Garlic Oil), optional but recommended:
- 1/3 cup neutral oil
- 6–8 cloves garlic, thinly sliced
- Ramen and Toppings:
- Fresh ramen noodles (thin, Hakata-style if possible)
- Soft-boiled eggs (ajitsuke tamago), marinated if you like
- Sliced chashu (braised pork belly or shoulder)
- Scallions, finely sliced
- Nori sheets
- Wood ear mushrooms, thinly sliced (optional)
- Corn or bamboo shoots (optional)
- Salt for seasoning
Step-by-Step Instructions
- Clean and blanch the bones: Rinse pork bones under cold water. Place in a large stockpot, cover with cold water, and bring to a hard boil for 10 minutes.
Drain, then scrub and rinse bones under cold water to remove scum and marrow bits. Wash the pot too.
- Start the broth: Return cleaned bones to the pot. Add onions, garlic, ginger, and leeks.
Cover generously with fresh water.
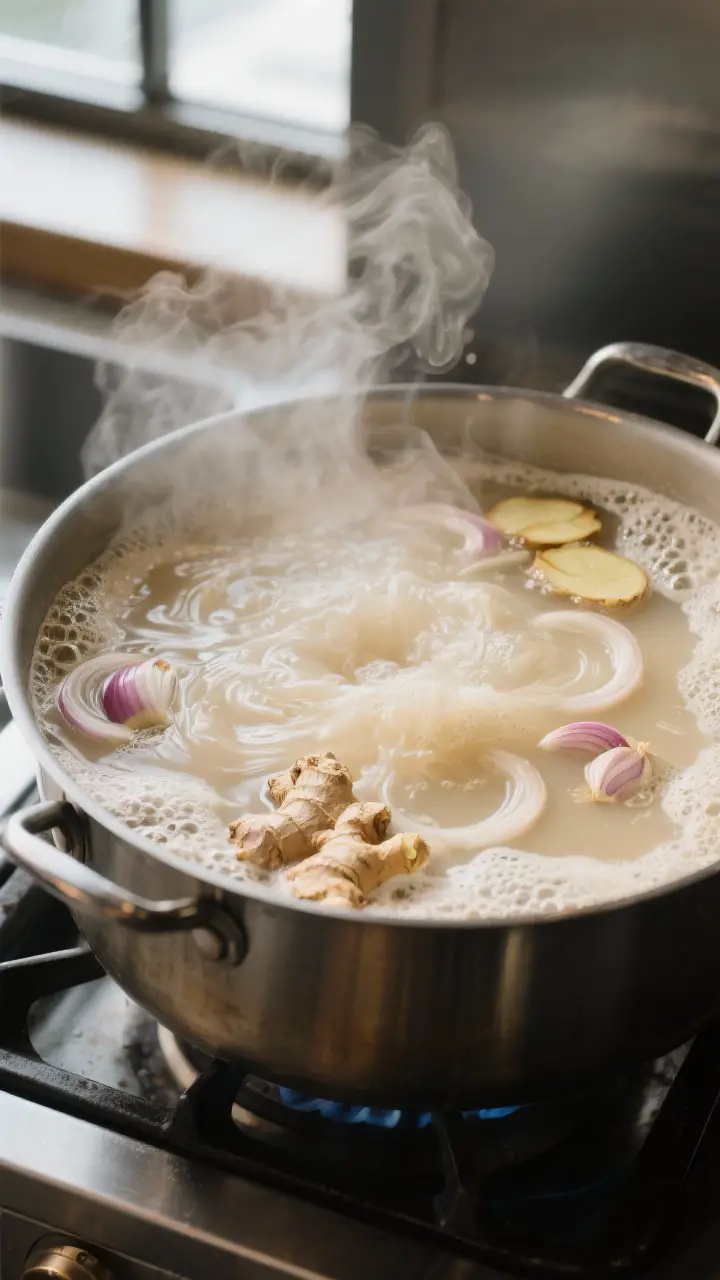
- Boil aggressively: Bring to a rolling boil and keep it there for 12–18 hours total, topping up with water as needed to keep bones submerged. Skim occasionally, but don’t baby it—strong boiling is what turns the broth milky. A pressure cooker can shorten this to about 3–4 hours at high pressure, but traditional boiling yields excellent texture.
- Add pork belly/shoulder (optional): If making chashu in the broth, add the pork piece during the last 2–3 hours so it tenderizes.
Remove when soft and set aside to slice later.
- Strain and blend (optional for extra creaminess): Strain the broth through a fine mesh. For a thicker, creamier broth, blend a portion (1–2 cups) of the soft aromatics and fatty broth together, then stir back into the pot. Season lightly with salt; final salting happens with tare.
- Make the shoyu tare: In a small pot, combine soy sauce, mirin, sake, and sugar.
Warm gently until sugar dissolves. Add kombu and bonito if using; steep 10 minutes off heat, then strain. The tare should taste strong and savory.
- Make the mayu (garlic oil): Heat oil over medium-low.
Add garlic and cook, stirring, until deep brown—almost black at the edges but not burned. Cool, then smash or blend into the oil. Strain if you prefer a smoother finish.
This adds a smoky, rich aroma.
- Prepare toppings: Soft-boil eggs (6–7 minutes), cool in ice water, peel, and marinate in a mix of soy, mirin, and water if desired. Slice chashu. Prep scallions, mushrooms, and nori.
- Cook the noodles: Boil fresh ramen noodles in unsalted water 1–2 minutes until just tender.
Drain well; do not rinse.
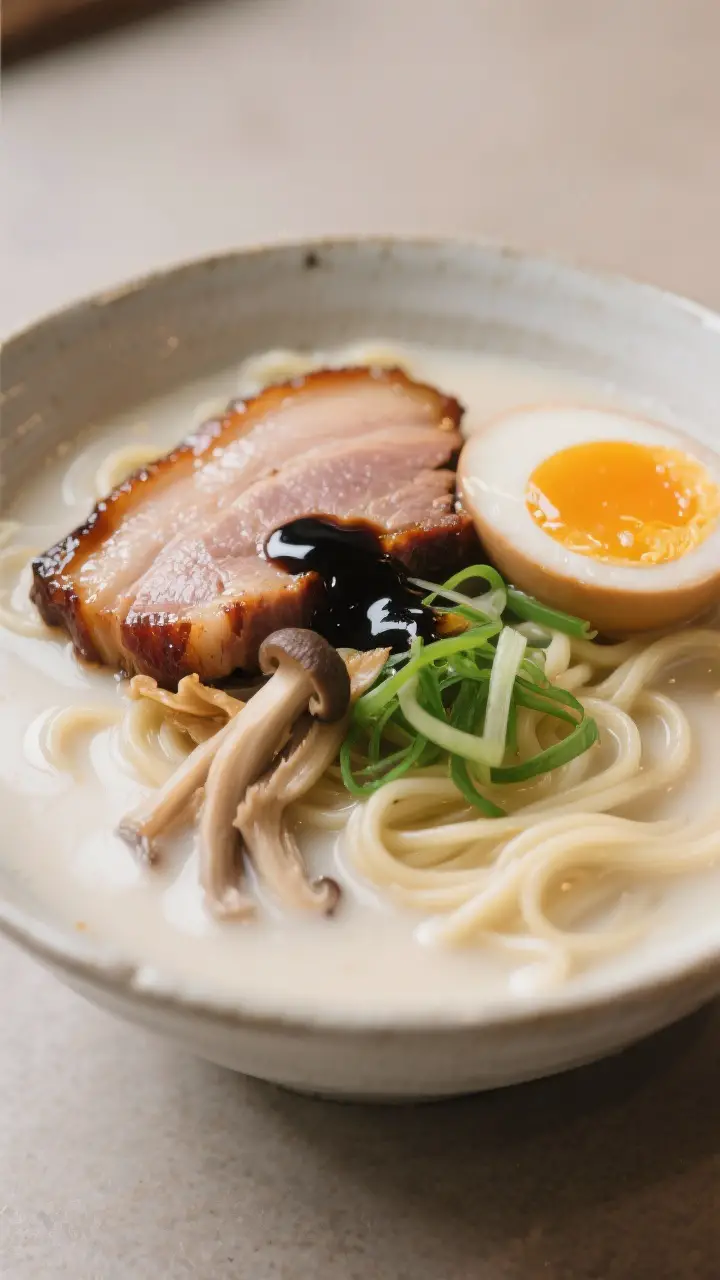
- Assemble: In each bowl, add 1–2 tablespoons tare. Ladle in 12–14 ounces of hot broth and taste; adjust with more tare or salt as needed. Add noodles.
Top with chashu, egg halves, scallions, mushrooms, and a drizzle of mayu. Serve immediately.
How to Store
- Broth: Cool quickly, then refrigerate in airtight containers for up to 4 days or freeze for up to 3 months. Fat will solidify on top when chilled; you can remove some for a lighter bowl or melt it back in for richness.
- Tare: Keeps in the fridge for 2–3 weeks.
- Mayu: Store in a jar in the fridge up to 2 weeks.
- Noodles: Keep uncooked and separate.
Cook fresh at serving time to avoid sogginess.
- Toppings: Eggs for up to 3 days; chashu up to 4 days refrigerated or 1 month frozen.
Health Benefits
- Collagen and gelatin: Long-simmered bones release collagen, which turns into gelatin, giving the broth body and a satisfying mouthfeel.
- Protein: Between the broth, pork, and eggs, this bowl offers a solid protein boost.
- Minerals: Bones can contribute small amounts of minerals like calcium and phosphorus.
- Balanced energy: With noodles for carbs and fat from the broth, it’s filling and comforting. Balance it with vegetables and leaner toppings if you want a lighter profile.
What Not to Do
- Don’t simmer gently: A timid simmer won’t emulsify the fats. You want a vigorous, rolling boil for that trademark creamy color.
- Don’t skip blanching: Blanching and scrubbing bones is key to a clean flavor without off aromas.
- Don’t rely on salt alone: Tare brings depth and balance.
Salt alone makes the broth salty but flat.
- Don’t overcook noodles in the broth: Always cook noodles separately and add at the end. Overcooked noodles turn mushy fast.
- Don’t ignore water levels: Keep bones submerged. If water gets low, the broth can scorch and turn bitter.
Variations You Can Try
- Spicy Tonkotsu: Add chili oil or a spoon of spicy miso paste to the tare for heat.
- Miso Tare: Swap shoyu tare for a miso-based one with white miso, mirin, and a touch of sesame paste.
- Black Garlic Tonkotsu: Use extra-dark mayu and a bit of black garlic paste for deep, smoky sweetness.
- Chicken-Pork Blend: Add chicken backs or feet for a slightly lighter but still creamy broth.
- Ultra-Rich: Toss in extra trotters and blend a ladle of softened fat and aromatics into the broth for a thicker texture.
- Lighter Bowl: Skim more fat after chilling and pair with steamed greens and lean chashu.
FAQ
Why isn’t my broth turning white and creamy?
A gentle simmer won’t emulsify the fats.
Keep a strong boil and don’t overcrowd the pot with too much water. High heat, long time, and enough agitation are what make it opaque.
Can I make this in a pressure cooker?
Yes. Pressure-cook cleaned bones with aromatics for 3–4 hours at high pressure.
The result is rich, though you may need to blend a small portion for extra creaminess. Finish on the stovetop at a boil for 15–20 minutes to emulsify further.
What noodles should I use?
Thin, straight ramen noodles (Hakata-style) pair best with tonkotsu. Fresh noodles cook fast and hold texture.
If using dried, cook to just shy of al dente.
How salty should the broth be?
Season to taste using the tare. A good rule: start with 1–2 tablespoons tare per bowl, then adjust. The broth itself should be lightly seasoned; the tare provides the backbone.
Can I substitute the pork bones?
For classic tonkotsu, pork bones are essential.
If needed, blend pork with chicken backs or feet, but avoid using only beef bones—they won’t give the same flavor or texture.
Do I need kombu and bonito in the tare?
They’re optional, but they add savoriness and depth. If you skip them, consider a touch more soy or a splash of fish sauce for umami.
How do I keep the kitchen from smelling too strong?
Keep the lid slightly ajar to vent and use your stove’s fan. Blanching well reduces strong aromas, and adding onions and ginger helps keep the broth clean-smelling.
Wrapping Up
Tonkotsu ramen takes time, but none of it is complicated.
Clean bones, boil hard, season with a solid tare, and finish with your favorite toppings. The result is a rich, velvety bowl that feels like a treat every time. If you’re up for a weekend project, this is one that pays off in comfort and serious flavor.
Printable Recipe Card
Want just the essential recipe details without scrolling through the article? Get our printable recipe card with just the ingredients and instructions.