
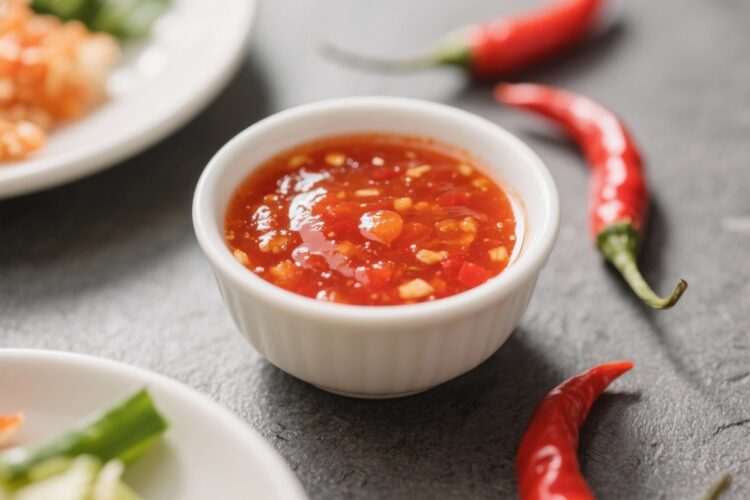
If you’ve only ever had sweet chili sauce from a bottle, you’re in for a treat. Homemade Nam Jim Gai is brighter, fresher, and perfectly balanced—sweet, tangy, garlicky, and just the right amount of heat. It takes about 15 minutes and a few pantry staples.
Plus, you can tweak it to suit your taste, whether you like it mild and sweet or spicy with a real kick. Once you make it yourself, the store-bought version won’t stand a chance.
What Makes This Recipe So Good
- Fresh, real flavor: No syrupy aftertaste or artificial notes. The garlic and chili shine through, backed by clean vinegar tang.
- Fully customizable: Adjust sweetness, heat, and thickness.
Make it smooth or leave it a little chunky—your call.
- Fast and easy: One pot, 15 minutes, zero fuss. You can whip it up while your chicken wings are in the oven.
- Versatile: Use it as a dipping sauce, glaze, marinade, or drizzle. It plays well with everything from fried tofu to grilled shrimp.
- Budget-friendly: Simple ingredients you probably already have.
A small batch costs less than a bottle and tastes better.
Shopping List
- Red chilies: Fresh Thai bird’s eye chilies for heat, or red Fresno/jalapeño for milder sauce
- Garlic: Fresh cloves for the signature flavor
- Sugar: White sugar for classic clarity and brightness
- Rice vinegar: Unseasoned rice vinegar for gentle acidity
- Water: To control thickness and simmer the sauce
- Fish sauce: Adds savory depth; use soy sauce for a vegetarian option
- Salt: Fine sea salt or kosher salt
- Cornstarch: For thickening (or use a little rice flour)
- Lime juice (optional): For brightness at the end
Step-by-Step Instructions
- Prep the aromatics: Mince 3–4 garlic cloves and finely chop 2–4 red chilies. Remove seeds for less heat, keep them for more. You’ll want about 2 tablespoons of chopped chilies.
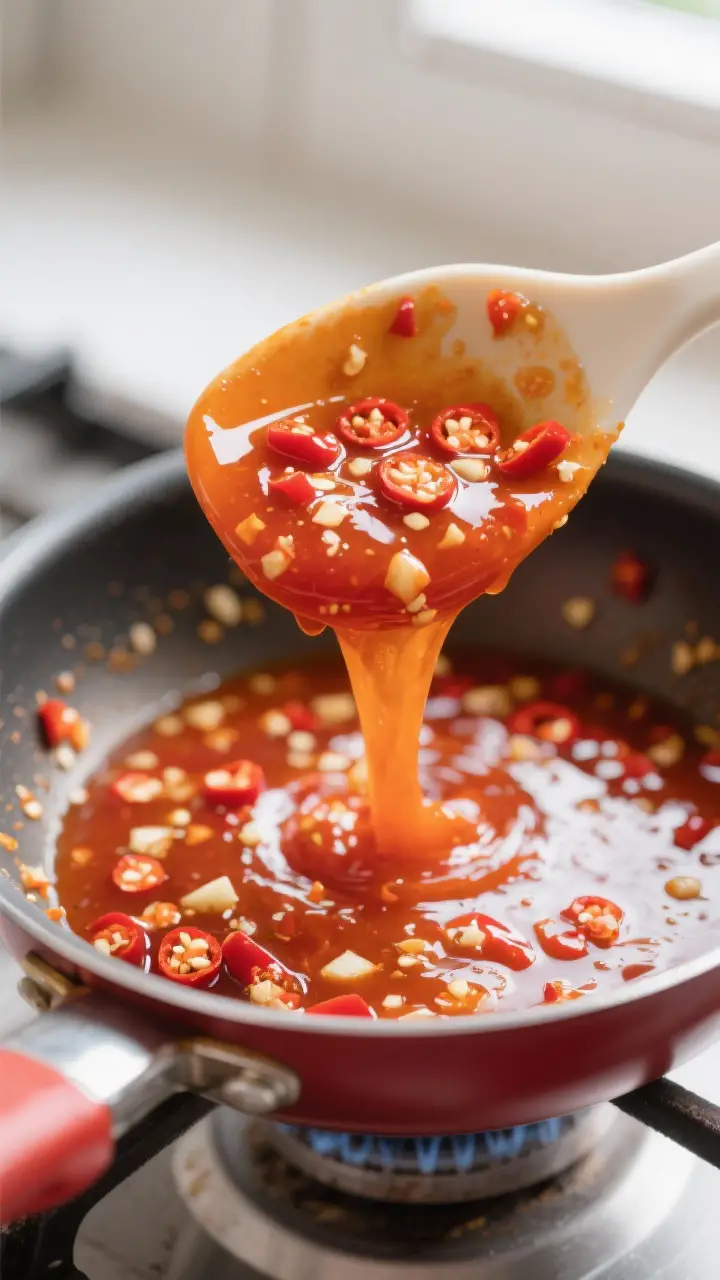
- Make the base: In a small saucepan, combine 1/2 cup sugar, 1/2 cup rice vinegar, 1/2 cup water, the garlic, and the chilies.
Add 1–2 teaspoons fish sauce and a pinch of salt.
- Simmer gently: Bring to a simmer over medium heat, stirring to dissolve the sugar. Let it bubble softly for 3–5 minutes to meld flavors.
- Thicken: In a small bowl, mix 1 tablespoon cornstarch with 1 tablespoon water until smooth. Stir this slurry into the saucepan.
Simmer 1–2 minutes more, stirring, until the sauce turns glossy and lightly thickened.
- Taste and adjust: Add more vinegar for tang, a pinch of sugar for sweetness, or a splash more fish sauce for umami. If you like extra shine and heat, add a dash of chili flakes.
- Optional smoothing: For a smoother sauce, blend with an immersion blender for a few seconds. Keep it chunky if you like texture.
- Finish with brightness: Off the heat, stir in 1–2 teaspoons lime juice.
This keeps flavors lively.
- Cool and store: Let the sauce cool completely, then pour into a clean jar. It will thicken slightly as it cools.
Keeping It Fresh
- Storage: Store in an airtight jar in the refrigerator for up to 3 weeks.
- Freezing: Freeze in small containers or ice cube trays for up to 3 months. Thaw in the fridge and stir.
- Safety: Always use a clean spoon to avoid contamination.
If it smells off or looks cloudy with gas bubbles, discard it.
- Refreshing flavor: If the sauce dulls over time, brighten it with a squeeze of lime or a splash of vinegar.
Benefits of This Recipe
- Cleaner ingredients: You control the sugar, sodium, and heat—no preservatives needed.
- Restaurant-quality results: The balance of sweet, salty, sour, and spicy is classic Thai and truly crowd-pleasing.
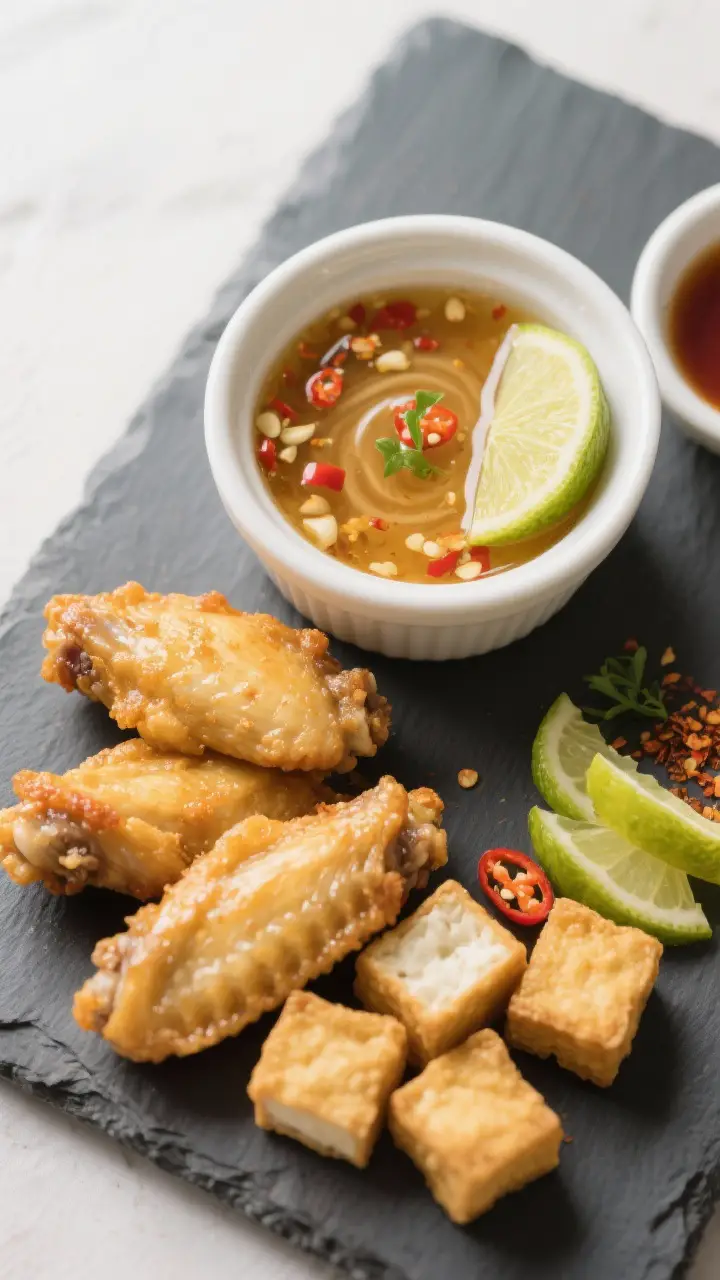
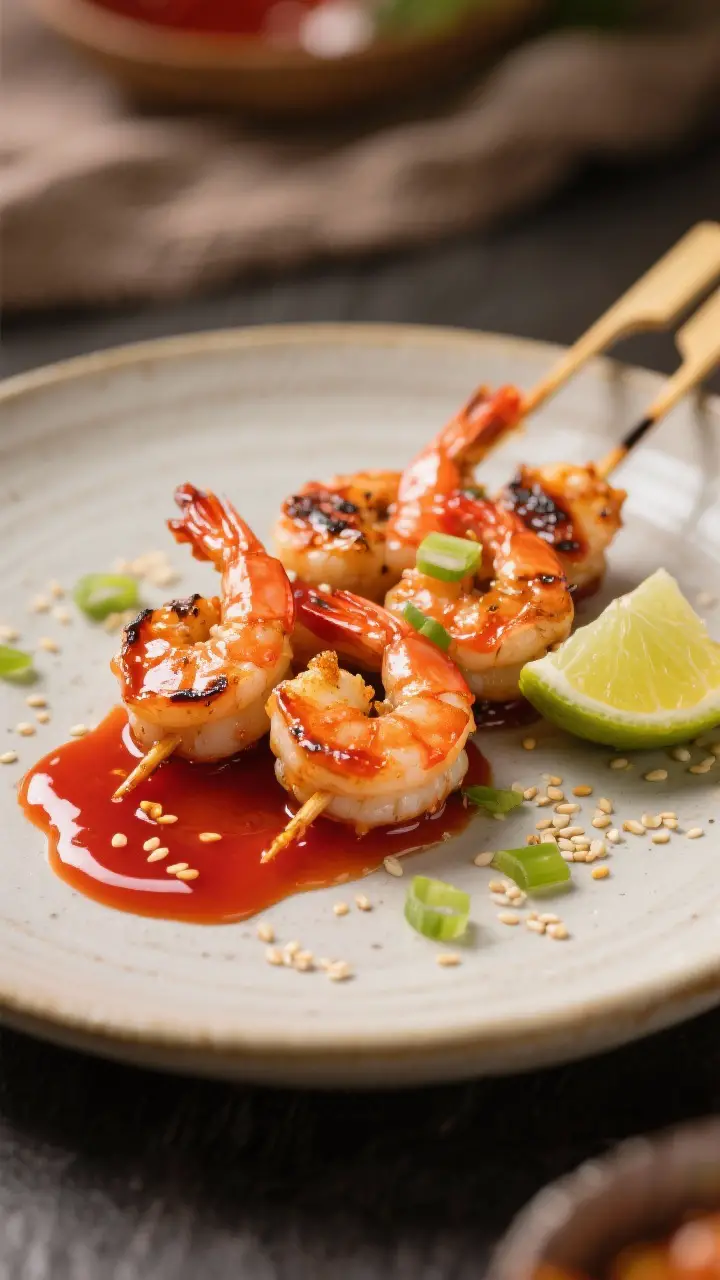
- Multipurpose: Works as a dip for spring rolls, glaze for chicken, drizzle for noodles, or dressing base with a little oil.
- Quick payoff: Minimal time for maximum flavor, perfect for weeknights or last-minute entertaining.
What Not to Do
- Don’t boil hard: A vigorous boil can dull the fresh chili and garlic flavors and over-thicken the sauce.
- Don’t skip the salt/umami: Without fish sauce or soy sauce, the sauce tastes flat and too sweet.
- Don’t over-thicken: The sauce should be pourable. If it turns gloopy, whisk in warm water a tablespoon at a time.
- Don’t use seasoned rice vinegar: It has added sugar and salt, which can throw off the balance.
- Don’t add lime too early: Cooked lime juice can taste bitter—add it at the end.
Alternatives
- Vegan/vegetarian: Swap fish sauce for soy sauce or tamari. Add a few drops of mushroom soy for extra depth.
- No cornstarch: Use 1–1.5 teaspoons rice flour, or reduce the sauce a few extra minutes for a thinner but still clingy texture.
- No fresh chilies: Use 1–2 teaspoons crushed red pepper flakes, or a mix of flakes and a spoon of sambal oelek.
- Low sugar: Reduce sugar to 1/3 cup and simmer a bit longer.
Add a touch of honey at the end if needed.
- Extra garlicky: Fry 1 tablespoon minced garlic briefly in a teaspoon of neutral oil, then add to the pot for a richer garlic note.
- Citrus twist: Add orange zest or a spoon of pineapple juice at the end for a fruit-forward variation.
FAQ
Is this the same as the bottled sweet chili sauce?
No, it’s fresher and more balanced. Bottled versions can be very sweet and thick. This homemade sauce has a clean chili-garlic flavor with adjustable heat and tang.
How spicy is it?
It depends on the chilies and how many seeds you include.
Use Thai bird’s eye for a hot sauce or Fresno/jalapeño for mild. You can always add more chili later.
Can I make it without cornstarch?
Yes. Reduce the liquid a few extra minutes for a thinner, syrupy sauce, or use rice flour as a substitute thickener.
What if my sauce is too spicy?
Add more sugar and a little water, then simmer briefly.
A splash more vinegar can help, too. Straining out some chili flecks also lowers the heat.
What do I serve it with?
It’s great with chicken wings, grilled pork, fried tofu, shrimp, spring rolls, fish cakes, and roasted vegetables. It also makes a tasty glaze for salmon.
Can I can this sauce for pantry storage?
This recipe is designed for refrigeration, not canning.
For shelf-stable canning, follow a tested, safe canning recipe with proper acidity and processing times.
Why did my sauce crystallize in the fridge?
That can happen if sugar concentration is high. Warm it gently and whisk in a teaspoon or two of hot water to smooth it out.
How do I make it brighter red like store-bought?
Use fresh red chilies and don’t overcook. For a more vibrant color, blend briefly.
Avoid food coloring if you want to keep it natural.
In Conclusion
Homemade Thai Sweet Chili Sauce is simple, quick, and far more flavorful than anything in a bottle. You control the balance, the heat, and the texture, and you end up with a sauce that upgrades everything it touches. Keep a jar in the fridge for easy weeknight dinners, last-minute appetizers, and bold, bright flavor whenever you want it.
After one batch, you’ll wonder why you ever bought it pre-made.
Printable Recipe Card
Want just the essential recipe details without scrolling through the article? Get our printable recipe card with just the ingredients and instructions.