
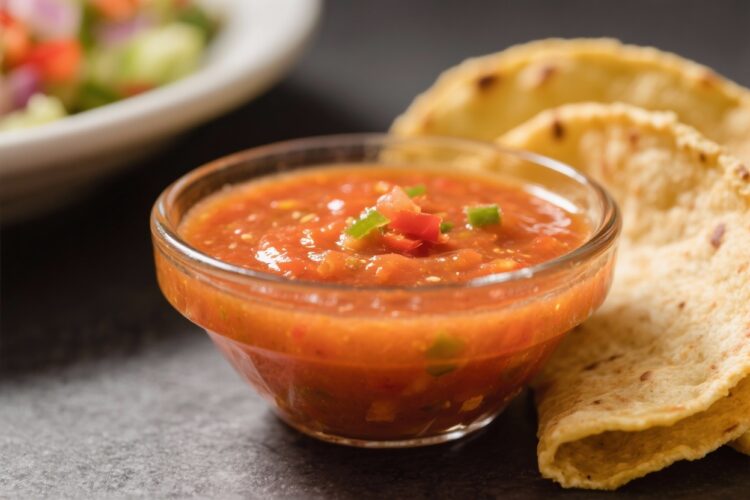
If you’ve ever unwrapped a taco from a street stand and reached for the creamy orange salsa, this is the one. Salsa taquera is silky, spicy, and built to cling to meat, tortillas, and roasted veggies. It’s bold without being overwhelming, and it always tastes fresher than anything from a jar.
The best part? You can make it at home with a handful of ingredients and a blender. Once you try it, you’ll want a jar in your fridge at all times.
What Makes This Recipe So Good
- That signature smooth texture: Boiled and blended chiles create a velvety sauce that pours easily and coats food beautifully.
- Bright, balanced heat: It’s spicy, but rounded out with onion, garlic, and a little acidity, so it complements rather than overpowers.
- Simple pantry ingredients: No rare items needed.
Just dried chiles, aromatics, oil, and vinegar or lime.
- Versatile: Amazing on tacos al pastor, carne asada, carnitas, grilled chicken, roasted vegetables, eggs, and even as a dip with chips.
- Make-ahead friendly: The flavor actually improves after a night in the fridge.
Ingredients
- 8–10 dried árbol chiles (for heat)
- 4 dried guajillo chiles, stems and seeds removed (for color and body)
- 2 medium Roma tomatoes, cored
- 1/2 medium white onion, peeled and halved
- 2–3 garlic cloves, peeled
- 2–3 tablespoons neutral oil (vegetable, canola, or avocado)
- 1–2 tablespoons white vinegar or apple cider vinegar (or juice of 1 lime)
- 1/2–3/4 teaspoon kosher salt, plus more to taste
- 1/4–1/2 cup water or cooking liquid, as needed
- Optional: 1 small carrot, peeled and chopped (adds sweetness and a thicker body)
Step-by-Step Instructions
- Prep the chiles: Remove stems and most seeds from the guajillos. Leave the stems on the árbol chiles for now to make handling easier; you can shake out seeds if you want less heat.
- Toast the chiles: Warm a dry skillet over medium heat. Toast the chiles in batches, pressing them lightly for 10–20 seconds per side until fragrant and slightly darkened. Do not burn or they’ll turn bitter.
- Soften the chiles: Place toasted chiles in a bowl and cover with hot water.
Let them soak for 10–15 minutes until pliable. Reserve 1/2 cup of the soaking liquid.
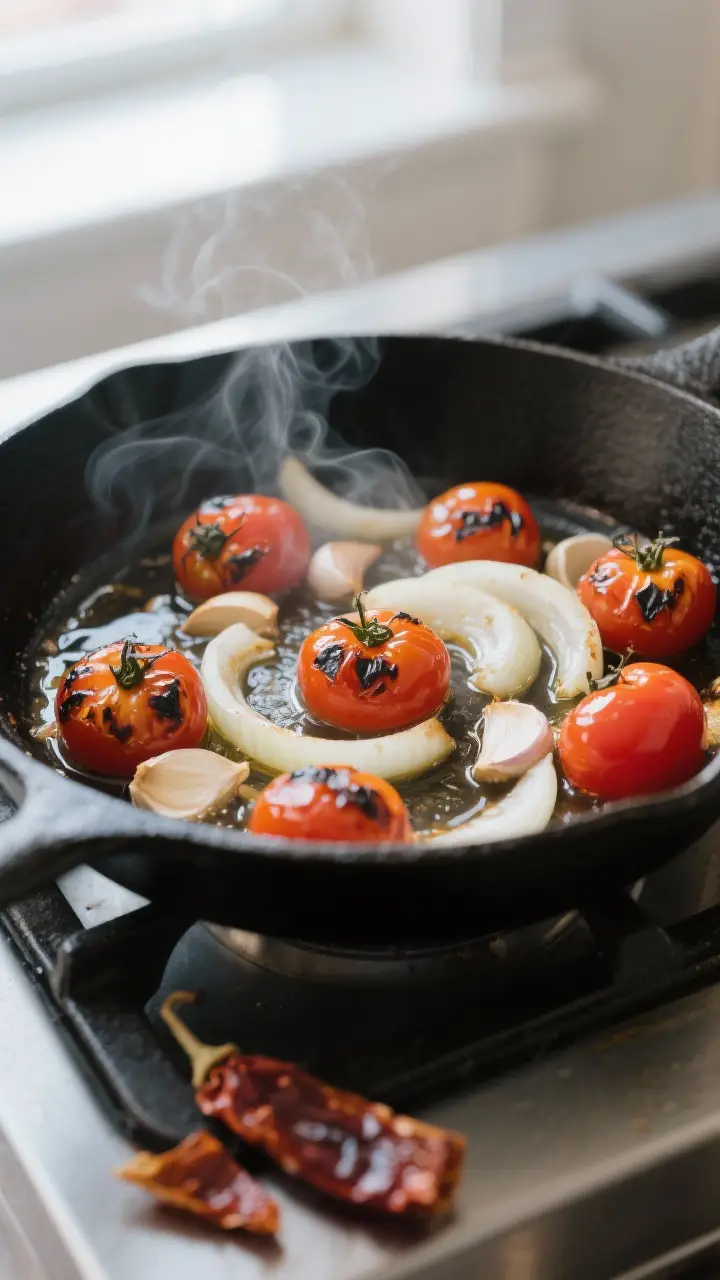
- Cook the vegetables: In the same skillet, add a drizzle of oil. Cook the onion, garlic, and tomatoes (and carrot if using) over medium heat until lightly blistered and softened, about 6–8 minutes.
You’re looking for a little char and sweetness.
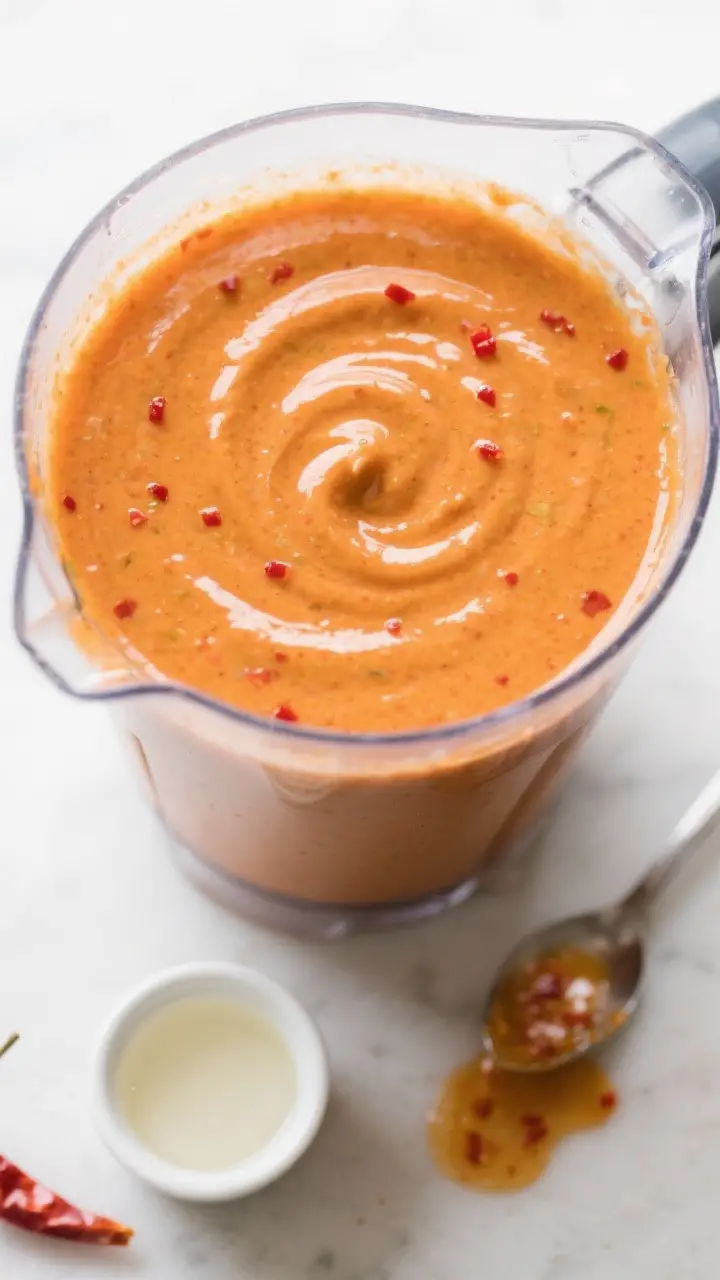
- Blend the base: Drain the chiles. Add chiles, tomatoes, onion, garlic, 1/4 cup soaking liquid or water, and 1/2 teaspoon salt to a blender. Blend until very smooth, adding more liquid as needed to reach a pourable but thick consistency.
- Emulsify with oil: With the blender running on low, stream in 2–3 tablespoons of neutral oil.
This creates the signature silky texture and orange glow. Blend until completely smooth.
- Balance the acidity: Add vinegar or lime juice to taste. Start with 1 tablespoon, blend, then taste and adjust.
You want a bright finish that lifts the heat.
- Adjust seasoning: Add more salt, a splash more vinegar, or a bit more liquid to loosen if needed. It should taste bold, slightly tangy, and pleasantly spicy.
- Optional simmer: For deeper flavor and better keeping quality, pour the salsa into a small pot and simmer on low for 5–7 minutes, stirring occasionally. Cool before storing.
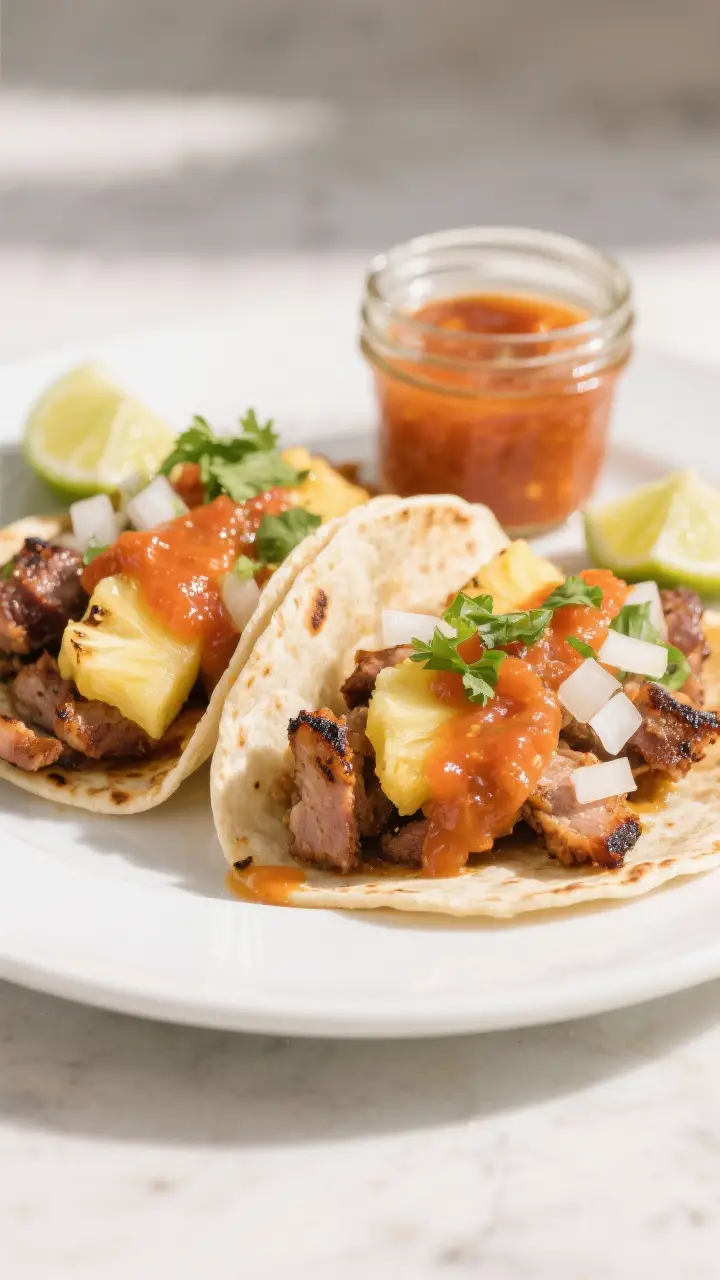
- Serve: Spoon over tacos, burritos, quesadillas, grilled meats, or roasted veggies.
It also makes a great table salsa.
How to Store
- Refrigerator: Store in a clean, airtight jar for up to 7–10 days. The flavor improves after 24 hours.
- Freezer: Freeze in small containers or ice cube trays for up to 3 months. Thaw in the fridge and whisk before serving.
- Food safety tip: Use a clean spoon each time to prevent contamination, and label with the date.
Benefits of This Recipe
- Cost-effective: Dried chiles are inexpensive and make a large batch.
- Customizable heat: Control the spice level by adjusting the number of árbol chiles or removing seeds.
- Better-than-store-bought: No additives, just fresh ingredients and big flavor.
- Meal-prep friendly: Keeps well and instantly upgrades leftovers or quick weeknight meals.
- Naturally vegan and gluten-free: Simple, whole ingredients that fit many diets.
Common Mistakes to Avoid
- Burning the chiles: Over-toasting makes the salsa bitter.
Keep the heat moderate and toast briefly.
- Skipping the oil: The oil isn’t just for richness—it creates the smooth, taquera-style texture and color.
- Under-blending: This salsa should be silky. Blend longer than you think, and add a bit more liquid if needed.
- Forgetting acidity: A splash of vinegar or lime wakes everything up. Without it, the salsa can taste flat.
- Over-salting early: Salt gradually.
The flavors intensify after resting and especially after simmering.
Alternatives
- Chiles: Swap guajillo with ancho for a slightly sweeter profile. If you can’t find árbol chiles, use a pinch of cayenne or a couple of dried japones for heat.
- Tomato-free version: Use 1 roasted tomatillo and 1 small carrot instead of tomatoes for a tangier, equally smooth salsa.
- Smoky note: Add a small piece of chipotle in adobo for smoky heat. Start with half a pepper and adjust.
- Oil-free: You can omit oil and rely on extra blending and a small boiled carrot for body.
It won’t be as silky but still tasty.
- Extra-creamy taquera style: Blend in 1–2 tablespoons of mayo or Mexican crema for a richer, taco-truck vibe. This version should be refrigerated and used within 5–6 days.
FAQ
How spicy is salsa taquera?
It’s medium to hot, depending on the number of árbol chiles and whether you keep the seeds. Start with fewer chiles and add more after tasting if you’re sensitive to heat.
Can I use fresh chiles instead of dried?
You can, but the flavor will be different.
Dried chiles provide depth and that classic taquera taste. If using fresh, roast them well to build complexity.
Why is my salsa bitter?
Bitter salsa usually comes from burnt chiles. Toast lightly and soak them properly.
If it’s already bitter, add a bit more acidity and a pinch of sugar or a small piece of cooked carrot to balance.
Do I have to simmer the salsa?
No, but a brief simmer melds flavors and extends shelf life. If you’re in a rush, you can skip it and still get great results.
What can I serve this with besides tacos?
It’s great on breakfast eggs, grilled shrimp, roasted cauliflower, quesadillas, and grain bowls. It also makes a punchy base for spicy ranch or mayo spreads.
Can I make it in a food processor?
Yes, but it may not get quite as smooth.
Process longer and add a little more liquid to help it along.
How do I keep the color bright orange?
Use guajillo chiles, blend thoroughly, and emulsify with oil. A touch of carrot and a splash of vinegar also help keep the color vibrant.
In Conclusion
Salsa taquera is the saucy secret that makes taco-stand meals so craveable. With a few dried chiles, some simple aromatics, and a good blend, you can get that smooth, spicy, orange salsa at home anytime.
Keep a jar in the fridge and you’ll have an instant flavor upgrade ready for tacos, eggs, and everything in between. Simple ingredients, big payoff—exactly what a great salsa should be.
Printable Recipe Card
Want just the essential recipe details without scrolling through the article? Get our printable recipe card with just the ingredients and instructions.