

Pot bread is the kind of recipe that rewards you with big results for very little effort. You mix a simple dough, let it rest, then bake it in a pot for a crackly crust and tender, airy interior. It’s perfect for beginners and satisfying for seasoned bakers.
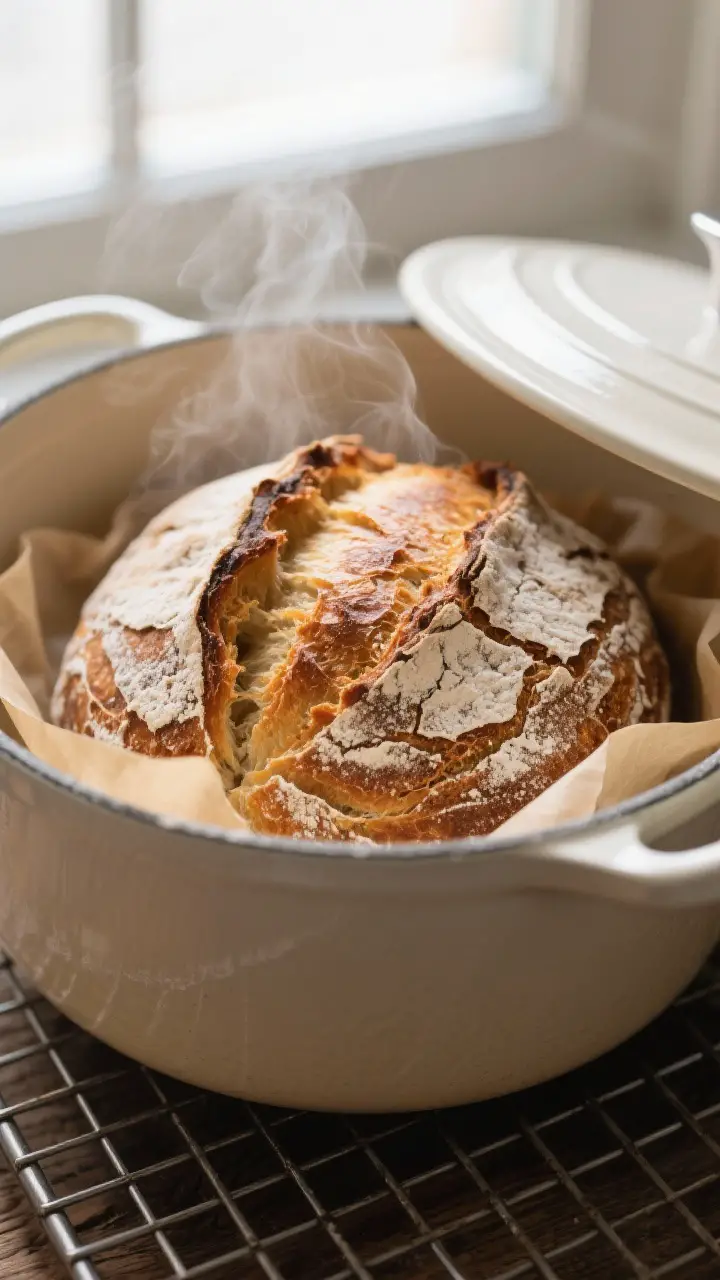
The pot traps steam, which is the secret to that bakery-style crust. Whether you’re serving it with soup, making toast, or just tearing off a warm piece with butter, this bread delivers every time.
What Makes This Recipe So Good
- Low effort, high reward: The dough is simple and forgiving. No fancy techniques needed.
- Crust you’ll crave: Baking in a covered pot creates steam for a crisp, crackly crust.
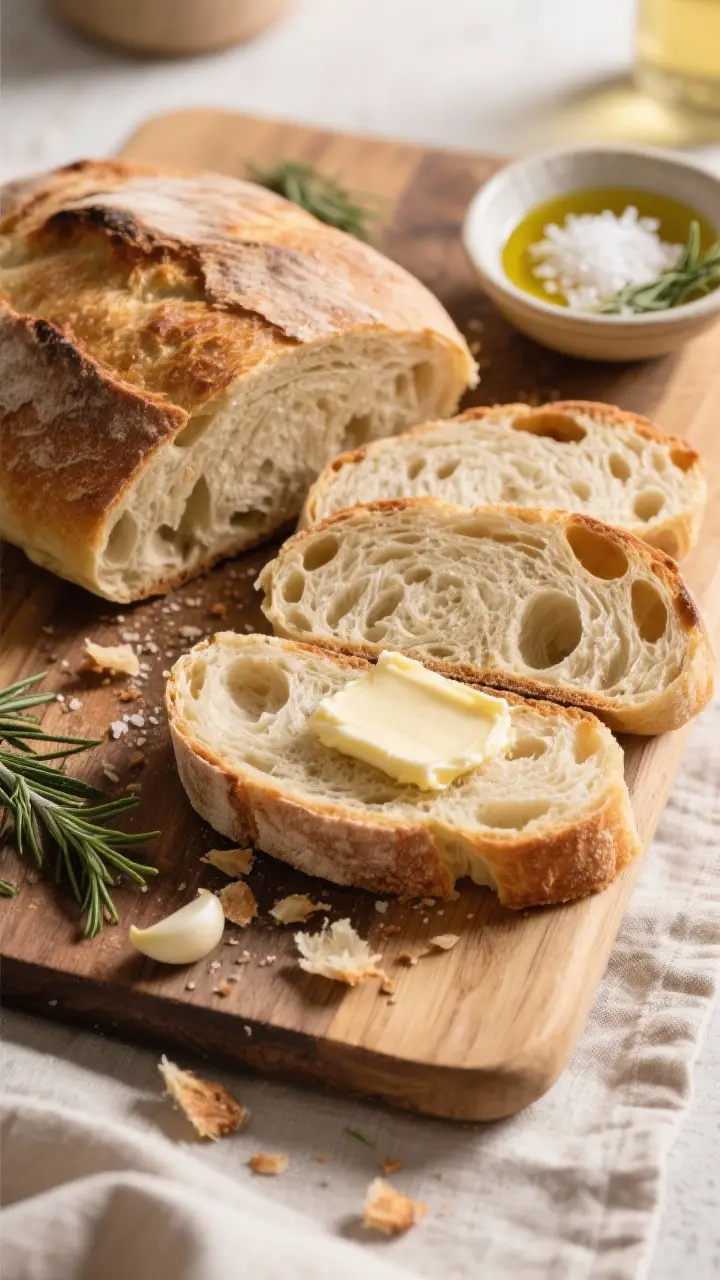
- Soft, open crumb: The inside stays moist and airy, perfect for spreading or dipping.
- Flexible timing: You can do a long, slow rise overnight or a quicker rise the same day.
- Basic ingredients: Flour, water, yeast, and salt—things you probably already have.
Shopping List
- All-purpose flour (3 cups / 360 g) or bread flour for a chewier texture
- Warm water (1 1/2 cups / 360 ml, about 100–110°F / 38–43°C)
- Active dry yeast (1/2 teaspoon) or instant yeast (1/2 teaspoon)
- Fine sea salt (1 1/4 teaspoons)
- Optional: Olive oil (1 tablespoon) for a softer crust
- Optional add-ins: Herbs, garlic, shredded cheese, seeds, olives
- Equipment: Heavy oven-safe pot with lid (Dutch oven, 4–6 quarts), parchment paper, mixing bowl
Step-by-Step Instructions
- Mix the dough. In a large bowl, whisk flour, salt, and yeast.
Add warm water and stir with a spoon until a shaggy, sticky dough forms. If using olive oil, mix it in. The dough should be a bit tacky.
- First rise. Cover the bowl with plastic wrap or a clean towel.
Let it rise at room temperature until doubled and bubbly. Overnight (10–14 hours) gives the best flavor, but 2–3 hours works if you’re in a hurry.
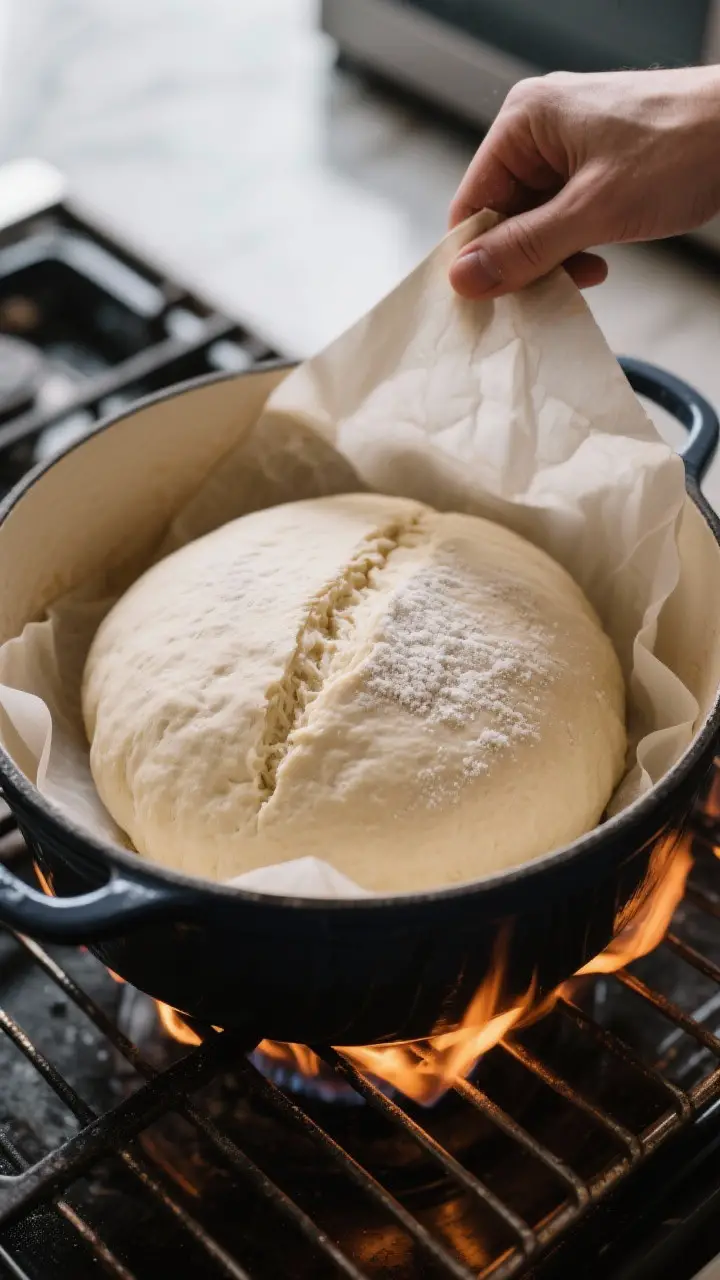
- Shape gently. Lightly flour your hands and a piece of parchment. Turn the dough onto the parchment. Fold the edges toward the center a few times to form a round.
Don’t knead; you want to keep the air in. Flip it seam-side down.
- Second rise. Cover the shaped dough loosely and let it rest 30–45 minutes. It should puff slightly.
Meanwhile, place your pot with the lid in the oven and preheat to 450°F (230°C) for at least 30 minutes.
- Transfer to the hot pot. Using the parchment as a sling, carefully lower the dough into the preheated pot. Cover with the lid. Work carefully—everything is very hot.
- Bake covered. Bake for 30 minutes with the lid on. This traps steam and builds that beautiful crust.
- Finish uncovered. Remove the lid and bake another 12–18 minutes, until the crust is deep golden-brown and the loaf sounds hollow when tapped.
Internal temperature should be around 205–210°F (96–99°C).
- Cool before slicing. Lift the bread out using the parchment and cool on a rack at least 45 minutes. This sets the crumb and prevents gumminess.
Storage Instructions
- Room temperature: Store the loaf cut-side down on a board or in a paper bag for up to 2 days. Avoid plastic, which softens the crust.
- Longer storage: Wrap in foil and freeze for up to 2 months.
Thaw at room temperature, then refresh in a 350°F (175°C) oven for 8–10 minutes.
- Sliced option: Slice before freezing, then toast slices straight from the freezer.
Health Benefits
- Simple, whole ingredients: No additives or preservatives. You control the salt and add-ins.
- Potential for whole grains: Swap in 25–50% whole wheat for more fiber, minerals, and a nuttier flavor.
- Satiating carbs: Bread provides quick energy; pairing with protein and fat (like eggs, cheese, or olive oil) gives steady fullness.
- Fermentation perks: A longer rise can make gluten easier to digest for some people and deepens flavor.
Pitfalls to Watch Out For
- Water too hot: Anything above about 120°F can kill yeast. Aim for warm bath water, not hot.
- Under-proofing: If the dough hasn’t visibly puffed, the loaf may bake up dense.
Give it more time, especially in a cool kitchen.
- Over-flouring during shaping: Too much flour tightens the dough and dries the crust. Use just enough to handle it.
- Skipping the preheat: The pot must be blazing hot for the best oven spring and crust.
- Cutting too soon: Slicing hot bread compresses the crumb and makes it gummy. Let it rest.
Recipe Variations
- Whole Wheat Pot Bread: Replace 1 to 1 1/2 cups of the flour with whole wheat.
Add 1–2 tablespoons extra water if the dough feels stiff.
- Herb and Garlic: Add 2 teaspoons dried herbs (rosemary, thyme, Italian seasoning) and 2–3 minced garlic cloves to the dry ingredients.
- Olive and Rosemary: Fold in 1/2 cup chopped, well-drained olives and 1 tablespoon chopped fresh rosemary during mixing.
- Cheddar Jalapeño: Mix in 3/4 cup shredded sharp cheddar and 1 finely chopped jalapeño (seeds removed for less heat).
- Seeded Crust: Sprinkle the top with sesame, poppy, or sunflower seeds before baking for extra crunch.
- Sourdough Hybrid: Replace 1/2 cup water and 1/2 cup flour with 1 cup active sourdough starter. Use just a pinch of yeast and extend the first rise.
FAQ
What kind of pot should I use?
A heavy, oven-safe pot with a tight lid works best—think cast-iron Dutch oven, enameled cast iron, or a thick ceramic pot rated for high heat. A 4–6 quart size is ideal for this dough amount.
Do I need parchment paper?
It makes transferring the dough safer and prevents sticking, but you can skip it if you generously flour the pot or lightly oil it.
Still, parchment is the most reliable and easiest to handle.
Can I use whole wheat flour only?
You can, but expect a denser loaf. For a lighter texture with whole wheat flavor, use a 50/50 mix and add a splash more water if needed.
How do I know if my dough has risen enough?
Look for a noticeably puffy dough with bubbles on the surface. If you gently press it with a floured finger, it should slowly spring back but leave a slight indent.
What if I don’t have yeast?
Use a fed sourdough starter instead.
Replace part of the flour and water with starter, extend the rise until doubled, and bake as instructed. Timing depends on your starter’s strength.
Why is my crust too hard?
You may have baked too long or at too high a temperature, or stored it in a way that dried it out. Try reducing the final uncovered time by a few minutes, and store in a paper bag.
Can I add sugar or honey?
Yes.
A tablespoon of sugar or honey can add mild sweetness and help the crust brown a bit more. It won’t drastically change the texture.
Is kneading necessary?
No. This is a no-knead style bread.
Time and moisture develop gluten for you. Gentle folding during shaping is enough.
Can I make smaller loaves?
Absolutely. Divide the dough in half and bake in a smaller pot or one at a time.
Reduce the bake time slightly—check for color and internal temperature.
What’s the best way to re-crisp the crust?
Warm the loaf or slices in a 350°F (175°C) oven for 5–10 minutes. This refreshes the crust without drying the interior too much.
Wrapping Up
Pot bread is a simple, reliable way to bake bakery-quality bread at home. With a short ingredient list and hands-off rising time, it fits into busy schedules and still turns out a beautiful loaf.
Use the base recipe as your canvas, then riff with herbs, cheeses, or whole grains. Once you see how easy it is, this method will become your go-to for weeknights, weekends, and everything in between.
Printable Recipe Card
Want just the essential recipe details without scrolling through the article? Get our printable recipe card with just the ingredients and instructions.