
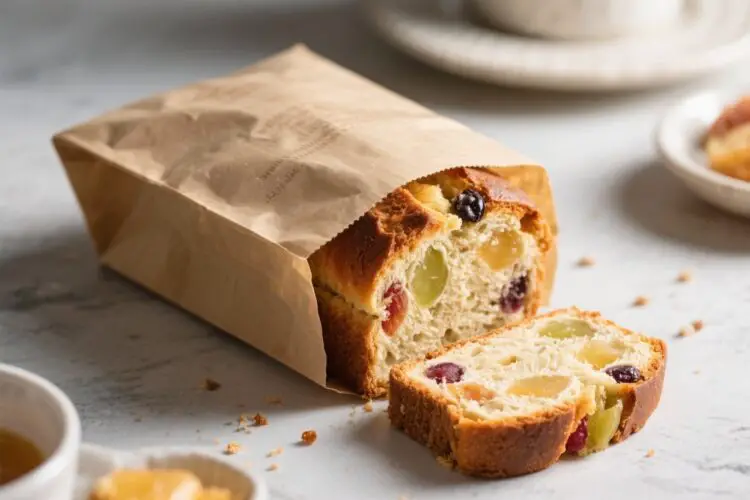
There’s something charming about baking that feels a little old-fashioned, especially when it delivers such great results. Paper Bag Fruit Bread brings that feeling to your kitchen—simple ingredients, a gentle bake, and a rustic loaf that tastes like home. The paper bag acts like a mini oven, keeping the bread moist while building a crisp crust.
It’s the kind of recipe you’ll want to make for weekend brunch, holiday gifts, or whenever your fruit bowl is overflowing. The best part? It’s easy, adaptable, and smells incredible as it bakes.
Why This Recipe Works
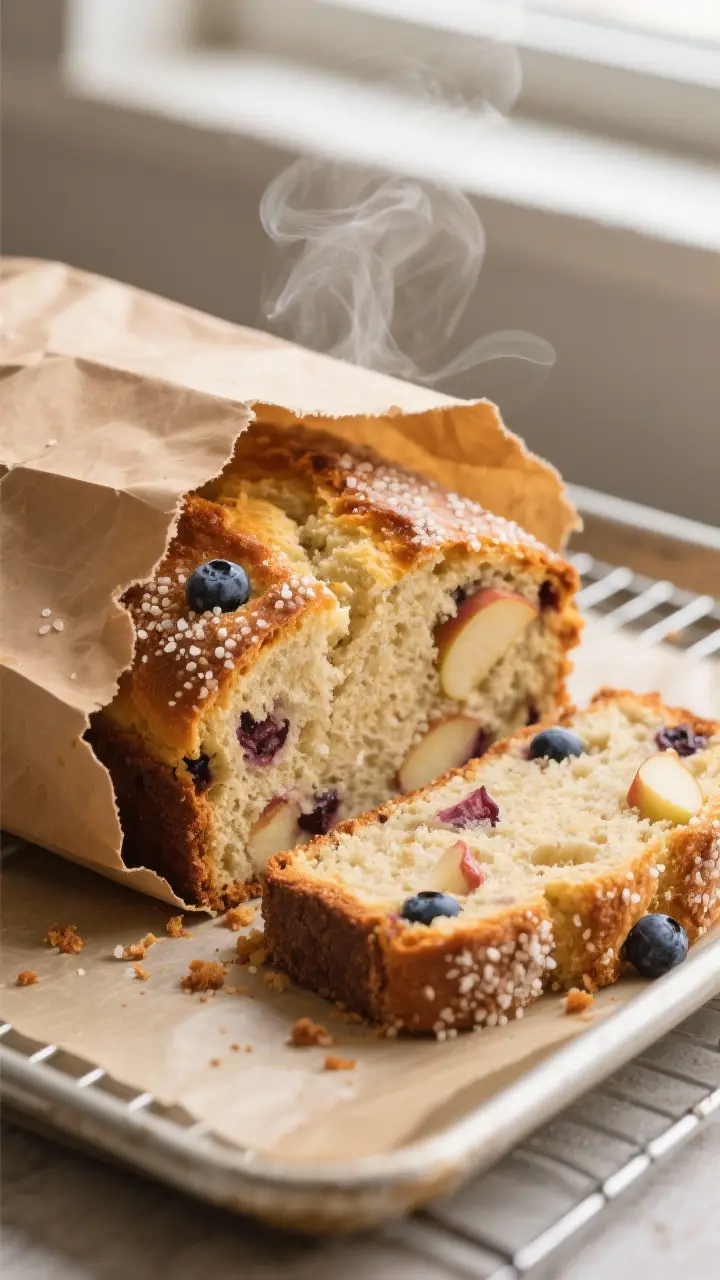
- Moist interior, crisp crust: Baking in a paper bag traps gentle steam around the loaf, which keeps the crumb soft while still allowing the outside to brown.
- Even baking: The bag reduces hot spots and over-browning, especially for a fruit-heavy batter that needs a little extra time.
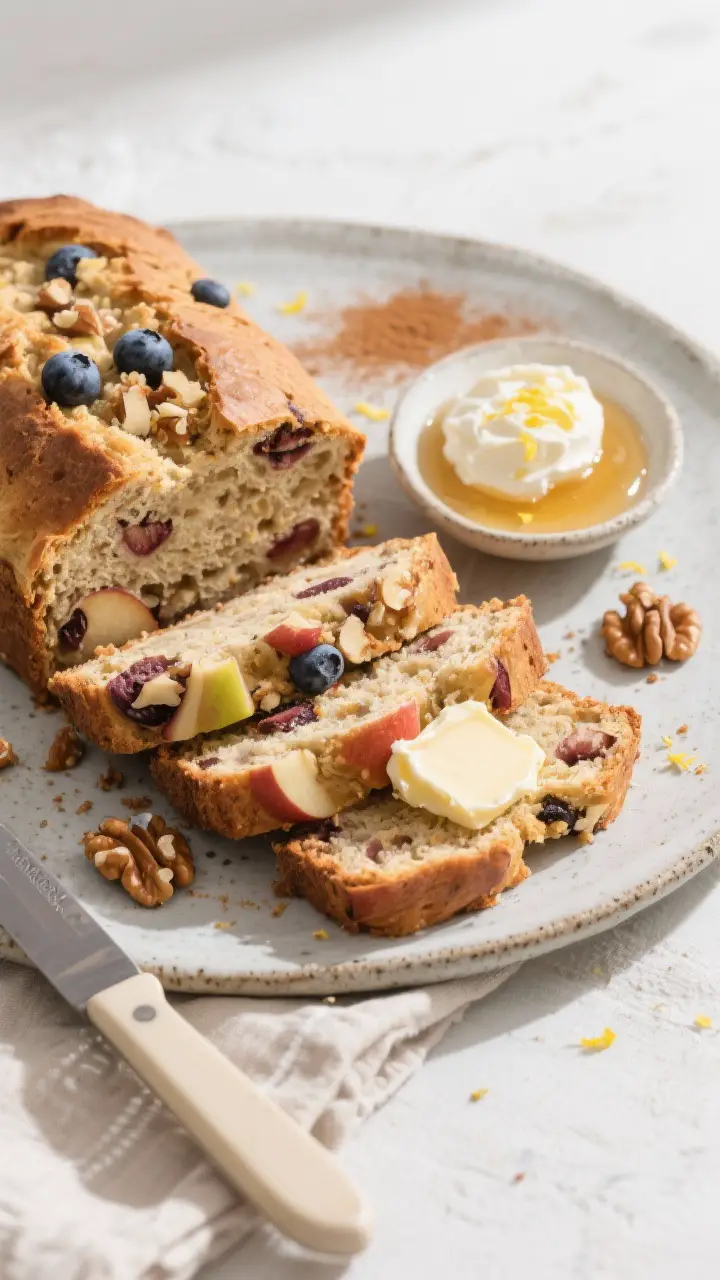
- Flexible fruit mix-ins: Use whatever you have—apples, pears, berries, dried fruit—without compromising texture.
- Simple pantry base: No fancy equipment needed, just basic baking staples and a plain brown paper lunch bag.
- Perfect for gifting: The loaf holds its shape well and slices beautifully, making it ideal for sharing.
What You’ll Need
- 1 3/4 cups (220 g) all-purpose flour
- 1 teaspoon baking powder
- 1/2 teaspoon baking soda
- 1/2 teaspoon fine salt
- 1 teaspoon ground cinnamon (optional but recommended)
- 1/4 teaspoon ground nutmeg (optional)
- 1/2 cup (110 g) granulated sugar
- 1/2 cup (110 g) light brown sugar, packed
- 2 large eggs, room temperature
- 1/2 cup (120 ml) neutral oil (canola, sunflower, or light olive oil)
- 1/2 cup (120 ml) plain yogurt or buttermilk
- 1 teaspoon vanilla extract
- 1 1/2 to 2 cups chopped fruit (apples, pears, firm bananas, blueberries, or a mix)
- 1/2 cup chopped nuts or dried fruit (walnuts, pecans, raisins, cranberries), optional
- 1 tablespoon coarse sugar for topping, optional
- 1 plain brown paper lunch bag (unwaxed, food-safe)
- Butter or oil for greasing the bag
Step-by-Step Instructions
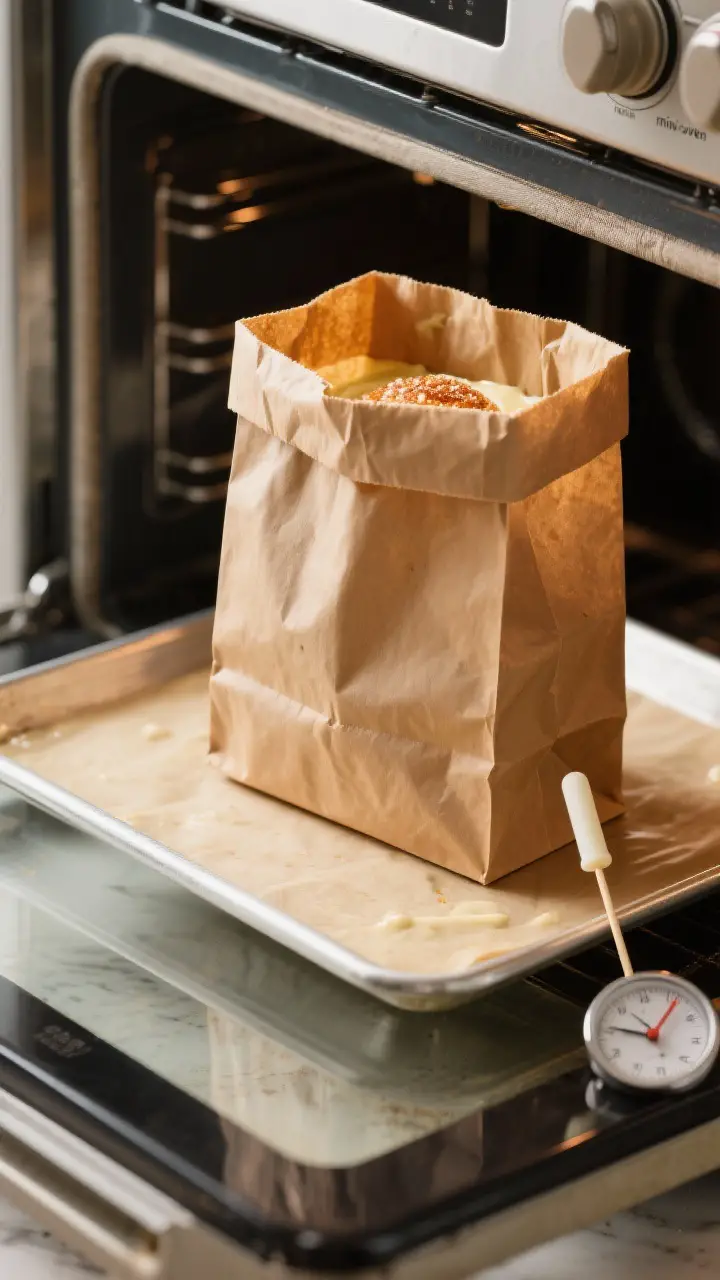
- Prep your bag and oven: Preheat the oven to 350°F (175°C).
Open a brown paper lunch bag and lightly grease the inside with butter or oil. Place the bag on a baking sheet to keep it steady.
- Mix the dry ingredients: In a large bowl, whisk together flour, baking powder, baking soda, salt, cinnamon, and nutmeg. This helps prevent clumps and ensures even flavor.
- Whisk the wet ingredients: In another bowl, whisk the granulated sugar, brown sugar, eggs, oil, yogurt (or buttermilk), and vanilla until smooth and slightly thick.
- Combine gently: Pour the wet mixture into the dry ingredients.
Stir with a spatula until just combined. Do not overmix; a few streaks of flour are fine.
- Fold in fruit and extras: Add the chopped fruit and any nuts or dried fruit. Fold gently to distribute. If using very juicy fruit, pat it dry first to avoid excess moisture.
- Fill the paper bag: Spoon the batter into the greased bag, guiding it to the bottom and smoothing the top.
Sprinkle with coarse sugar if you like. Fold the top of the bag over twice to close; no need to seal tightly.
- Bake: Set the bag on the baking sheet and bake for 55–70 minutes. Start checking at 55 minutes.
The bread is done when a skewer inserted into the center comes out clean or with a few moist crumbs.
- Cool carefully: Remove the baking sheet from the oven and let the bag sit for 10 minutes. Tear the bag open along the sides, then lift the loaf onto a rack to cool completely before slicing.
- Slice and serve: Use a serrated knife to cut neat slices. Serve warm or at room temperature with butter, cream cheese, or a drizzle of honey.
Storage Instructions
- Room temperature: Wrap tightly in foil or store in an airtight container for up to 3 days.
- Refrigerator: Keeps up to 1 week, wrapped well.
Warm slices briefly in the toaster oven for best texture.
- Freezer: Freeze whole or sliced, double-wrapped, for up to 3 months. Thaw overnight in the fridge or at room temp for a few hours.
- Moisture tip: If the bread dries out slightly, a quick toast or a short microwave burst with a damp paper towel restores softness.
Why This is Good for You
- Fruit-forward: Fresh fruit adds fiber, vitamins, and natural sweetness, letting you keep total sugar moderate.
- Balanced fats: Using oil gives a tender crumb and stays soft even when chilled.
- Customizable add-ins: Nuts bring healthy fats and a protein boost, while spices like cinnamon offer antioxidants and flavor without extra calories.
- Portion friendly: The loaf slices well, making it easier to enjoy reasonable portions without crumbling.
Common Mistakes to Avoid
- Using a waxed or coated bag: Only use plain, unwaxed brown paper. Coated bags can melt or smoke.
- Overmixing the batter: This develops gluten and makes the bread tough.
Stir just until combined.
- Too-wet fruit: High-moisture fruit can make the center gummy. Pat fruit dry and avoid overripe, mushy pieces.
- Overfilling the bag: Leave room for rise. A standard lunch bag should be about half to two-thirds full.
- Skipping doneness checks: Ovens vary.
Start testing at 55 minutes and continue every 5–7 minutes.
- Cutting too soon: Let the loaf cool so it sets. Slicing hot bread can make it crumble.
Alternatives
- Dairy-free: Use dairy-free yogurt or plant milk with 1 teaspoon vinegar to mimic buttermilk.
- Whole-grain: Swap up to 50% of the all-purpose flour for whole wheat flour. Add 1–2 tablespoons extra yogurt if batter seems thick.
- Gluten-free: Use a 1:1 gluten-free baking blend with xanthan gum.
Check doneness 5–10 minutes early.
- Sugar swaps: Replace part of the sugar with maple syrup or honey; reduce yogurt by 2 tablespoons to balance moisture.
- Spice variations: Try cardamom, ginger, or pumpkin pie spice. Citrus zest brightens berry-heavy loaves.
- No paper bag: Use a standard 8×4-inch loaf pan lined with parchment; baking time is similar.
FAQ
Is it safe to bake in a paper bag?
Yes, as long as you use a plain, unwaxed brown paper bag and keep the oven at or below 350°F (175°C). The moisture from the batter and the moderate temperature help prevent scorching.
Always place the bag on a baking sheet for stability.
Can I use frozen fruit?
Yes. Do not thaw; toss the frozen fruit with a teaspoon of flour and fold it in straight from the freezer. Add a few extra minutes to the bake time if needed.
What fruits work best?
Firm apples, pears, blueberries, cranberries, and chopped firm bananas work well.
Avoid very watery fruits like melon or overripe peaches, which can make the loaf dense.
My bread is browning too fast. What should I do?
Slide a loose tent of foil over the bag or reduce the oven temperature by 15°F (about 10°C). Continue baking until the center tests done.
Can I make muffins instead?
Absolutely.
Line a 12-cup muffin tin and bake at 350°F (175°C) for 18–24 minutes, or until a tester comes out clean.
How do I know it’s done?
A skewer inserted in the center should come out clean or with a few moist crumbs. The top should spring back when lightly pressed, and the loaf should feel set, not jiggly.
Can I add a glaze?
Yes. A simple lemon or vanilla glaze (powdered sugar plus a little citrus juice or milk) drizzled on the cooled loaf adds sweetness and shine.
What if I don’t have yogurt or buttermilk?
Use regular milk mixed with 1 teaspoon vinegar or lemon juice and let it sit for 5 minutes.
Or swap in sour cream thinned with a splash of milk.
Final Thoughts
Paper Bag Fruit Bread is a nostalgic, low-fuss bake that rewards you with a tender, fruit-studded loaf and a golden crust. The paper bag trick keeps things moist and forgiving, even if you’re not a frequent baker. Keep the base recipe handy, then adapt it to whatever fruit you have on hand.
It’s simple, cozy, and reliably delicious—just the kind of recipe you’ll reach for again and again.
Printable Recipe Card
Want just the essential recipe details without scrolling through the article? Get our printable recipe card with just the ingredients and instructions.