
If you love crunchy tacos but want an easier, hands-off method, oven tacos are the move. You still get that golden shell and melty cheese, but you bake everything together so the flavors mingle and dinner hits the table fast. This version is hearty, customizable, and perfect for busy weeknights or casual get-togethers.
The prep is simple, cleanup is easy, and you can load each taco exactly how you like it. One pan, big flavor, minimal effort.
What Makes This Recipe So Good
- Hands-off cooking: Most of the magic happens in the oven, so you’re not babysitting a skillet at the stove.
- Extra crispy shells: Baking gives hard taco shells a toasty crunch that holds up to juicy fillings.
- Mega melty cheese: Everything warms together, so the cheese melts into the meat for a unified, restaurant-style bite.
- Great for a crowd: Build a tray of tacos, bake, and serve. It scales easily and looks impressive.
- Flexible fillings: Beef, turkey, beans, or veggies—this format works with what you have.
Shopping List
- 12 hard taco shells (stand-and-stuff style if possible)
- 1 pound ground beef (or ground turkey)
- 1 small onion, finely diced
- 2 cloves garlic, minced
- 1 packet taco seasoning (or 2–3 tablespoons homemade)
- 1/2 cup tomato sauce or crushed tomatoes
- 1/2 cup black beans, drained and rinsed (optional)
- 1 cup shredded cheddar or Mexican blend cheese
- 1/2 cup corn kernels (fresh, frozen, or canned; optional)
- 1 tablespoon olive oil
- Salt and pepper to taste
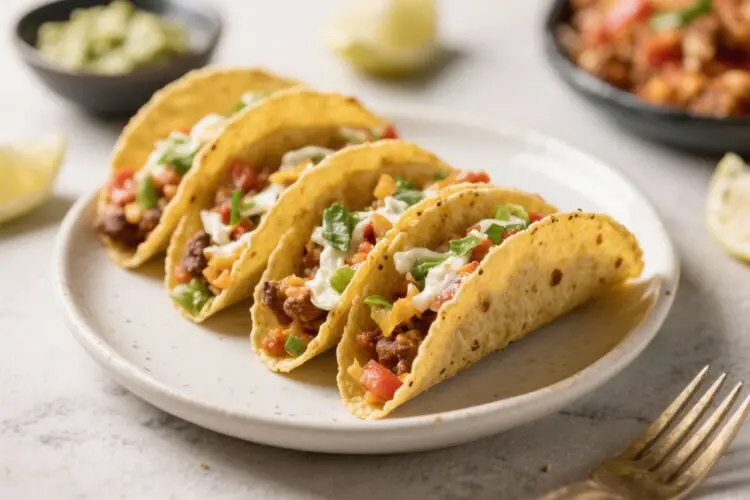
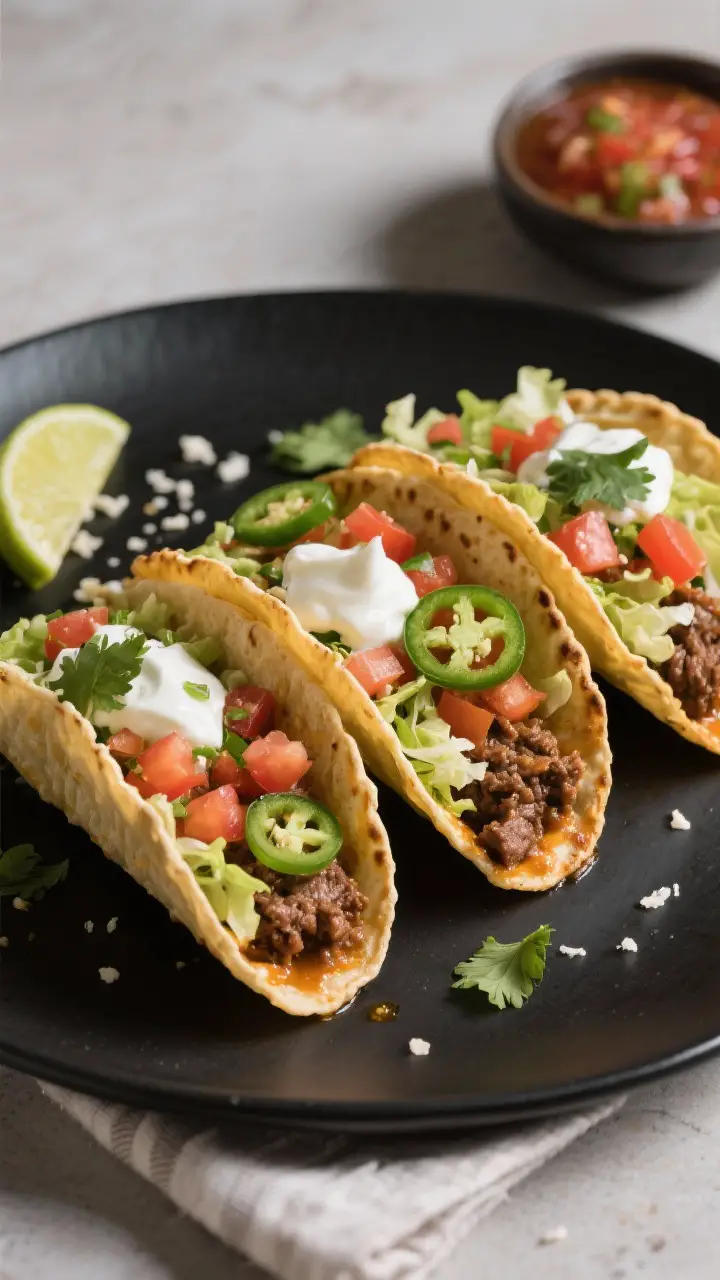
- Shredded lettuce
- Diced tomatoes or pico de gallo
- Sour cream or Greek yogurt
- Sliced jalapeños (optional)
- Fresh cilantro and lime wedges for serving
Step-by-Step Instructions
- Preheat the oven: Set your oven to 375°F (190°C).
Line a large baking sheet or 9×13-inch baking dish with foil for easy cleanup.
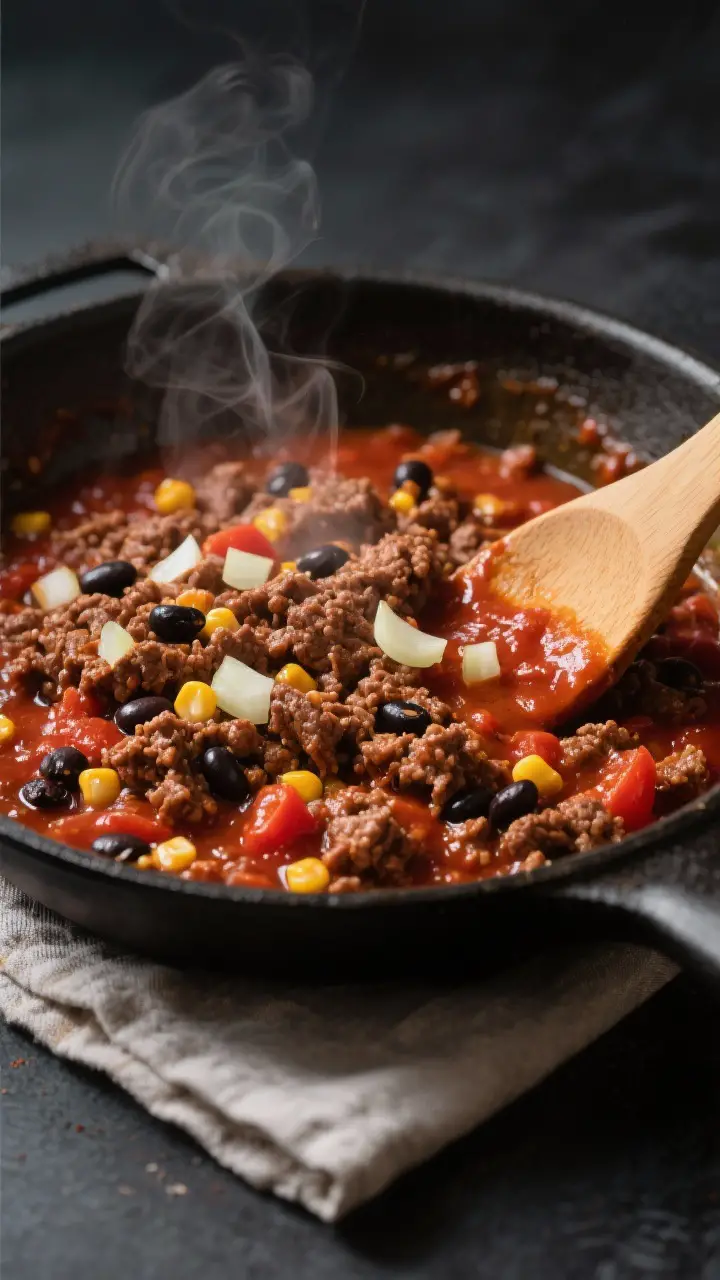
- Sauté the aromatics: Heat olive oil in a skillet over medium. Add diced onion and cook 3–4 minutes until softened. Stir in garlic and cook 30 seconds until fragrant.
- Brown the meat: Add ground beef.
Break it up with a spatula and cook until no longer pink, about 6–8 minutes. Drain excess fat if needed.
- Season and simmer: Sprinkle in taco seasoning, then stir in tomato sauce. Add black beans and corn if using.
Simmer 2–3 minutes to thicken. Taste and season with salt and pepper.
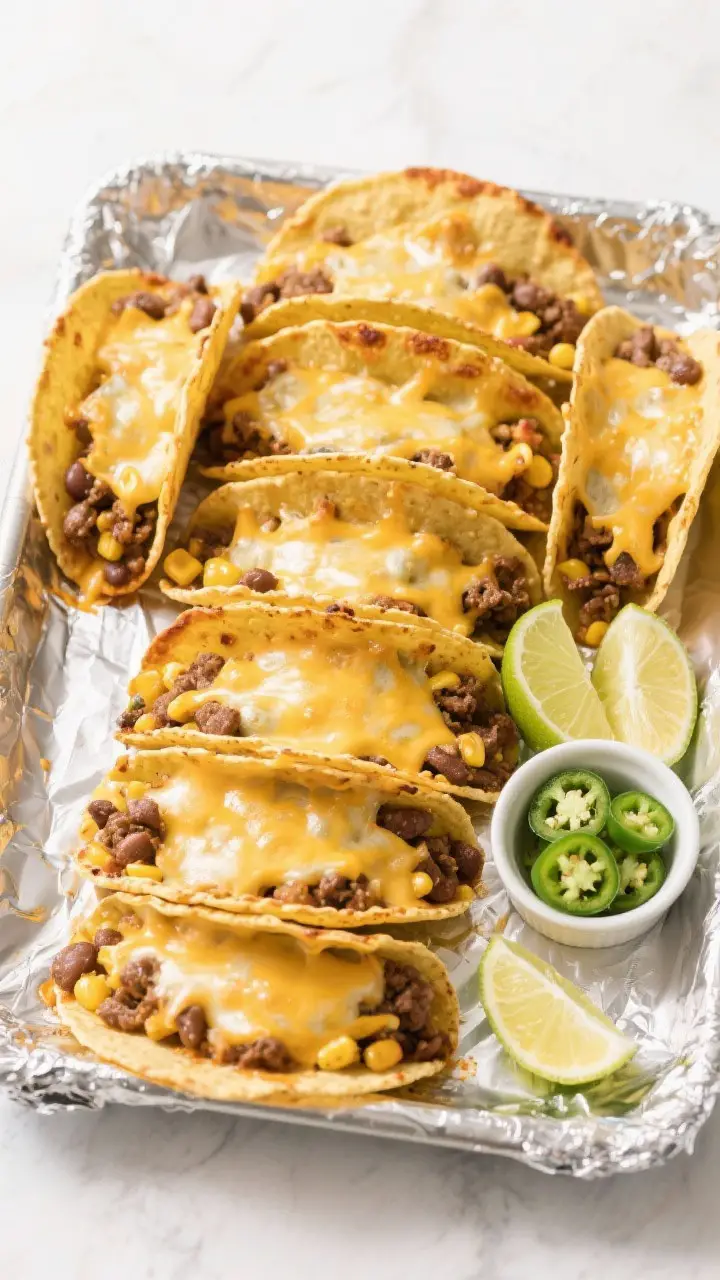
- Prep the shells: Arrange taco shells upright in the baking dish or on the sheet. If they tip, nestle them together or use crumpled foil to help them stand.
- Fill and cheese: Spoon a generous amount of meat mixture into each shell, about two heaping tablespoons.
Top with shredded cheese.
- Bake: Transfer to the oven and bake for 8–10 minutes, until the shells are toasty and the cheese is melty and bubbly.
- Top and serve: Add lettuce, tomatoes, jalapeños, and a dollop of sour cream or yogurt. Finish with cilantro and a squeeze of lime.
How to Store
- Refrigerate components separately: Store leftover meat filling in an airtight container for 3–4 days. Keep toppings separate to maintain freshness.
- Keep shells crisp: Store unfilled shells at room temperature in their box or a sealed bag.
Avoid refrigerating shells—they’ll soften.
- Reheat the filling gently: Warm in a skillet over medium heat or microwave in short bursts, adding a splash of water if it’s too thick.
- Assemble to order: For best texture, fill and bake only what you’ll eat, then assemble fresh next time.
Why This is Good for You
- Balanced macros: You get protein from the meat or beans, carbs from the shells, and fat from the cheese for a satisfying meal.
- Fiber boost: Adding black beans, corn, and lettuce increases fiber, which supports digestion and keeps you full longer.
- Customizable nutrition: Swap ground turkey or a bean-and-veggie mix to reduce saturated fat. Choose Greek yogurt instead of sour cream for extra protein.
- Built-in portion control: Tacos are naturally portioned, making it easier to serve the right amount without overthinking it.
What Not to Do
- Don’t overfill the shells: Too much filling makes them tip over and get soggy. Keep it generous but tidy.
- Don’t skip draining fat: Excess grease will soften shells and dull flavor.
Drain or blot if needed.
- Don’t add cold toppings before baking: Lettuce and tomatoes should go on after baking to stay crisp and fresh.
- Don’t bake too long: Overbaking dries out the filling and can scorch the shells. Watch for cheese to melt and edges to toast.
- Don’t rely only on seasoning packets: Taste and adjust with salt, pepper, and a squeeze of lime for brightness.
Recipe Variations
- Turkey and Veggie: Use ground turkey and fold in finely chopped bell peppers or zucchini with the onions.
- Bean and Cheese: Skip the meat and use a mix of black beans and pinto beans. Add a pinch of cumin and smoked paprika.
- Street-Style: Add a little chopped white onion and cilantro after baking.
Serve with lime and a sprinkle of cotija.
- Chipotle Beef: Stir in chopped chipotle peppers in adobo with the tomato sauce for smoky heat.
- Breakfast Tacos: Swap the meat for scrambled eggs and chorizo or bacon. Bake briefly just to melt the cheese.
- Low-Carb Option: Bake the filling and serve in lettuce cups or low-carb tortillas warmed separately.
- Cheesy Bottom Hack: Sprinkle a little cheese into the empty shells before the meat. It melts into a barrier that helps resist sogginess.
FAQ
Can I use soft tortillas instead of hard shells?
Yes.
Briefly warm small flour or corn tortillas to make them pliable, then fill and arrange them in a snug baking dish. Bake just until the cheese melts. They won’t crisp like hard shells but will be soft and toasty.
How do I prevent soggy shells?
Keep the filling thick by simmering off excess moisture, drain any fat, and bake the tacos right away after filling.
Adding a light sprinkle of cheese on the bottom of each shell before the meat also creates a barrier.
What cheese works best?
A melty blend like cheddar, Monterey Jack, or a Mexican blend works great. Pepper Jack adds a nice kick. Avoid very aged or crumbly cheeses that don’t melt smoothly.
Can I make these ahead?
Prep the filling and chop toppings up to two days in advance.
Store separately. Fill and bake right before serving so the shells stay crisp.
What if I don’t have taco seasoning?
Use chili powder, cumin, paprika, garlic powder, onion powder, oregano, salt, and pepper. Start with about 2 teaspoons chili powder, 1 teaspoon cumin, 1/2 teaspoon each paprika, garlic powder, and onion powder, plus a pinch of oregano.
Is this recipe spicy?
It’s mildly seasoned as written.
To increase heat, add jalapeños, cayenne, or chipotle in adobo. To keep it mild, skip the spicy additions and choose a mild seasoning blend.
Can I freeze the filling?
Absolutely. Cool it completely, then freeze in a zipper bag or container for up to 3 months.
Thaw in the fridge and reheat on the stove before assembling and baking.
Wrapping Up
Oven tacos bring the best parts of taco night together with less fuss. You get crisp shells, melty cheese, and a flavorful filling that’s easy to tweak for your crew. Keep the steps simple, finish with fresh toppings, and serve with lime on the side.
It’s a weeknight win and a crowd-pleaser every time.