
There’s something deeply comforting about a slow-cooked brisket that fills the house with rich, savory aromas. You don’t need a smoker to get that melt-in-your-mouth texture—your oven can do the heavy lifting. With a simple rub, low heat, and patience, you’ll end up with slices that are juicy and deeply flavored.
This is weekend cooking at its best: minimal fuss, big payoff, and perfect for feeding a crowd. Whether it’s your first brisket or your fiftieth, this method is steady, forgiving, and delicious.
What Makes This Special
This oven brisket uses a classic, straightforward technique that prioritizes moisture and flavor. A dry rub builds a savory crust, and a covered, low-and-slow roast keeps the meat tender.
You’ll get that familiar BBQ-style richness without needing any special equipment. It’s also flexible: you can keep it smoky, sweet, spicy, or herby, depending on your mood. Plus, the leftovers are even better the next day.
Shopping List
- Beef brisket, 4–6 pounds (first cut/flat preferred, with a fat cap)
- Kosher salt
- Black pepper, freshly ground
- Paprika (sweet or smoked)
- Garlic powder
- Onion powder
- Brown sugar (light or dark)
- Ground cumin
- Chili powder or ancho chili powder
- Mustard powder (optional, but great)
- Beef broth or stock
- Apple cider vinegar (or red wine vinegar)
- Worcestershire sauce
- Yellow onion, sliced
- Garlic cloves, smashed
- Bay leaves (optional)
- Olive oil or neutral oil
- Barbecue sauce (optional, for glazing or serving)
How to Make It

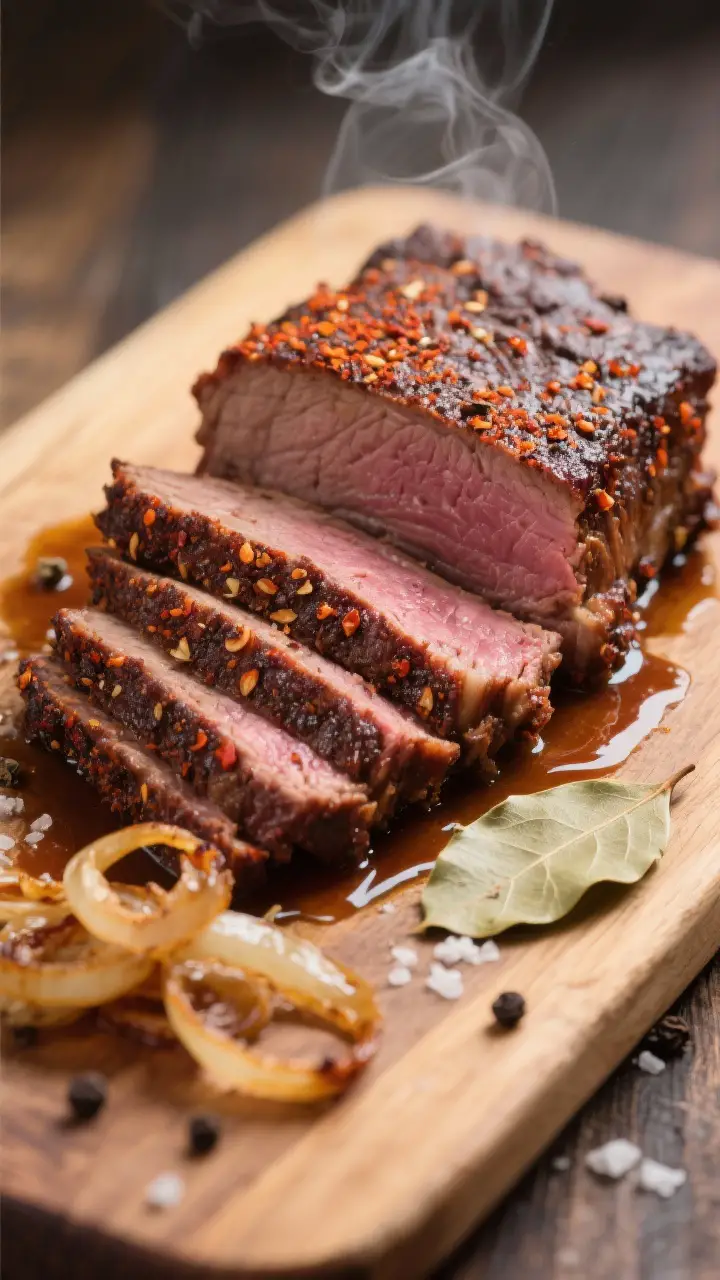
- Trim the brisket. Leave a thin layer of fat (about 1/4 inch) on top.
Trim off any thick or hard fat so it renders more evenly.
- Mix the rub. In a small bowl, combine 2 tablespoons kosher salt, 2 teaspoons black pepper, 2 teaspoons paprika, 2 teaspoons garlic powder, 2 teaspoons onion powder, 1 tablespoon brown sugar, 1 teaspoon cumin, 1–2 teaspoons chili powder, and 1/2 teaspoon mustard powder.
- Season generously. Pat the brisket dry. Rub with a thin coat of oil, then cover all sides with the spice mix. Press it in so it sticks.
- Build the braising base. In a large roasting pan or Dutch oven, add 1 large sliced onion, 4 smashed garlic cloves, 1 1/2 cups beef broth, 2 tablespoons apple cider vinegar, and 1 tablespoon Worcestershire.
- Arrange the brisket. Place the brisket fat-side up over the onions.
Add 1–2 bay leaves if you like. Cover tightly with a lid or heavy-duty foil so steam stays trapped.
- Low and slow roast. Bake at 300°F (150°C) for about 3 1/2 to 4 1/2 hours, depending on size. Start checking around the 3-hour mark.
It’s ready to uncover when a fork goes in with little resistance.
- Uncover and finish. Remove the lid/foil. If you want a light glaze, brush with barbecue sauce. Return to the oven for another 30–45 minutes to set the crust and deepen color.
- Rest properly. Transfer the brisket to a board and tent loosely with foil.
Rest for 20–30 minutes. This helps juices redistribute.
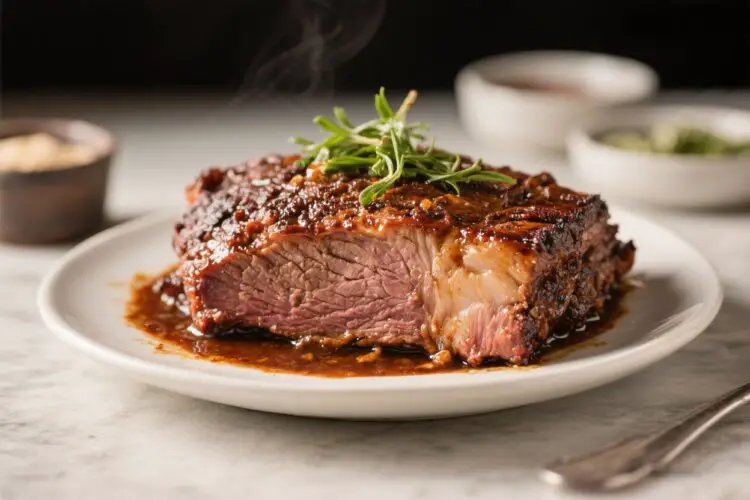
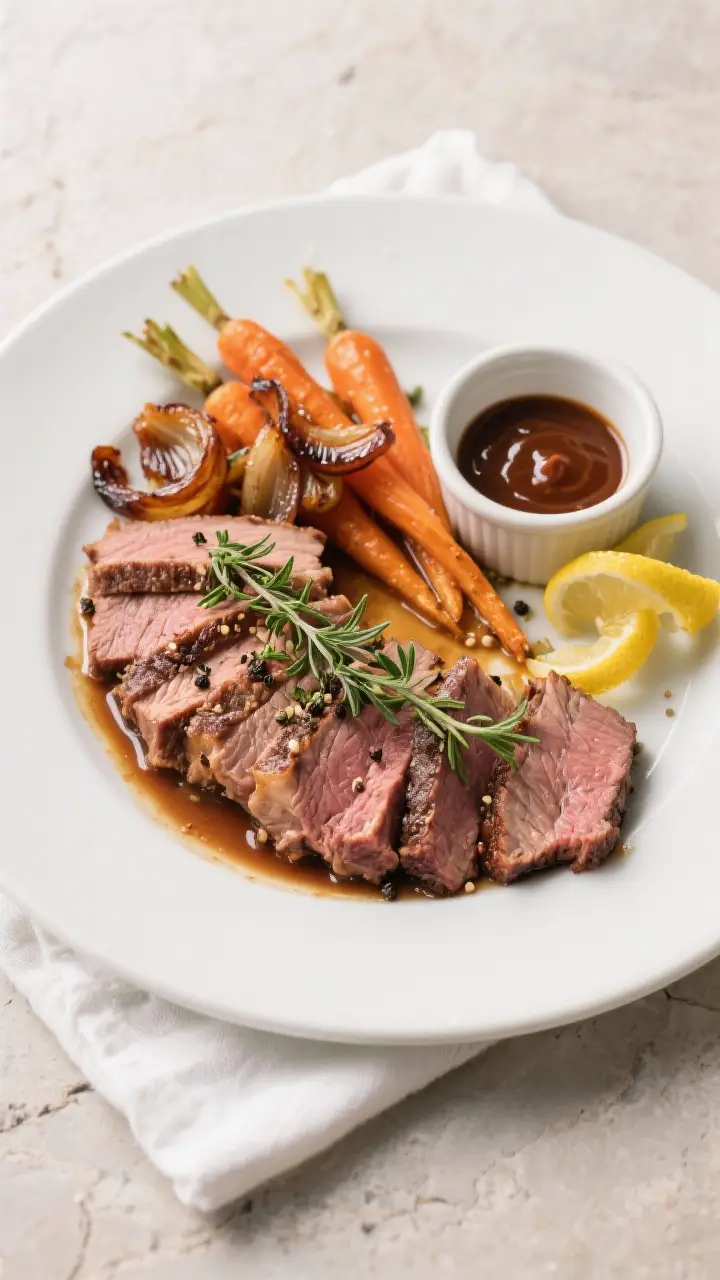
- Slice against the grain. Identify the direction of the muscle fibers and cut perpendicular to them into thin slices. This makes each bite tender.
- Make a quick gravy (optional). Skim fat from the pan juices.
Simmer to reduce, or whisk in a cornstarch slurry to thicken. Adjust seasoning with salt, pepper, or a splash of vinegar.
Storage Instructions
- Refrigerator: Store sliced brisket with some pan juices in an airtight container for up to 4 days.
- Freezer: Wrap tightly in foil, then place in a freezer bag with a bit of sauce or juices. Freeze up to 3 months.
- Reheating: Warm covered in a 300°F oven with a splash of broth until hot.
Or reheat gently on the stovetop in the pan juices. Avoid high heat so it doesn’t dry out.
Benefits of This Recipe
- Oven-friendly: No smoker required, and the method is consistent year-round.
- Moist and forgiving: The covered roast keeps the brisket tender, even if your timing isn’t perfect.
- Big flavor, simple steps: A straightforward rub and basic pantry ingredients deliver deep, rich taste.
- Great for gatherings: Feeds a crowd and holds well for serving.
- Versatile leftovers: Perfect for sandwiches, tacos, hash, or grain bowls.
Pitfalls to Watch Out For
- Skipping the rest: Cutting too soon makes the juices run out. Rest at least 20 minutes.
- Not sealing the pan: If the foil or lid isn’t tight, moisture escapes and the meat can dry.
- Overcooking uncovered: Once you uncover, watch it.
The goal is a crust, not a dry roast.
- Slicing with the grain: This makes the meat chewy. Always slice across the fibers.
- Too little seasoning: Brisket is a large cut. Be generous with the rub so the flavor penetrates.
Recipe Variations
- Texas-Style: Keep it simple—salt, pepper, and a touch of garlic powder.
Skip the sugar and sauce for a bold beef-forward flavor.
- Smoky Maple: Use smoked paprika and add 1 tablespoon maple syrup to the braising liquid. Brush with a light maple-barbecue glaze at the end.
- Coffee Rub: Add 1 tablespoon finely ground coffee to the rub. It deepens the bark and adds subtle bitterness that balances the sweetness.
- Herb and Garlic: Mix chopped fresh rosemary and thyme into the rub, and add lemon peel to the braise for a brighter profile.
- Spicy Ancho: Use ancho chili powder, chipotle powder, and a splash of hot sauce in the braising liquid for a gentle heat.
FAQ
What size brisket should I buy?
For 6–8 people, a 4–6 pound brisket flat works well.
If you’re feeding more or want leftovers, go larger. Plan on about 1/2 pound of raw brisket per person.
Do I need to marinate the brisket?
No. A well-seasoned dry rub and a flavorful braise are enough.
If you want extra time for the rub to penetrate, season the night before and refrigerate uncovered for more depth and a drier surface.
How do I know when it’s done?
Look for tenderness more than time. A fork should slide in easily with little resistance, and the internal temperature will often be around 195–205°F. If it feels tight, keep cooking and check every 20–30 minutes.
Can I make this ahead?
Yes.
Cook fully, cool, and refrigerate. Reheat gently with pan juices. Many people find brisket tastes even better the next day after the flavors meld.
Should I cook fat-side up or down?
In the oven, fat-side up works well because the fat bastes the meat as it renders.
If the bottom is getting too dark, use a rack or add more liquid to the pan.
Can I add vegetables?
Absolutely. Carrots, celery, and more onions are classic. Add them to the pan during the last 2 hours so they don’t overcook.
What if I don’t have a Dutch oven?
Use a sturdy roasting pan and cover tightly with heavy-duty foil.
The key is creating a sealed environment to trap steam.
How do I keep the slices from drying out?
Slice only what you plan to serve and keep the rest warm in the pan juices. When storing, always add some cooking liquid to the container.
Can I use the point instead of the flat?
Yes, but the point has more fat and can cook a bit faster. It’s incredibly juicy and great for shredded brisket if you prefer that texture.
Is barbecue sauce necessary?
No.
It’s optional. The brisket will be flavorful on its own, but a light glaze or sauce on the side is a nice touch for serving.
Final Thoughts
Oven brisket is all about patience, simple seasoning, and steady heat. With a tight seal and a gentle roast, you’ll get tender slices that taste like you fussed all day.
Keep the rub bold, rest the meat, and slice against the grain—those three steps make all the difference. Serve it with the reduced pan juices, pass some sauce on the side, and enjoy the kind of meal that brings everyone back to the table for seconds.
Printable Recipe Card
Want just the essential recipe details without scrolling through the article? Get our printable recipe card with just the ingredients and instructions.