
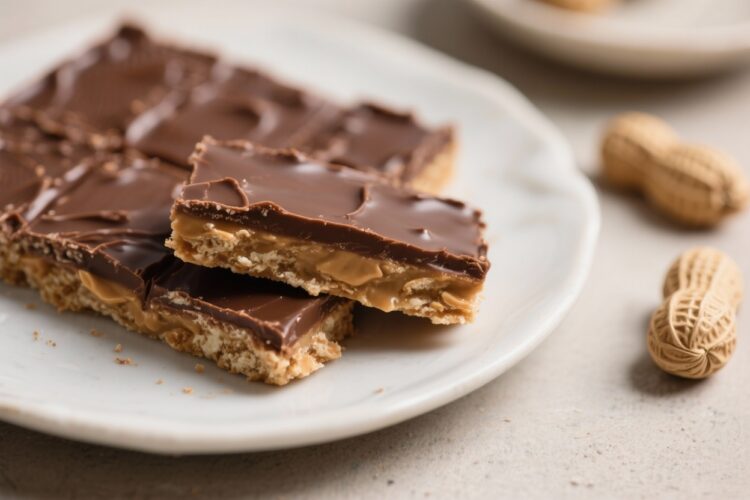
These No Bake Chocolate Peanut Butter Bars taste like a classic candy bar, but they take just minutes to put together. You don’t need an oven, a mixer, or any special skills—just a bowl, a pan, and a little patience while they chill. The layers are simple: a sweet, peanut buttery base topped with a smooth chocolate-peanut butter shell.
They’re perfect for parties, bake sales, or a late-night treat. If you love chocolate and peanut butter, this is one of those no-fail recipes you’ll make on repeat.
Why This Recipe Works
The ratio of peanut butter, butter, and powdered sugar creates a firm but tender base that holds its shape without baking. A touch of graham cracker crumbs adds body and a subtle, toasty flavor that balances the sweetness.
The chocolate topping blends chocolate chips with peanut butter to keep the top layer glossy and easy to slice—no cracking. Because everything sets in the fridge, the bars firm up quickly and slice cleanly. It’s a smart, low-effort method that delivers bakery-level results.
Ingredients
- 1 cup (225 g) unsalted butter, melted
- 2 cups (500 g) creamy peanut butter, divided (1 1/2 cups for base, 1/2 cup for topping)
- 2 cups (240 g) graham cracker crumbs (about 14 full sheets), finely crushed
- 2 cups (240 g) powdered sugar, sifted if lumpy
- 2 cups (340 g) semi-sweet chocolate chips (or chopped chocolate)
- 1 teaspoon vanilla extract (optional, for the base)
- Pinch of salt (skip if using salted butter)
Instructions
- Prep the pan. Line a 9×13-inch baking pan with parchment paper, leaving overhang on the long sides for easy lifting.
This makes removal and slicing cleaner.
- Make the base. In a large bowl, stir together melted butter, 1 1/2 cups peanut butter, graham cracker crumbs, powdered sugar, vanilla (if using), and a pinch of salt. Mix until thick and evenly combined; it should resemble a soft dough.
- Press into the pan. Transfer the mixture to the lined pan and press it into an even layer. Use the back of a spoon or the bottom of a measuring cup to smooth the surface.
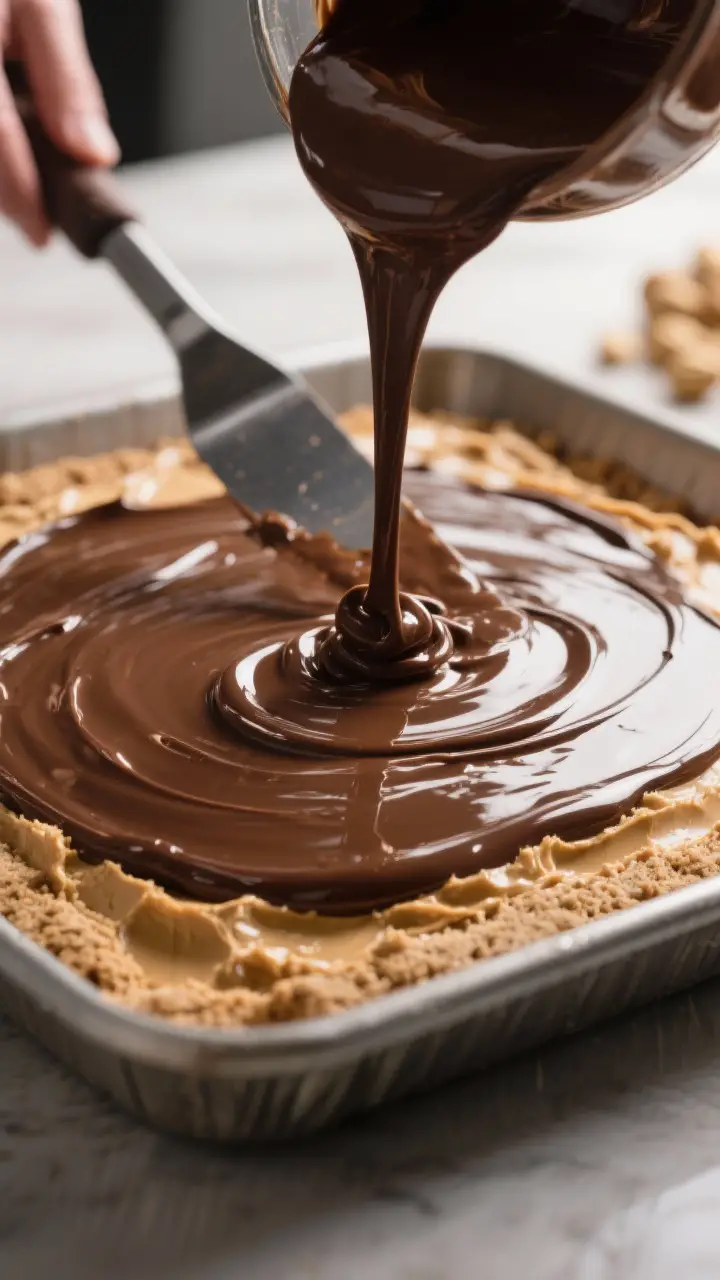
- Melt the topping. In a microwave-safe bowl, combine chocolate chips and the remaining 1/2 cup peanut butter.
Microwave in 20–30 second bursts, stirring between each, until smooth and glossy. Alternatively, melt over a double boiler on the stovetop.
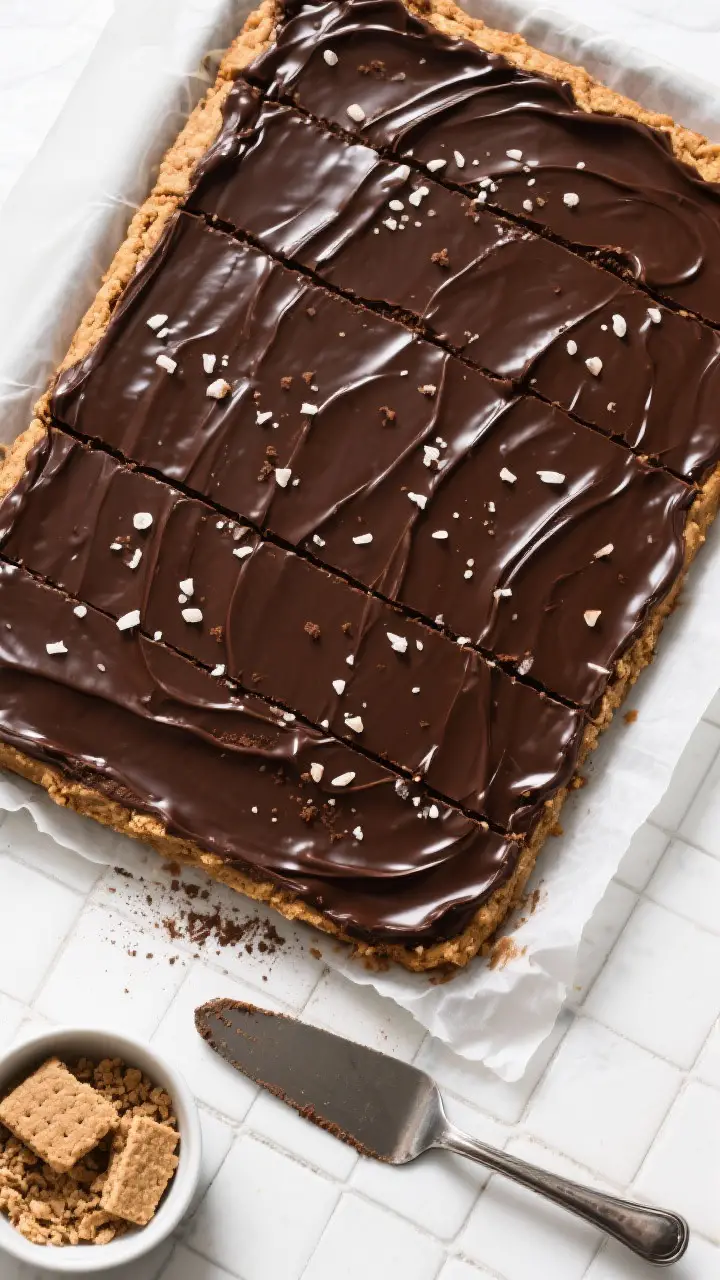
- Top and smooth. Pour the warm chocolate mixture over the base and tilt the pan or use an offset spatula to spread it into an even layer.
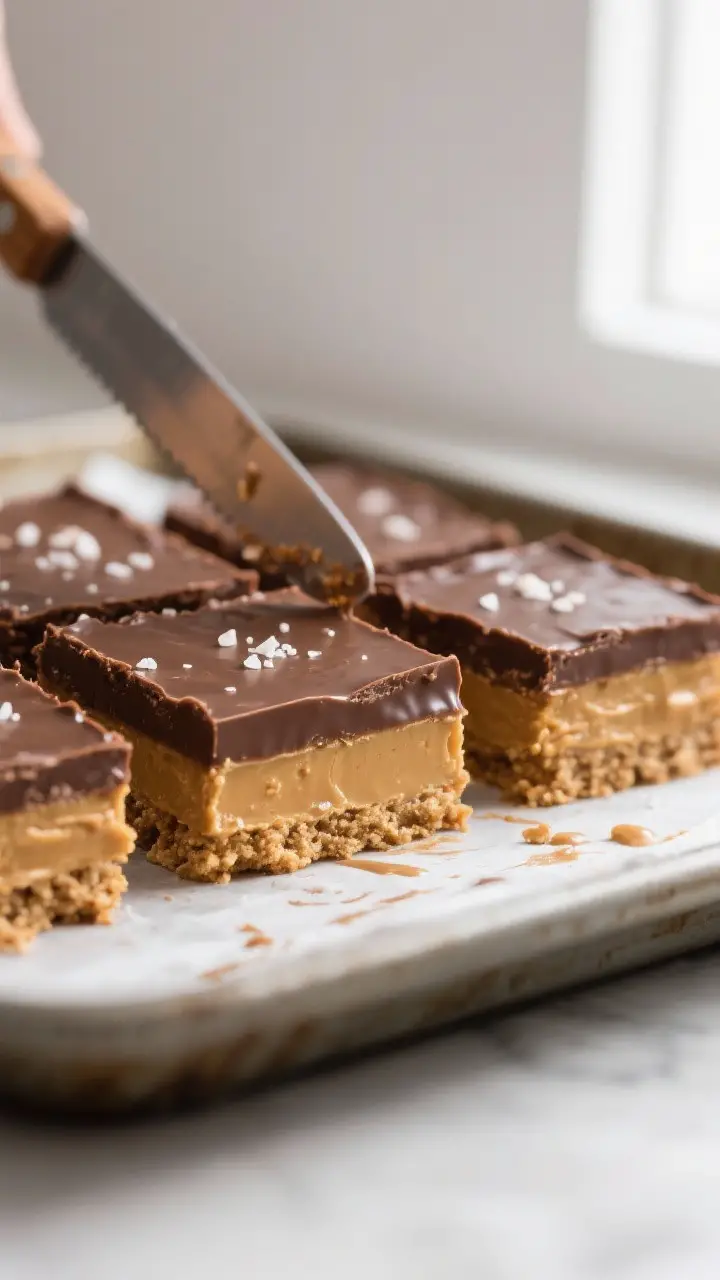
- Chill to set. Refrigerate for 1–2 hours, or until the chocolate is firm to the touch. For neater slices, let the bars sit at room temperature for 5–10 minutes before cutting.
- Slice and serve. Lift the slab out using the parchment overhang.
Use a sharp knife to cut into bars or squares, wiping the blade clean between cuts for tidy edges.
Storage Instructions
- Refrigerator: Store bars in an airtight container, layered with parchment, for up to 1 week.
- Freezer: Freeze in a sealed container for up to 2–3 months. Thaw in the fridge for best texture.
- Room temperature: For serving, bars can sit out for 1–2 hours. In warm rooms, the chocolate may soften, so keep them cool when possible.
Benefits of This Recipe
- No oven needed: Ideal for hot days or quick prep when you don’t want to bake.
- Fast and foolproof: Comes together in minutes with pantry staples.
- Kid-friendly: Easy steps and no hot pans make it great for little helpers.
- Make-ahead friendly: Sets well in the fridge and tastes even better the next day.
- Customizable: Works with different chocolates, add-ins, and nut butters.
Pitfalls to Watch Out For
- Oily separation: Natural peanut butter can separate and make the base greasy.
If using it, stir very well and consider adding an extra 2–3 tablespoons of graham crumbs.
- Crumbly base: If the mixture seems dry or doesn’t hold together, add 1–2 tablespoons of melted butter or a spoonful more peanut butter.
- Cracking chocolate: Cutting while the topping is ice-cold can cause cracks. Let bars warm slightly before slicing and use a sharp, warm knife.
- Overheating chocolate: Chocolate scorches quickly in the microwave. Heat in short bursts and stir often for a smooth finish.
- Too sweet: If you prefer less sweetness, use bittersweet chocolate (60–70% cacao) and reduce powdered sugar by 1/4 cup.
Variations You Can Try
- Crunchy texture: Fold in 1/2 cup chopped roasted peanuts or crispy rice cereal to the base.
- Salted finish: Sprinkle flaky sea salt over the chocolate topping before it sets.
- Almond or cashew butter: Swap the peanut butter for another nut butter.
Choose a creamy, no-stir variety for best results.
- Gluten-free: Use certified gluten-free graham cracker crumbs or crushed gluten-free cookies.
- Double chocolate: Mix 2 tablespoons of cocoa powder into the base and increase butter by 1 tablespoon to balance dryness.
- Espresso twist: Stir 1 teaspoon instant espresso powder into the melted chocolate for a mocha note.
- Mini size: Press into an 8×8-inch pan for thicker bars, or use mini muffin liners for bite-size cups.
FAQ
Can I use natural peanut butter?
Yes, but it requires extra care. Stir it very well to reincorporate the oils, and if the base seems loose, add more graham crumbs a tablespoon at a time until it firms up.
How do I prevent the chocolate from cracking?
Let the bars sit at room temperature for 5–10 minutes before slicing, and warm your knife under hot water, then dry it. Clean the blade between cuts for smooth edges.
Can I reduce the sugar?
You can cut the powdered sugar by up to 1/4–1/2 cup.
Expect a slightly softer base. Pairing with bittersweet chocolate also balances sweetness without changing texture much.
What can I use instead of graham cracker crumbs?
Try digestive biscuits, vanilla wafers, or shortbread cookies. For a gluten-free option, use gluten-free grahams or almond flour (start with 1 1/2 cups and adjust to texture).
How long do they take to set?
Usually 1–2 hours in the fridge.
If you’re in a rush, you can chill in the freezer for about 30–40 minutes, but check often and don’t let them freeze solid before slicing.
Can I make these dairy-free?
Use a dairy-free butter alternative and dairy-free chocolate chips. Check labels to ensure they’re vegan if needed. The method stays the same.
Why is my base greasy?
Overly oily peanut butter or too little crumb can cause separation.
Mix thoroughly and add extra graham crumbs to absorb excess oil, one tablespoon at a time.
How should I package these for gifting?
Layer bars with parchment in tins or boxes, and keep them cool during transport. Add a note to store in the fridge for best texture.
Wrapping Up
No Bake Chocolate Peanut Butter Bars deliver big flavor with minimal effort. They’re quick to assemble, easy to customize, and always a hit.
Keep the ingredients on hand and you’ll have a reliable go-to treat for any occasion. Once you make them, don’t be surprised if they disappear fast.
Printable Recipe Card
Want just the essential recipe details without scrolling through the article? Get our printable recipe card with just the ingredients and instructions.