
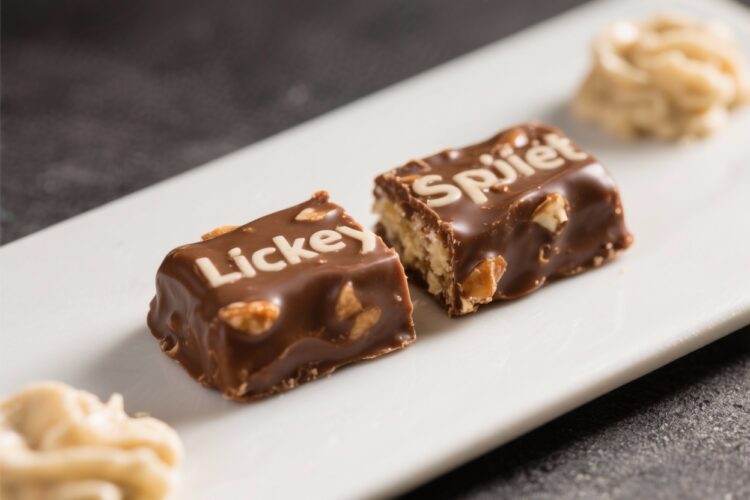
Nothing beats the snap of a fresh praline—sweet, buttery, and loaded with toasted pecans. This Lickety Split version gives you that classic Southern candy in a fraction of the time. No candy thermometer required, no fussy techniques, and no waiting around for hours.
You’ll cook, stir, scoop, and be enjoying pralines before your coffee gets cold. If you’ve ever been intimidated by candy-making, this easy method is your friendly shortcut.
Why This Recipe Works
Classic pralines can be finicky, but this quick version relies on simple timing and visual cues rather than specialized equipment. We use brown sugar for a richer, caramel-like depth and evaporated milk for that creamy texture without the risk of splitting.
A few minutes of boiling creates the right consistency, and a quick beat brings the mixture to the perfect thick, spoonable state. Toasted pecans provide crunch and aroma that balance the sweetness, making each piece taste like it took hours.
Shopping List
- Light brown sugar – 2 cups, packed
- Granulated sugar – 1/2 cup
- Unsalted butter – 6 tablespoons
- Evaporated milk – 1/2 cup
- Vanilla extract – 2 teaspoons
- Salt – 1/4 teaspoon
- Pecan halves or pieces – 2 cups (toasted)
- Optional: A pinch of cinnamon or bourbon for variation
- For prep: Parchment paper or silicone baking mat
Step-by-Step Instructions
- Prep your station. Line a baking sheet with parchment or a silicone mat. Set a tablespoon or cookie scoop nearby.
Measure all ingredients before starting—things move fast.
- Toast the pecans. In a dry skillet over medium heat, toast pecans for 4–6 minutes, stirring often, until fragrant. Remove from heat and set aside.
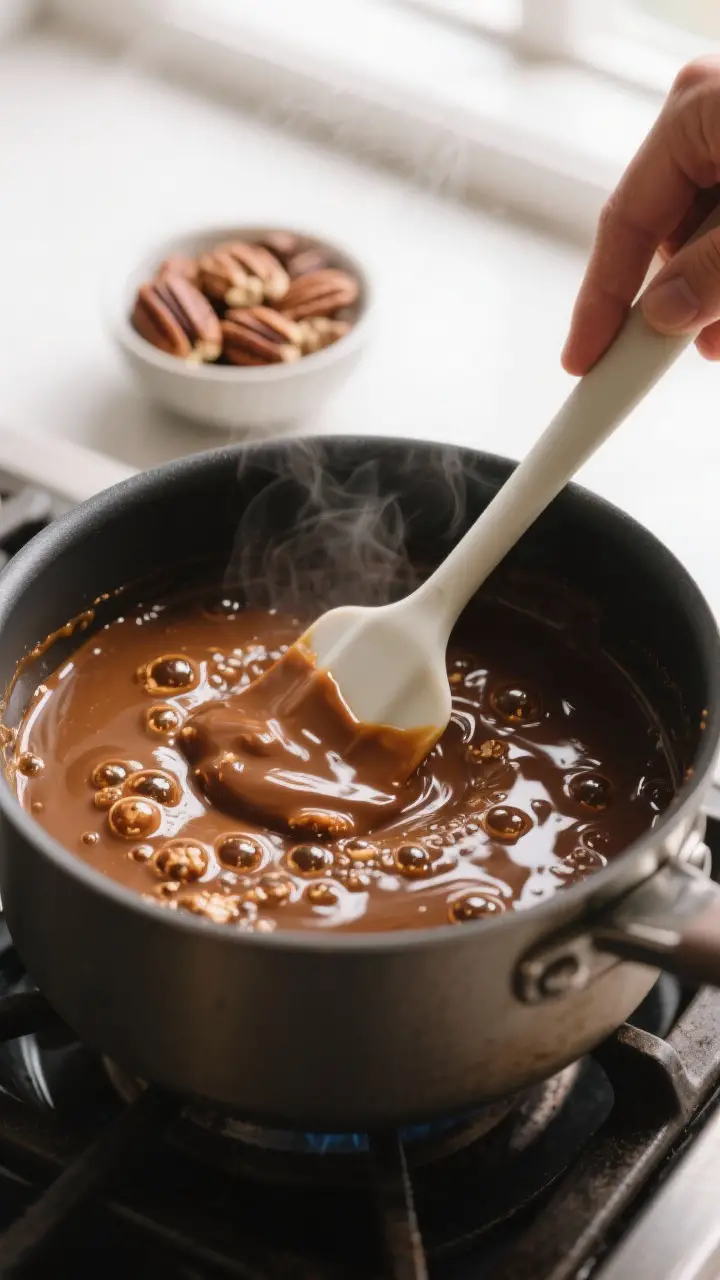
- Combine the base. In a medium, heavy-bottomed saucepan, add brown sugar, granulated sugar, evaporated milk, butter, and salt. Stir to combine.
- Heat and melt. Cook over medium heat, stirring gently, until the butter melts and the mixture looks smooth and glossy.
- Bring to a boil. Continue cooking, stirring occasionally, until the mixture reaches a steady boil.
Let it boil for about 3–4 minutes. You’re looking for thick bubbles and a slightly darker color.
- Check the texture. After 3–4 minutes, remove from heat. The mixture should coat the back of a spoon and leave a slow trail when a spatula drags across the bottom.
If it’s still thin, boil 30–60 seconds more.
- Add flavor. Stir in vanilla (and cinnamon or bourbon if using). The mixture will sizzle—keep stirring.
- Beat to thicken. Using a wooden spoon or silicone spatula, beat the mixture off the heat for 1–2 minutes until it turns creamy, loses some shine, and thickens slightly. It should hold a soft mound when dropped from the spoon.
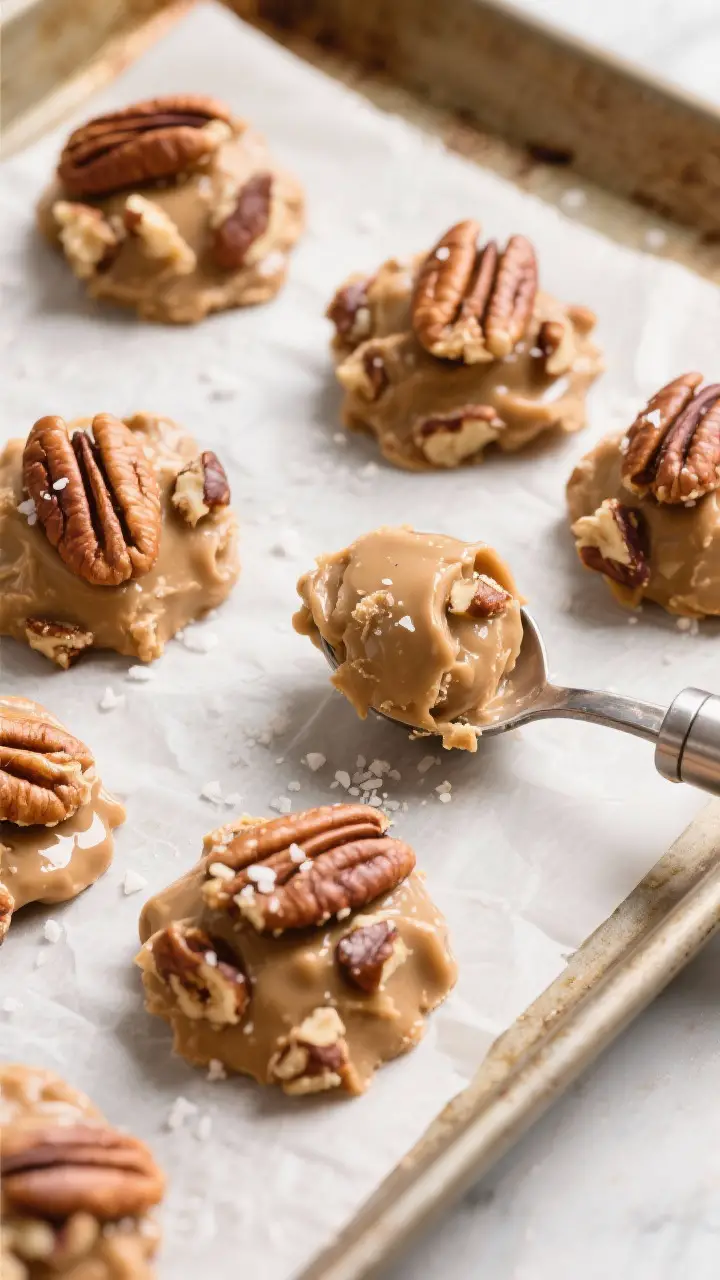
- Fold in pecans. Stir the toasted pecans into the mixture until evenly coated.
- Scoop quickly. Working fast, drop heaping tablespoons onto the prepared sheet, leaving space between each.
If the mixture firms up in the pot, add 1–2 teaspoons of hot water and stir to loosen.
- Set and enjoy. Let the pralines set at room temperature for 20–30 minutes. They should be firm to the touch with a slight snap but still creamy inside.
- Clean-up tip. Fill the sticky pot with hot water and let it sit for a few minutes—residue will dissolve easily.
How to Store
Store fully cooled pralines in an airtight container at room temperature for up to 1 week. Layer with parchment to prevent sticking.
For longer storage, freeze for up to 2 months; thaw uncovered at room temperature to avoid condensation. Avoid the fridge, which can cause moisture and graininess.
Why This is Good for You
Pralines are a treat, but they do have a few perks. Pecans bring healthy fats, fiber, and minerals like magnesium and zinc. A small portion offers satisfaction, so you can enjoy a sweet craving without going overboard.
And making candy at home helps you control ingredients—no preservatives, no mystery oils, just classic pantry staples.
What Not to Do
- Don’t skip toasting the pecans. It’s the difference between flat and fragrant.
- Don’t rush the boil. Too little time results in syrupy, sticky pralines that never set.
- Don’t overbeat. If you mix too long after removing from heat, the mixture may seize in the pot before you can scoop.
- Don’t cook over high heat. Sugar scorches fast—medium heat is safer and more predictable.
- Don’t store in humid places. Moisture makes pralines weep and turn grainy.
Alternatives
- Nut swaps: Try walnuts, almonds, or cashews. For allergy-friendly versions, use toasted pumpkin or sunflower seeds.
- Dairy-free: Use a plant-based butter and full-fat coconut milk (well-shaken) instead of evaporated milk. Expect a subtle coconut note.
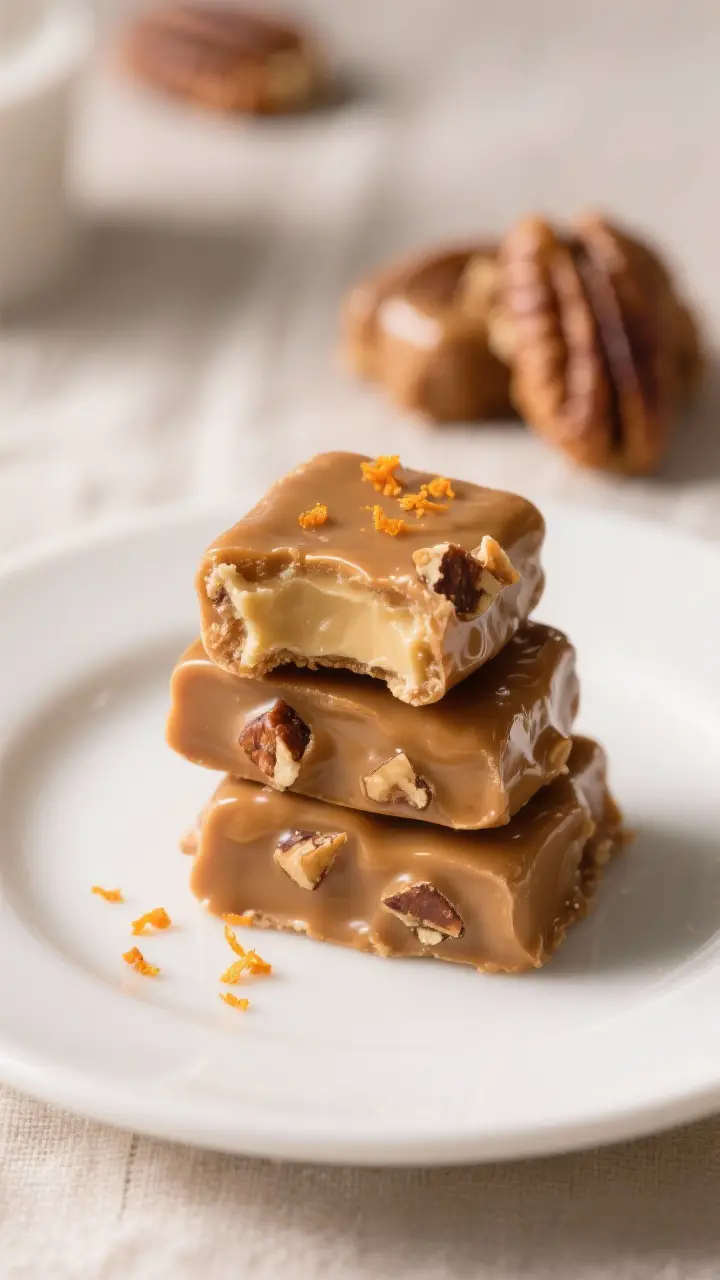
- Flavor twists: Add orange zest, a pinch of flaky sea salt on top, or 1 teaspoon of espresso powder to deepen the caramel flavor.
- Texture choices: Chop pecans for even distribution, or use halves for big, crunchy bites.
- Microwave method: Combine sugars, butter, and evaporated milk in a large microwave-safe bowl.
Heat in 1-minute bursts, stirring, for about 5–6 minutes until bubbling and thick, then proceed with vanilla, beating, and pecans.
FAQ
Why did my pralines turn grainy?
Graininess happens when sugar crystals form. Make sure the mixture dissolves fully before boiling and avoid scraping the sides of the pot while scooping. Humidity can also cause crystallization—store in an airtight container.
How do I know when to stop boiling?
Look for a steady boil with thick bubbles and slight darkening, usually around 3–4 minutes.
The mixture should coat a spoon and leave a slow trail when you drag a spatula across the pot. If unsure, boil in 30-second increments until it thickens.
Can I make these without a candy thermometer?
Yes. This recipe is designed to work by timing and visual cues.
As long as you reach a steady boil for a few minutes and beat until creamy and thick, you’ll get a solid set.
What if the mixture hardens before I’m done scooping?
Stir in a teaspoon or two of hot water to loosen it, then continue scooping. Work quickly after the beating stage to avoid premature setting.
Do I have to use evaporated milk?
Evaporated milk stabilizes the mixture and adds creaminess. If you don’t have it, use heavy cream.
Avoid regular milk, which can curdle or make the candy too thin.
Can I halve or double the recipe?
Yes. Halving works well and is great for small batches. Doubling is fine too, but use a larger pot and be ready to beat and scoop quickly—larger batches can set faster.
How can I make them softer or firmer?
For softer pralines, beat a little less and scoop earlier.
For firmer, candy-like pralines, boil 30–60 seconds longer and beat until the sheen fades more noticeably.
What’s the best way to gift them?
Wrap each praline in wax paper or place in mini candy cups, then pack in a tin with parchment between layers. Add a small silica packet to keep moisture away if you have one.
Can I reduce the sugar?
You can reduce total sugar by about 1/4 cup, but the texture may be softer and less stable. For best structure, keep close to the original ratio.
How do I clean the pot easily?
Fill it with hot water and let it sit for 5–10 minutes, then wipe clean.
Sugar dissolves quickly, so don’t scrape hard or you might scratch your cookware.
Final Thoughts
Lickety Split Pralines bring Southern charm without the stress. With a short ingredient list and quick stovetop method, you get buttery, nutty candies that feel special but take minutes. Keep a batch on hand for guests, gifting, or when you want something sweet and homemade fast.
Once you master the timing, these might just become your signature treat.
Printable Recipe Card
Want just the essential recipe details without scrolling through the article? Get our printable recipe card with just the ingredients and instructions.