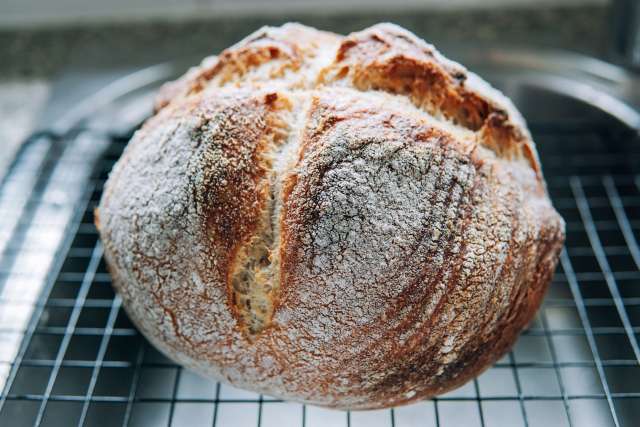
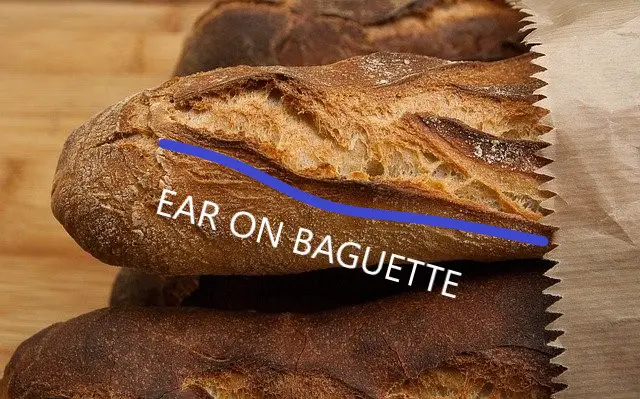
Each loaf has a secret, its ear, the crusty ridge that develops during the baking process whose mere presence is a promise of a tasty, crunchy, crispy mouthful of ecstasy. Yet, this ridge, or ear as it is known in the baking world, does not appear by accident. It is a carefully planned slash, done at just the right moment with just the right angle and strength that only an experienced baker possesses.
The stress in the bread will cause the bread to tear itself apart where there is a weakness. Your job as a baker is to preselect where this tear will occur and slash the bread “just so” in order to dictate not just how the bread will look like but also the ear.
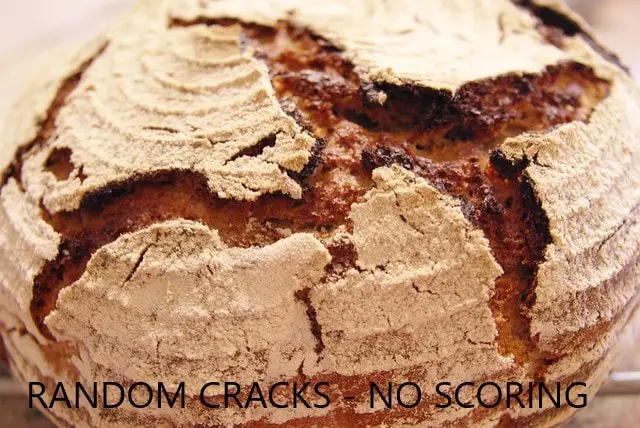
Think of the baking process as an earthquake, where the earth releases the stress in its crust and moves just so. If there is already a natural fault-line, the earthquake will occur along that precise line, with one side or the other moving ever so slightly sideway. There will be a steep, jagged escarpment along one side… In contrast, if there is no fault-line, then the earth will heave and shudder and mountains will rise randomly.
I have baked dozens of loaves in my time, if not hundreds and each one is unique, but each loaf required to to hit certain targets in order for the final product to be accepted in a bakery. However, cutting the ear correctly is not just a question of looks, it is also vital to the proper baking of the bread, allowing the stresses developed while puffing up in the oven to dissipate, leaving you with an actual loaf.
The six tips below are a cheat sheet if you will. Hit these notes and your bread will not only taste great but it will also look stunning.
1. Make sure that the skin of the bread is under stress.
In baking, stress is your friend. Stress is movement, stress is potential. Think of the dough like a giant elastic. Let the elastic loose and it has no special purpose. If you pull the elastic apart, then a the moment of release, you get a suddenly burst of energy.
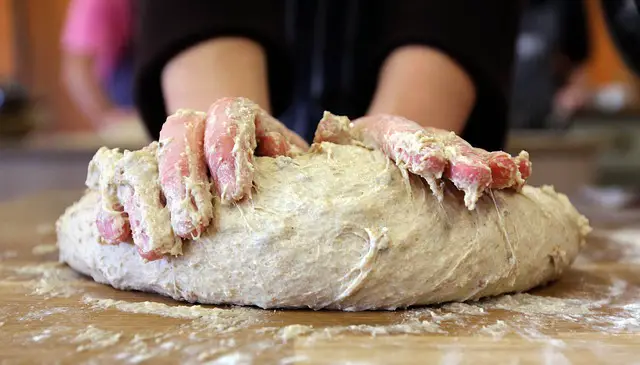
The gluten in your dough is the elastic part of your dough. By working the dough, you allow the gluten to gain some structure, which translates into more elasticity.
If you pull an elastic or rubber band back between your fingers and let go of it, you can launch a projectile quite far. Building stress in the dough is the same as pulling the rubber band back, you create the potential for a sudden release.
In your final shape, all you really want to do is give the bread a pleasant look and in the very last stage, you roll this bread ever so gently to introduce tension in the skin of the bread. This tension can be released during the baking process either by natural pressure as the trapped air tries to escape, or by a strategically placed slash just prior to baking. When you slash the bread, you suddenly release the built up tension.
2. Make sure that you cut the skin of the bread at the right place.
The baking step of making the bread is the moment where all stresses in the loaf come to a peak. The loaf is puffing up. It it thrusting its chest out and developing volume. Air bubbles are forming in the inside, which will make the bread feel to light and airy.
Most cuts are counterintuitive to a beginner baker. You will want to have the ear located at a specific spot and that is precisely the wrong place to cut.
Remember, the skin of the bread is under stress, the apex already wants to move towards the sides. There is upward pressure from the air trapped in the dough which is adding tension to the apex of the loaf, trying to escape.
If you cut there, then the two halves will simply drift apart, taking all of the drama of the tension along with it.

No, when slashing a bread, it is far better to select where the “calm” side of the cut will be and imagine that the ridge or ear will be pulled away from this spot towards the other end of the loaf. So, it is the ear that is moving, not the flat end of the tear. You cannot control precisely how far this ear will move, just know that it will move.

The best spot to slash the bread is roughly 1/3rd to 2/5ths of the way up from the side of the bread. Chances are that the ear will then be along the top of the loaf, or so close that no one will know…
Cutting at this location will give you enough skin on the moving side of the bread that the trapped air bubbles will cause it to lift until the air can curl up around the lip of the slash, making that lovely, crusty edge. The other side of the loaf remains static, all of its energy dissipated as the dough slides sideways into the gap and solidifies, like lava escaping from the earth.
Cut further towards the middle of the loaf and the drama of the ear is less, the ridge becoming almost imperceptible as the forces on the loaf dissipate.
3. Bake the bread at the optimal moment.
To create a really dramatic ear, you have to catch the bread at just the right moment, where the potential of an explosion in the crust is at its maximum. You want the maximum forces to be liberated all at once, certainly before the crust sets solid. This means that the dough needs to be just ready to be baked. Neither under- nor overproved as then you either have not built up enough air in the dough to cause it to lift as it is heated, or you have allowed the process to start degrading the gluten, which acts like a rubber-band in the dough. If the rubber-band is worn out, then pulling it apart results in a tiny snap. If the rubber-band is not tensed enough, then you cannot snap it. But get it just right, with just enough tension and the rubber-band explodes in your hands, stinging you with its whiplash and crackling in your ears as the pent up stress is released.

The oven spring is crucial. You need to capitalize on it by making sure that the bread rises as much as possible in the oven.
4. Keep the crust soft for as long as possible.
The whole aim for the ear is to be prominent, but in order for this to happen, the crust must be able to move freely as it bakes. This is just like lava in a volcano. Once the lava cools down, it forms a hard crust with new lava struggles to break through.
In the oven, the curst gets hot first, then the heat penetrates into the loaf, essentially causing it to set from the outside in. Keeping the crust soft for as long as possible means that it is pliable and can be moved as the air bubbles expand during the baking process.
We want to skin or crust of the dough to remain soft in order for it to respond to the settling of the dough on the inside.
The best way to achieve this is to bake the bread in an enclosed environment that is filled with steam. Bakers’ oven come with a steaming option, where you can set blasts of steam at set intervals.

In your kitchen, simply use:
- a Dutch oven, a heavy saucepan that can sit in the the oven with a lid on. This will become a self-steaming system as any moisture is trapped inside the Dutch oven.
- Create steam by adding a hot roasting pan at the bottom of the oven and filling it with boiling water
- Spray the loaf with a fine mist of water 2-4 times in the early stages of the baking
- Maintain the steam by simply not using the fan option of your oven as it will blow the steam out of the oven.
5. Bake the bread on an extremely hot surface.
The dough bakes from the outside in. By placing the dough on a very hot surface, it sets the bottom of the dough, pushing all of the expansion of the dough upwards. The air bubbles right at the bottom of the dough get trapped sooner, making the bread rise even more.
Using a cool surface, especially if it is a thick metal such as a roasting tray means that it will take longer for the heat to reach the bottom of the dough. This will cause the bread to set more at the top and prevent the loaf from rising as much as possible.
If you can, use a pizza stone or a piece of granite as these are designed to store heat for much longer and if preheated will retain their heat while the oven door is opened and closed. If using a pizza stone or other bulky, heat retaining material, pre-heat it for at least 30 minutes in the oven and an extra 5 minutes under the grill/broiler.