
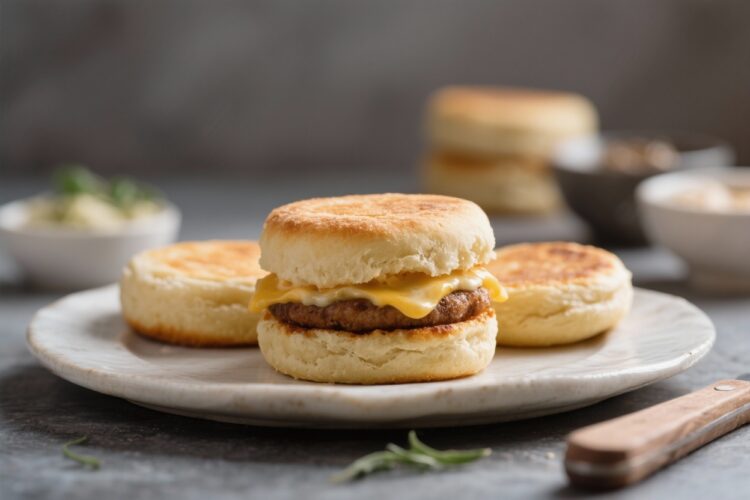
If you love a warm, toasty breakfast but don’t want a complicated baking project, these Easy English Muffins are for you. They’re soft inside, lightly crisp outside, and full of those classic nooks and crannies. You can cook them right on the stovetop, which keeps things simple and quick.
The dough is flexible, forgiving, and beginner-friendly. Once you make a batch, you’ll want to keep them on hand for breakfasts, sandwiches, and snacks all week.
What Makes This Recipe So Good
- Stovetop friendly: No need to turn on the oven. A skillet or griddle is all you need.
- Soft and airy: A touch of milk and a proper rise make tender muffins with great texture.
- Beginner-friendly dough: This is a simple yeast dough that’s easy to shape and handle.
- Freezer-ready: Make a batch now and freeze some for busy mornings later.
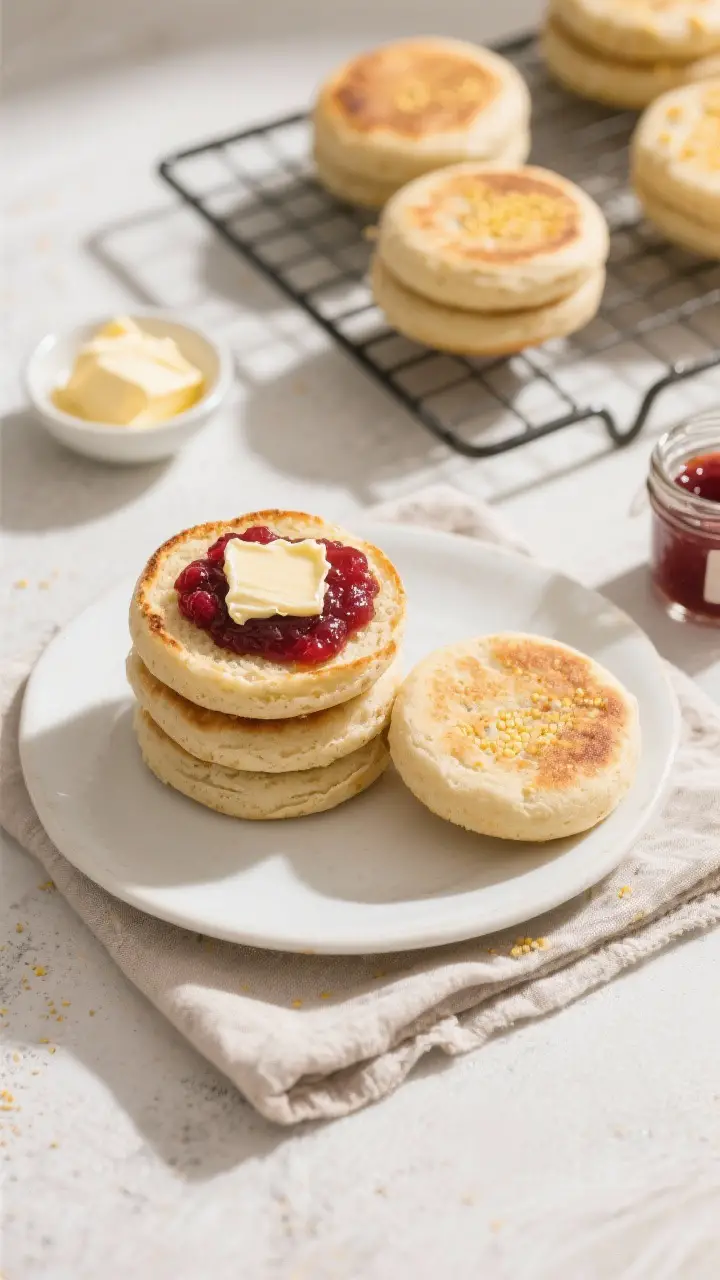
- Versatile: Perfect for breakfast sandwiches, eggs Benedict, or just butter and jam.
Ingredients
- 2 3/4 cups (330 g) all-purpose flour, plus more for dusting
- 1 cup (240 ml) warm milk (about 105–110°F / 40–43°C)
- 1/3 cup (80 ml) warm water
- 2 tablespoons unsalted butter, melted (plus a little more for greasing)
- 1 tablespoon granulated sugar
- 2 teaspoons instant yeast (or rapid-rise yeast)
- 1 teaspoon fine sea salt
- Semolina or cornmeal, for dusting
- Neutral oil or butter, for the skillet
Instructions
- Activate the yeast (if using active dry): If you’re using active dry yeast instead of instant, mix the warm water, a pinch of sugar, and the yeast in a small bowl.
Let it sit 5–10 minutes until foamy. If using instant yeast, you can skip this step and add it directly to the flour.
- Make the dough: In a large bowl, whisk the flour, sugar, salt, and instant yeast (if using). Add the warm milk, warm water (or the foamy yeast mixture), and melted butter.
Stir with a wooden spoon until a shaggy dough forms.
- Knead until smooth: Turn the dough onto a lightly floured surface and knead for 6–8 minutes, until smooth, elastic, and slightly tacky but not sticky. You can also use a stand mixer with a dough hook on medium-low for 5–6 minutes. If the dough is very sticky, sprinkle in 1–2 tablespoons more flour.
- First rise: Shape into a ball and place in a lightly greased bowl.
Cover with a clean towel or plastic wrap and let it rise in a warm spot until doubled, about 60–90 minutes.
- Prep the workspace: Sprinkle a baking sheet generously with semolina or cornmeal. This prevents sticking and gives that classic texture on the outside.
- Shape the muffins: Turn the dough out onto a lightly floured surface and gently press it to about 3/4 inch (2 cm) thick. Use a 3–3.5 inch (7.5–9 cm) round cutter to cut circles.
Gather scraps, gently press again, and cut more. You should get about 8–10 muffins.
- Second rise: Place the rounds on the prepared baking sheet. Dust the tops with more semolina or cornmeal.
Cover loosely and let rise until puffy, 30–45 minutes.
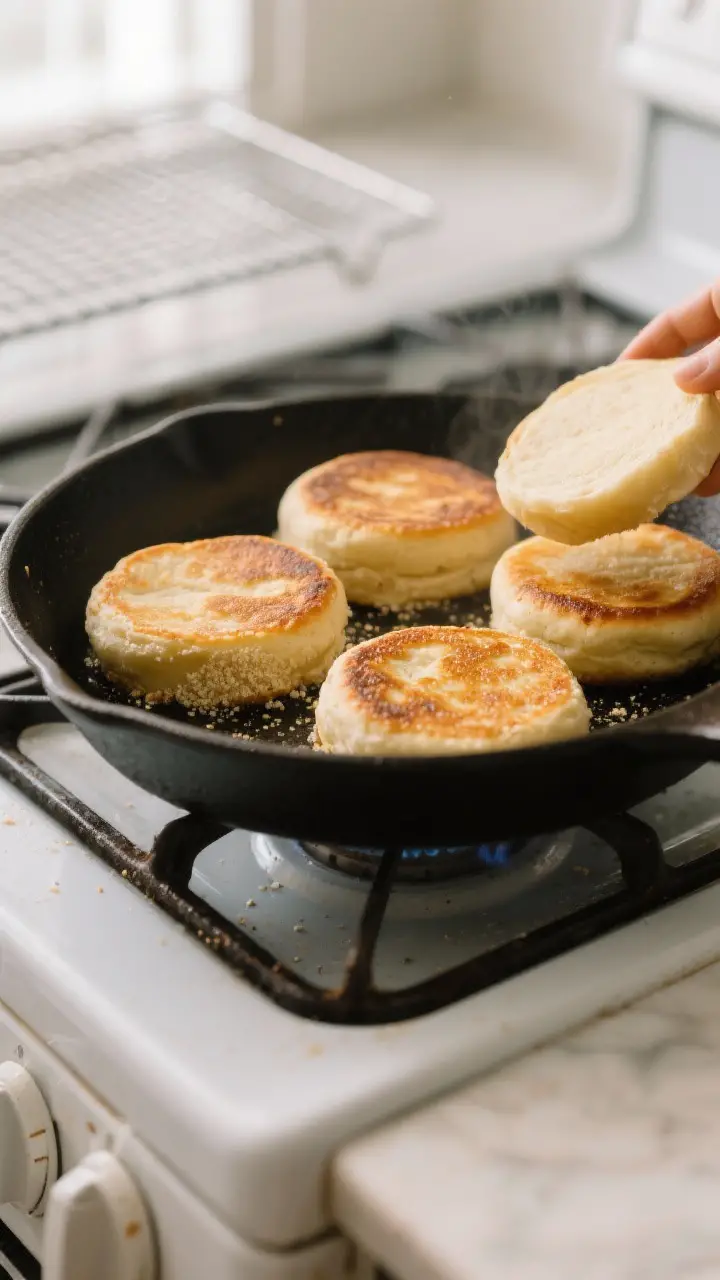
- Preheat the skillet: Heat a large, heavy skillet or griddle over medium-low. Lightly grease with butter or oil. The surface should be hot but not smoking.
- Cook the muffins: Place muffins in the skillet, leaving space between them.
Cook for 6–8 minutes per side, until deep golden brown and cooked through. Adjust heat as needed so they don’t brown too fast. If they color too quickly but feel soft in the center, lower the heat and extend the time.
- Finish and cool: Transfer cooked muffins to a wire rack.
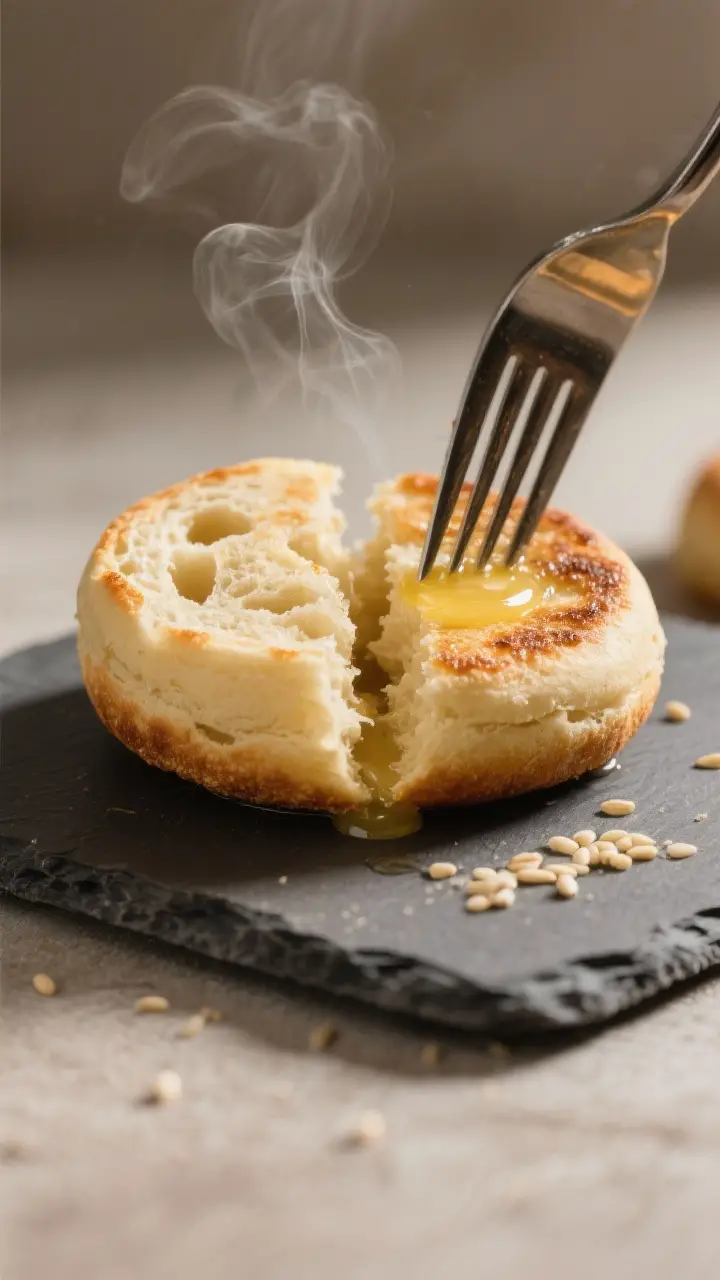
Let them cool at least 10–15 minutes before splitting. For the best nooks and crannies, use a fork to split, not a knife.
Keeping It Fresh
Let the muffins cool completely before storing. If they’re even a little warm, condensation can make them soggy.
Store at room temperature in an airtight container or zip-top bag for up to 3 days. For longer storage, freeze them.
To freeze, split them with a fork first, then place in a freezer bag with parchment between layers. They’ll keep well for up to 2 months.
Reheat from frozen in the toaster on a low setting, then toast again to your liking.
Benefits of This Recipe
- Cost-effective: Homemade muffins are much cheaper than store-bought, and you control the ingredients.
- Better texture: You get a soft interior and crisp edges without additives or preservatives.
- Customizable: Adjust sweetness, add whole wheat, or mix in flavors like cinnamon or cheese.
- Make-ahead friendly: The dough and finished muffins both freeze well, making mornings easier.
- Beginner success: Clear steps and forgiving dough mean great results even if you’re new to yeast baking.
What Not to Do
- Don’t rush the rise: Underproofed dough leads to dense muffins. Wait for a noticeable puff and light feel.
- Don’t overheat the skillet: High heat burns the outside before the center cooks. Keep it medium-low and patient.
- Don’t use a knife to split: A knife compresses the crumb.
A fork gives you the signature nooks and crannies.
- Don’t skip the semolina/cornmeal: It prevents sticking and adds the classic crust.
- Don’t add too much flour: A slightly tacky dough bakes up softer. Add just enough flour to handle it.
Variations You Can Try
- Whole wheat: Swap 1 cup of all-purpose flour for whole wheat flour. Add 1–2 tablespoons extra warm water if needed.
- Sourdough-style: Replace 1/2 cup of flour and 1/2 cup of milk with 1 cup active sourdough starter.
Reduce yeast to 1 teaspoon.
- Cinnamon raisin: Add 1 teaspoon cinnamon and 1/2 cup raisins during mixing. Increase sugar to 2 tablespoons.
- Cheddar and chive: Fold in 3/4 cup shredded sharp cheddar and 2 tablespoons chopped chives after the initial mix.
- Dairy-free: Use warm water or unsweetened non-dairy milk and swap the butter for olive oil or plant-based butter.
- Extra tang: Stir in 1–2 tablespoons plain yogurt with the liquids for a slight tang and tenderness.
FAQ
Can I bake these in the oven?
Yes. After the second rise, place muffins on a parchment-lined sheet, cook in a skillet for 2–3 minutes per side to set the crust, then bake at 350°F (175°C) for 8–10 minutes to finish.
This helps ensure they cook through evenly.
How do I know they’re fully cooked?
They should be deeply golden on both sides and feel lighter than they look. If you have an instant-read thermometer, aim for an internal temperature around 200–205°F (93–96°C). If they brown too fast, lower the heat and extend the time.
What if I only have active dry yeast?
Use the same amount but bloom it first in warm water with a pinch of sugar until foamy.
Then proceed as directed. Rise times may be slightly longer.
Can I make the dough ahead?
Yes. After kneading, place the dough in a greased bowl, cover, and refrigerate overnight.
The next day, let it warm up for 30–45 minutes, then shape, proof, and cook. The slow proof adds flavor.
Why are my muffins flat?
Likely causes include underproofing, overproofing, or pressing the dough too thin. Aim for 3/4 inch thickness, give them a puffy second rise, and handle the dough gently so you don’t knock out too much air.
How do I get more nooks and crannies?
Keep the dough on the softer side, avoid excessive kneading at the shaping stage, give it a proper rise, and always split with a fork.
Toasting brings out the texture even more.
What size cutter should I use?
Between 3 and 3.5 inches works well. A drinking glass can also do the job—just flour the rim to prevent sticking.
Can I use whole milk or skim?
Any will work. Whole milk gives the softest, richest crumb.
Skim or non-dairy will be a bit lighter but still delicious.
Wrapping Up
These Easy English Muffins are simple to make and even easier to love. With a soft interior, crisp edges, and plenty of flavor, they turn everyday breakfasts into something special. Keep a batch in the freezer, and you’re never far from a great toast or sandwich.
Once you try homemade, the store-bought ones won’t stand a chance.
Printable Recipe Card
Want just the essential recipe details without scrolling through the article? Get our printable recipe card with just the ingredients and instructions.