

If you love peanut butter cups but wish they had even more peanut butter flavor, this Double Buttercup recipe is your new favorite. It layers a silky peanut butter filling between two chocolate shells, then finishes with a drizzle for extra flair. The texture is soft in the middle with a satisfying snap from the chocolate.
Everything comes together with simple pantry ingredients, and there’s no baking involved. They look like a treat from a fancy candy shop, but anyone can make them at home.
What Makes This Recipe So Good
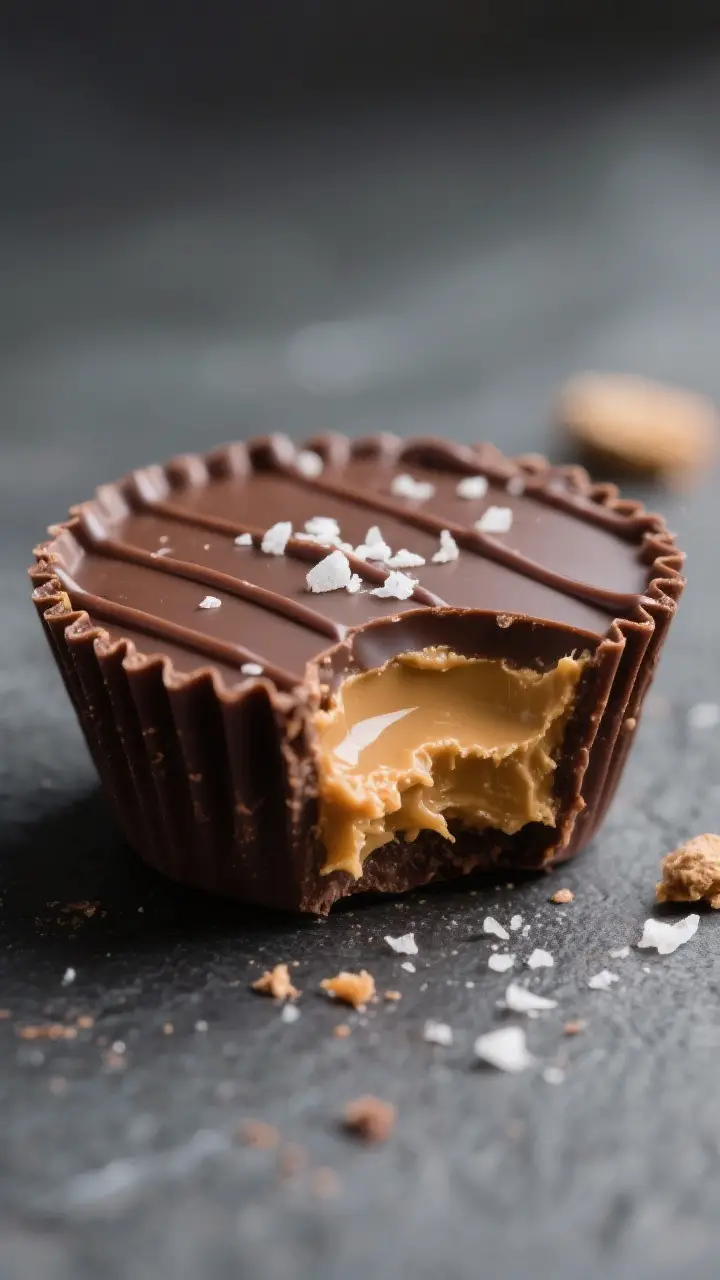
- Double the peanut butter flavor: A creamy, sweet-salty center with a peanut butter–infused chocolate shell.
- Simple, no-bake method: Just melt, mix, layer, and chill.
- Perfect texture: Smooth filling, crisp chocolate, and a clean bite every time.
- Easy to customize: Use dark, milk, or semi-sweet chocolate. Add crunch or keep it silky smooth.
- Freezer-friendly: Make a batch and stash them for quick treats or gifts.
Shopping List
- Chocolate chips or bars (12 ounces total; dark, milk, or semi-sweet)
- Peanut butter (creamy; no-stir works best, 1 cup)
- Powdered sugar (1/2 to 3/4 cup, to taste)
- Unsalted butter (4 tablespoons), plus extra 1 tablespoon if you want a glossy chocolate
- Vanilla extract (1 teaspoon)
- Fine sea salt (1/4 teaspoon, or to taste)
- Coconut oil or neutral oil (1–2 teaspoons; helps thin chocolate, optional)
- Flaky salt (optional garnish)
Instructions
- Prep your pan: Line a standard 12-cup muffin tin with paper liners.
This helps release the cups cleanly and creates that signature shape.
- Make the filling: In a bowl, combine peanut butter, softened butter (4 tablespoons), powdered sugar, vanilla, and sea salt. Stir until smooth and thick. Adjust sweetness and salt to taste.
You want a scoopable dough, not runny.
- Melt the chocolate: In a microwave-safe bowl, add half the chocolate (6 ounces) and 1 teaspoon coconut oil. Microwave in 20–30 second bursts, stirring between each until smooth. Alternatively, melt in a heatproof bowl over a pot of simmering water.
- Bottom chocolate layer: Spoon about 1 to 1.5 teaspoons melted chocolate into each liner.
Tilt the pan to spread it slightly. Tap the pan on the counter to level. Chill for 5–8 minutes, just until set.
- Form the peanut butter discs: Roll 12 equal portions of the filling into balls, then flatten slightly into discs that are smaller than the liners.
This prevents the filling from peeking out the sides.
- Add the filling: Place one peanut butter disc over each set chocolate base. Gently press so it sits flat but doesn’t squish out to the edges.
- Melt the remaining chocolate: Melt the remaining 6 ounces chocolate with another 1 teaspoon coconut oil (plus 1 tablespoon butter if you want a softer bite). Stir until glossy.
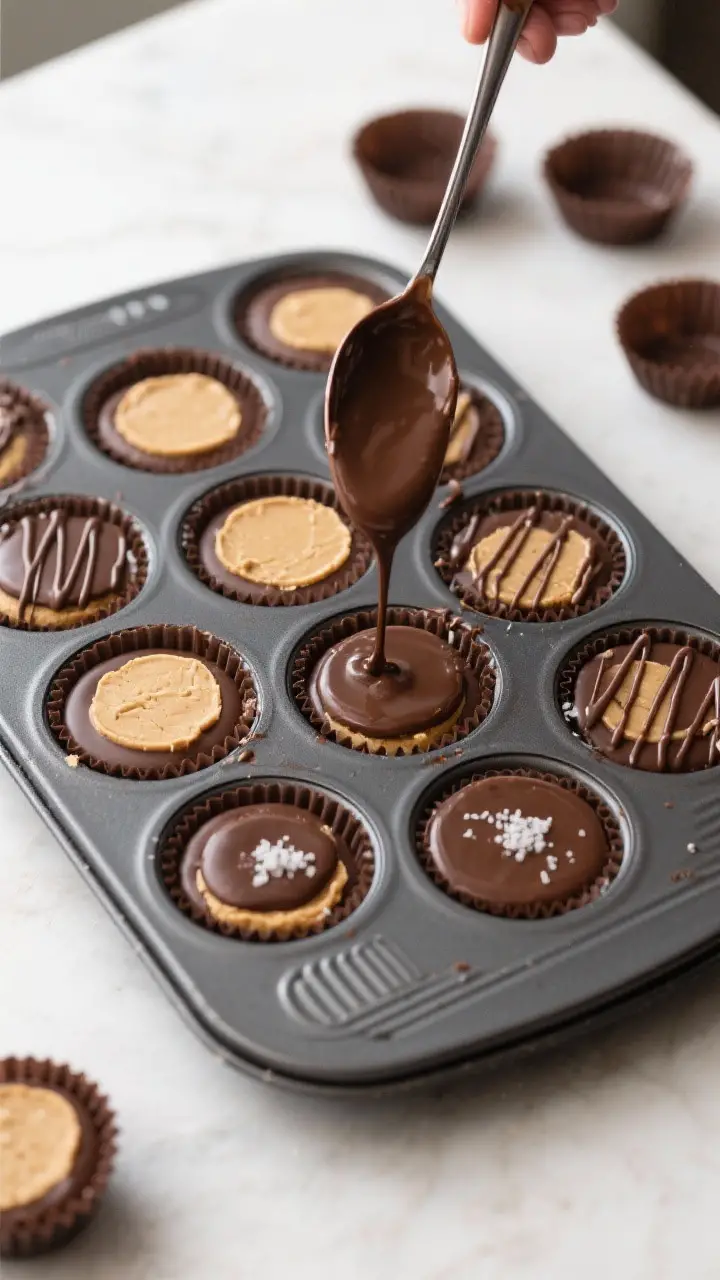
- Top layer and seal: Spoon enough chocolate over each cup to fully cover the filling.
Tap the pan again to settle and eliminate air bubbles. If you like, drizzle a thin zigzag on top with any extra chocolate.
- Chill to set: Refrigerate for 25–35 minutes, or until the chocolate is firm. If using flaky salt, sprinkle a pinch on each cup after 5 minutes in the fridge so it adheres without melting in.
- Serve: Peel off the paper liners and enjoy.
For the best texture, let them sit at room temperature for 3–5 minutes before eating.
Storage Instructions
- Fridge: Store in an airtight container for up to 2 weeks. Separate layers with parchment to prevent sticking.
- Freezer: Freeze for up to 3 months. Thaw at room temperature for 10–15 minutes for a softer bite.
- Room temperature: If your kitchen is cool, they can sit out for a day.
In warm rooms, the filling softens and chocolate can bloom, so keep them chilled.
Why This is Good for You
- Satiating fats and protein: Peanut butter offers plant-based protein and healthy fats, which can help keep you full.
- Portion control built in: Each cup is a defined serving, making it easier to enjoy a treat without going overboard.
- Customizable sweetness: You control the sugar level with the powdered sugar and chocolate type (dark is lower in sugar).
- Simple ingredient list: No artificial flavors needed; the peanut butter and chocolate do the heavy lifting.
What Not to Do
- Don’t use oily, fully natural peanut butter without adjusting: Stir it very well or the filling can separate and feel greasy.
- Don’t skip the liners: Removing cups from a bare muffin tin is frustrating and messy.
- Don’t overheat the chocolate: Burnt chocolate turns grainy. Melt low and slow, stirring often.
- Don’t pour hot chocolate over soft filling: If the base isn’t set, hot chocolate can melt the filling and cause swirls and leaks.
- Don’t over-salt: A pinch enhances flavor, but too much salt fights the sweetness and the chocolate’s natural bitterness.
Alternatives
- Nut-free: Use sunflower seed butter or soy nut butter. Add an extra tablespoon of powdered sugar if it tastes too earthy.
- Crunch lovers: Stir chopped roasted peanuts into the filling, or add a thin layer of crushed graham crackers beneath the filling.
- Chocolate options: Dark chocolate for a richer, less sweet bite; milk chocolate for a classic candy vibe; semi-sweet for balance.
- Flavor twists: Add a pinch of cinnamon, espresso powder, or a drizzle of honey to the filling.
A few drops of maple extract also work well.
- Dairy-free: Use dairy-free chocolate and swap the butter for coconut oil or vegan butter.
- Keto-friendly: Use sugar-free chocolate and a powdered sweetener like erythritol or allulose. Adjust to taste.
FAQ
Can I make these without a muffin tin?
Yes. Use silicone candy molds or mini paper cups set on a baking sheet.
The shape will be less traditional, but the flavor and texture stay the same.
Why did my chocolate turn dull or develop white streaks?
That’s likely chocolate bloom from temperature swings or moisture. It’s safe to eat. Keep the cups in a cool, dry place and avoid frequent fridge-to-counter cycles to maintain a shiny finish.
How do I prevent the filling from squeezing out the sides?
Make the peanut butter discs smaller than the chocolate base and don’t press too hard.
When topping, use enough chocolate to fully seal the edges, then tap the pan to level.
Can I use crunchy peanut butter?
Absolutely. Crunchy peanut butter adds texture and a nutty bite. If it’s extra thick, warm it slightly so it blends smoothly with the powdered sugar and butter.
What if I don’t have powdered sugar?
Blend granulated sugar in a blender until powdery, or use a liquid sweetener like maple syrup sparingly.
If using liquid sweetener, chill the filling briefly so it firms up before assembling.
How can I make neat, even tops?
Use a small cookie scoop for the chocolate, and gently tap the pan after each layer. A quick pass with a warm spoon can also smooth any ripples before chilling.
Final Thoughts
Double Buttercup takes the best part of a classic peanut butter cup and turns up the volume. With a rich peanut butter center, a clean chocolate shell, and a simple no-bake process, it’s a treat you can make anytime.
Keep a batch in the fridge for a sweet pick-me-up, or box them up for a gift that always gets a smile. Simple ingredients, big flavor, and reliable results—what more do you need?
Printable Recipe Card
Want just the essential recipe details without scrolling through the article? Get our printable recipe card with just the ingredients and instructions.