
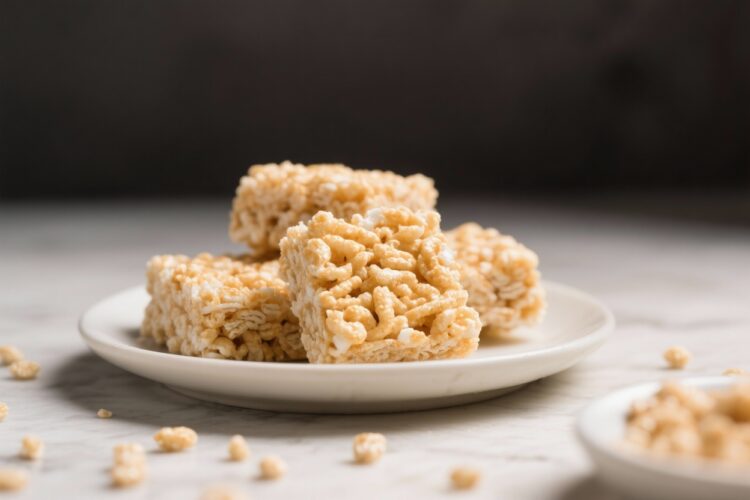
There’s something about Rice Krispies treats that hits the sweet spot between nostalgic and just plain delicious. They’re quick, kid-friendly, and always a crowd-pleaser. But not all bars are created equal—some are too hard, some are too sticky, and some taste like nothing but marshmallow.
This version is balanced: buttery, chewy, and soft with just the right snap. If you want bars that hold their shape but don’t shred the roof of your mouth, you’re in the right place.
Why This Recipe Works
Most recipes stop at melting butter and marshmallows. This one goes a little further for better texture and flavor.
- Extra marshmallows: A higher ratio keeps the bars soft and chewy instead of dry.
- Low-and-slow melting: Gentle heat prevents stiff, rubbery marshmallow and gives you plush bars.
- Butter for flavor: A touch more butter adds richness and helps coat the cereal evenly.
- Vanilla and salt: Just a little makes the sweetness taste more complex, not flat.
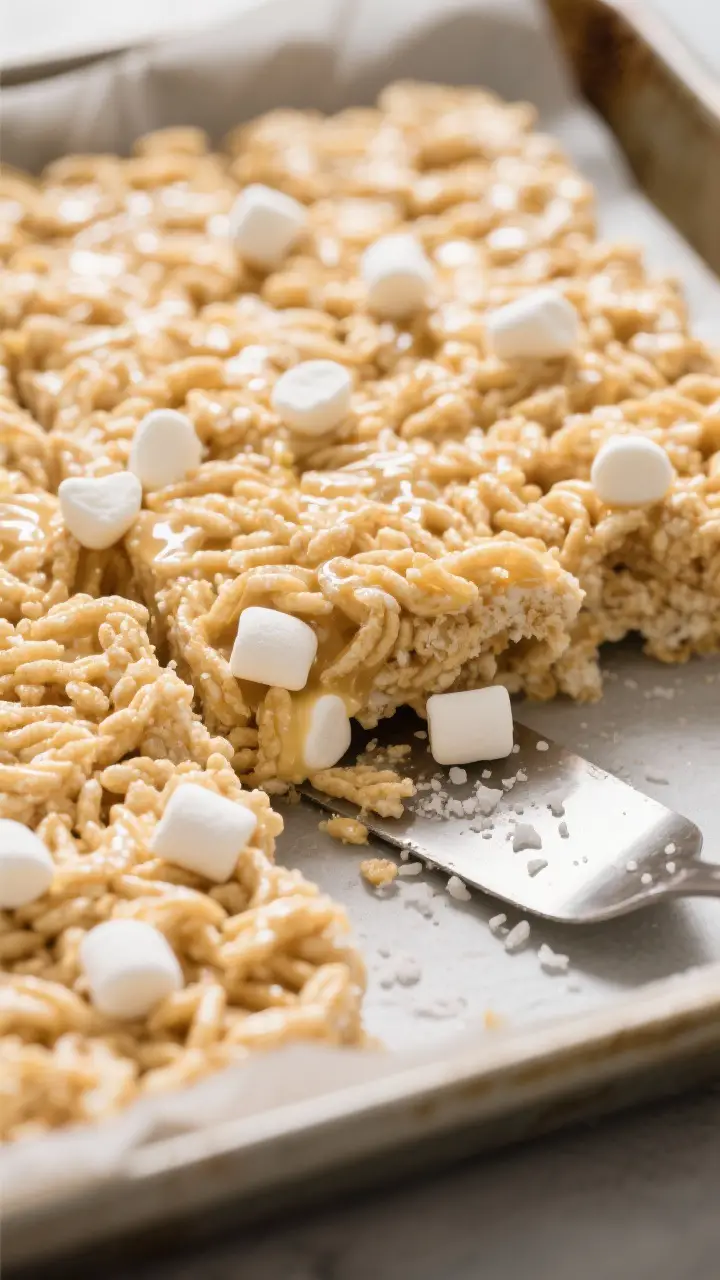
- Reserve-and-fold method: Stirring in a handful of mini marshmallows at the end gives delicious little pockets of goo.
Shopping List
- 6 cups Rice Krispies cereal (or any crisped rice cereal)
- 10 cups mini marshmallows (about two 10-ounce bags), divided
- 6 tablespoons unsalted butter
- 1 teaspoon pure vanilla extract
- 1/4 teaspoon fine sea salt
- Nonstick cooking spray or a little extra butter for the pan
- Optional add-ins: flaky sea salt, chocolate chips, sprinkles, crushed Oreos, peanut butter, or M&M’s
Step-by-Step Instructions
- Prep the pan: Lightly grease a 9×13-inch baking pan with cooking spray or butter.
Line with parchment, leaving overhang for easy lifting.
- Set aside extra marshmallows: Measure out 10 cups of mini marshmallows. Reserve 2 cups to fold in at the end.
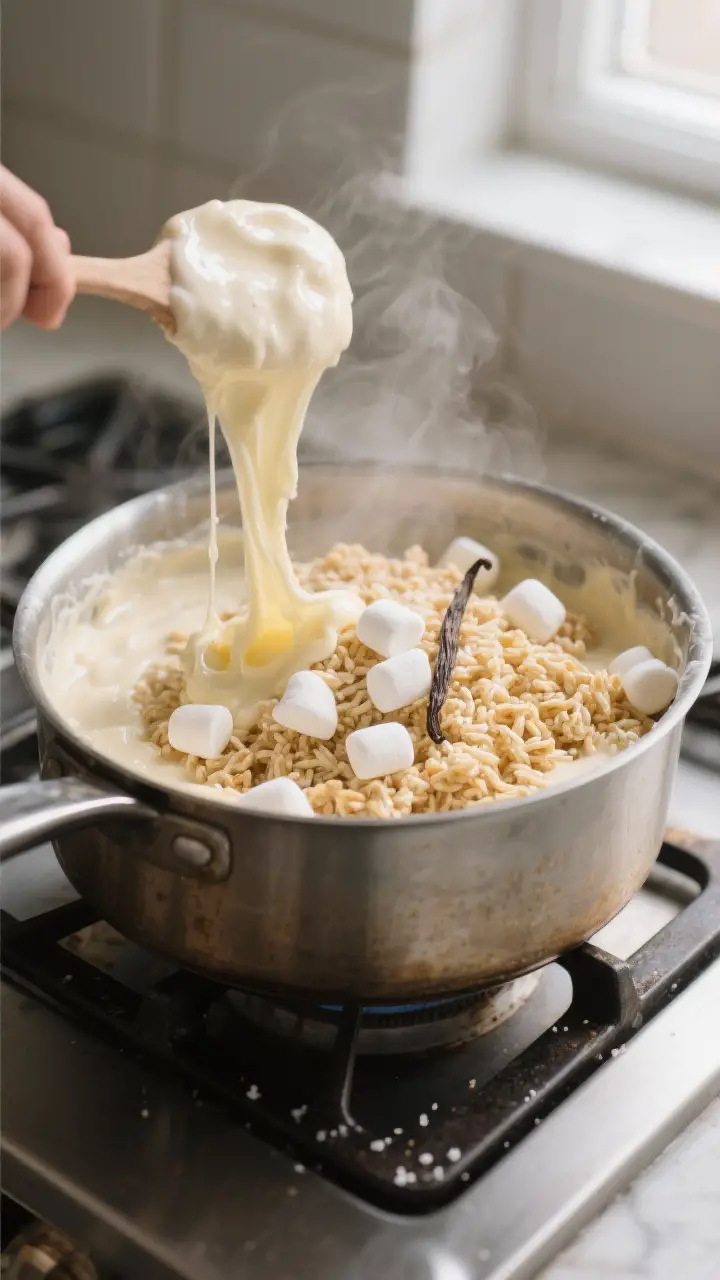
- Melt the butter: In a large, heavy pot over low heat, melt 6 tablespoons of butter. Keep the heat low to avoid scorching.
- Add most of the marshmallows: Stir in the remaining 8 cups of marshmallows.
Cook on low, stirring constantly, until fully melted and glossy. This should take 3–5 minutes. Don’t rush it.
- Flavor it: Turn off the heat.
Stir in the vanilla and salt. If using peanut butter (up to 1/2 cup), whisk it in now until smooth.
- Fold in cereal: Add the Rice Krispies and gently fold until evenly coated. Work quickly but carefully to avoid crushing the cereal.
- Add the reserved marshmallows: Stir in the last 2 cups of mini marshmallows for gooey pockets.
If adding mix-ins like chocolate chips, let the mixture cool 1–2 minutes so they don’t fully melt, then fold them in.
- Press into the pan: Transfer the mixture to the prepared pan. Lightly grease your hands or a spatula, then press the mixture into an even layer. Do not press hard—gentle pressure keeps the bars soft.
- Finish and set: For a sweet-salty pop, sprinkle a pinch of flaky sea salt on top. Let the bars sit at room temperature for 30–45 minutes to set.
- Slice and serve: Lift out using the parchment and cut into squares.
For clean edges, use a sharp knife greased with a bit of butter.
Storage Instructions
- Room temperature: Store in an airtight container for up to 3 days. Separate layers with parchment to prevent sticking.
- Softness tip: Add a slice of sandwich bread to the container to keep bars soft. Replace the bread daily.
- Freezing: Not ideal—texture gets tough.
If you must, wrap tightly and freeze up to 1 month. Thaw at room temp in the wrapper.
- Make-ahead: You can make them the day before serving; they actually cut cleaner on day two.
Why This is Good for You
These aren’t health food, but there are a few upsides. They satisfy a sweet craving with built-in portion control—one square goes a long way.
They’re also nut-free by default, great for school events or mixed groups. Compared to many frosted brownies or cupcakes, these are lighter and less messy. Plus, making treats at home lets you control ingredients and avoid artificial flavors or dyes if that matters to you.
What Not to Do
- Don’t crank up the heat. High heat makes melted marshmallows rubbery and sets the bars rock hard.
- Don’t overpack the pan. Pressing too firmly compresses the cereal and ruins the soft chew.
- Don’t skip the salt. A pinch balances sweetness and makes the buttery flavor pop.
- Don’t use stale cereal. Old cereal gives limp, unpleasant texture.
- Don’t add chocolate too soon. It will melt into streaks.
Let the mixture cool a minute before folding in chips or candies.
Recipe Variations
- Browned Butter: Cook the butter over medium heat until golden and nutty, then continue as written. Adds a toasty, caramel flavor.
- Salted Chocolate Drizzle: Drizzle melted dark chocolate over the pan and finish with flaky salt. Let set before slicing.
- Peanut Butter Swirl: Whisk 1/2 cup creamy peanut butter into the melted marshmallow mixture.
Top with chopped peanuts or mini peanut butter cups.
- Birthday Cake: Stir in 1/2 teaspoon almond extract and fold in rainbow sprinkles at the end. Press extra sprinkles on top.
- S’mores: Replace 1 cup of cereal with crushed graham crackers and fold in mini chocolate chips at the end.
- Cookies and Cream: Fold in 1 cup roughly crushed chocolate sandwich cookies.
- Gluten-Free: Use certified gluten-free crisped rice cereal and marshmallows; many brands are GF, but check labels.
- Dairy-Free: Swap in a plant-based butter and check that your marshmallows are gelatin-free if needed.
FAQ
How do I keep Rice Krispies treats soft?
Use low heat to melt the marshmallows, don’t overpress into the pan, and store airtight at room temperature. Extra marshmallows in the mix help keep everything plush.
Can I use regular marshmallows instead of mini?
Yes.
Cut them into smaller pieces for faster melting. Use the same total amount by weight and still reserve some to fold in at the end.
Why are my treats hard?
Usually it’s from too much heat or pressing too firmly. Another culprit is old cereal or using less butter than called for.
Keep the heat low and handle the mixture gently.
What size pan should I use?
A 9×13-inch pan gives classic, not-too-thick bars. For thicker bars, use an 8×8 or 9×9 pan, but let them set a bit longer before slicing.
Can I double the recipe?
Yes. Use a large Dutch oven and a rimmed baking sheet or two 9×13 pans.
Work quickly when mixing to keep the texture even.
Are marshmallows vegetarian?
Most marshmallows contain gelatin. Look for gelatin-free or vegan marshmallows if you want a vegetarian option, and check labels.
Do I need to refrigerate them?
No. Refrigeration makes them firm and sticky.
Room temperature is best for texture and flavor.
How long do they last?
They’re best within 1–2 days but good up to 3 days when stored airtight. After that, they tend to dry out.
Final Thoughts
Great Rice Krispies treats come down to simple choices: low heat, the right ratios, and a gentle touch. This method gives you soft, chewy squares with buttery flavor and just enough structure.
Keep a couple of bags of marshmallows in the pantry and you’re never far from a fast dessert, a bake sale win, or a last-minute party tray. Once you try this version, you’ll have a go-to recipe you can tweak for any occasion.
Printable Recipe Card
Want just the essential recipe details without scrolling through the article? Get our printable recipe card with just the ingredients and instructions.